Now we're into winter it is time to perform two very important jobs that relate to arguably the 968's two biggest weaknesses. The first one is to inspect the brakes and the second is to inspect the variocam system (more on that later and in a seaparate article). Neither of these two can usually be done before you buy a car (although there are possibly some telltale signs) so its more of a case of suck it and see.
In the 1980's, in the name of lower unsprung weight and better heat dissapation, Porsche started using aluminium for their calipers. To safely and effectively seat the brake pads within the soft aluminium of these calipers, a pair of stainless steel plates are used top and bottom and act as a load spreading friction surface across which the pad can move.
Autumnal blast into the Surrey countryside with a fellow petrolhead and Noble owner
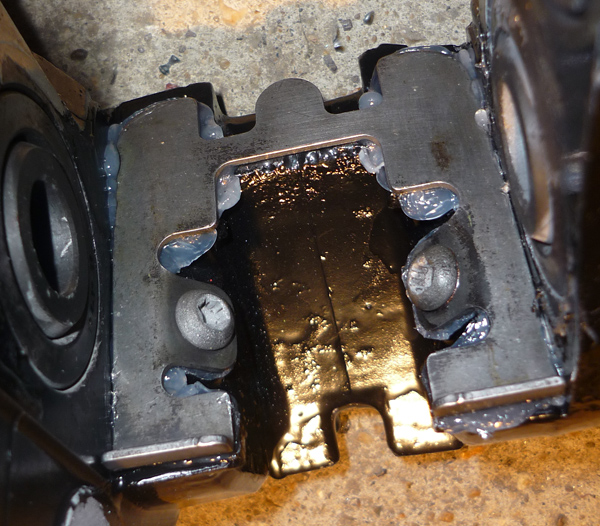
The problem is that, over the years, as salt and rainwater gets underneath these plates and between the aluminium body, bimetallic corrosion is formed. This corrosion bubbles up and swells. It eats into the aluminium caliper body but also pushes the steel caliper plate inwards toward the pad, thus compressing the longtitudinal space within which the pad fits. When this happens the pads gets squeezed tight and have no real room to move leading to very poor braking performance. This problem is generally known as 'plate lift' and as stated is seen in 80's and 90's porsches with ali claipers (944 turbo & S2, 968, 964, sometimes 993). Possibly because of the greater risk of collecting water and salt as an electrolyte, it is often underneath the lower plates (and also the innermost side) where corrosion is first or most violently seen.

white corrosion bubbling underneath the rhs of the lower caliper plate
note the awkward inclined position of the torx screws
Checking under the pads/plates is not part of routine servicing so often its not until a brake change that one finds that the pads will not come out and are stuck fast, only removable if the whole caliper is taken off and they are then hammered out. Some people file off the top and bottom edges of their pads to then fit them in but this can only be considered a bodge and not something you want to be doing with your car's brakes. Not only will your pads be loose and possibly give you nasty brake judder but the corrosion will continue and could well destroy your caliper forever.
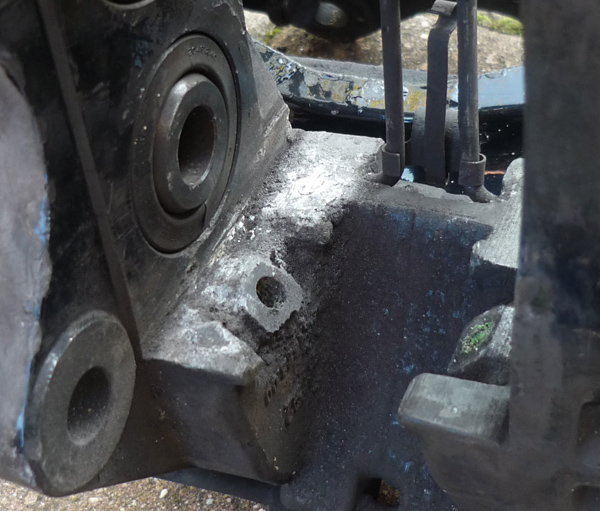
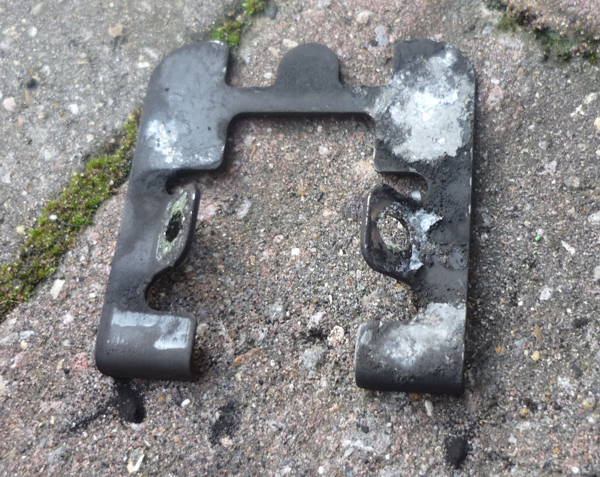
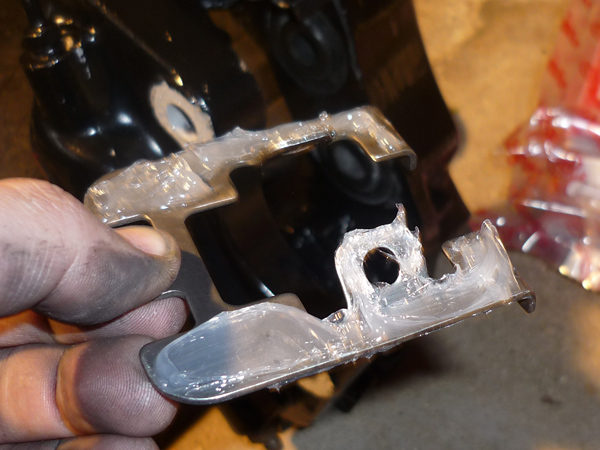
plate removed, lots of white corrosion and a nasty pitted surface
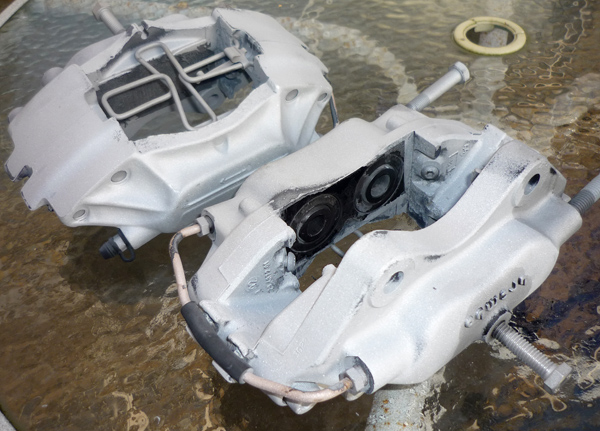
some of the aluminium has been completely eroded away, at least the seals are intact !
Bear in mind that we are generally talking about cars that are 13, 14, 15 years old or more so chances are, if a car's brakes haven't been looked at in the last 4 or 5 years or so, then it will be suffering some amount of corrosion.
The proper fix is to remove the caliper from the steering knuckle, remove the 2 caliper plates, file away the corrosion underneath and then repaint, seal with copper grease or a suitable corrosion retardant and then reassemble with new plates. Now this would ordinarily be a breeze but the biggest headache about this whole job is the 4 dome headed screws that hold the caliper plates onto the body. These will either be torx head or if the caliper is even older, hex head but given the age of these sorts of calipers now, chances are unless someone has undone them in recent years, they will be well and truly seized. In the very worst cases the head of the screw will just be a corroded mess with no indentation to speak of for any tool to grip into. Across the internet there are various methods described for dealing with these persistent things. Google at your leisure but I will list the main approaches that I discovered on my travels:
1. always try heat first, lots of it from a blow torch
2. clean the recess of the bolt head with a very fine screwdriver or pick
3. soak in your fave penetrating fluid, plus gas, duck oil, marvel mystery oil, Penol, Diesel fuel etc..
4. apply downward pressure into the head as you turn, maybe tighten a bit then anti-clock, keep the ratchet at a perfect 90 degrees
5. use a high quality torx key that is a tight fit (snap on, facom etc..)
6. a slot can be made with a dremel then a cold chisel or screwdriver on a ratchet
7. weld a nut or a metal bar or a hex key onto the screw head
8. separate the caliper in two then use a stud extractor or drill it out and re tap (last option I would have thought)
9. take it to a garage or local friendly motor engineer
If you get well and truly stuck then an independent will probably doa full job for you for around 60-80 pounds per corner. But that will be for cleaning the corrosion and fitting new plates and screws. If you want them properly fully refurbished then I can recommend Classicar Automotive in cheshire. These guys know Porsche brakes backwards and will do an amazing job for 150+vat per corner and they basically come back new with new pistons, seals, nipples, plates, plate screws and a full blast and repaint in your chosen colour. Sounds expensive ? Well, its still way cheaper than brand new calipers at 360+vat per corner yet they will be virtually good as new.
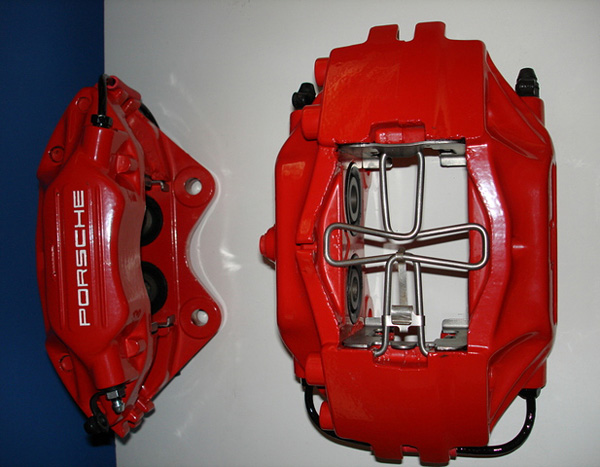
A caliper that has been refurbed at Classicar ..
as good as new and Jewelery Whores won't be able to resist !
After a few weeks driving of my 968 I suspected some plate lift problems of my own. The car's stopping power was pretty poor no matter how hard I pressed, and once or twice it really caught me out with a few brown trouser moments. Pedal feel was always pretty awful as well.
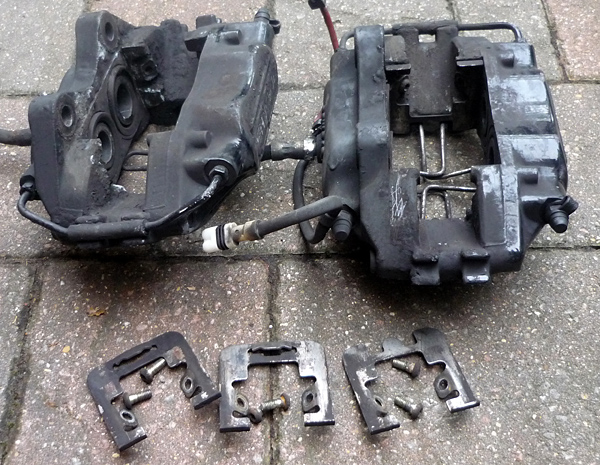
With my wheels off and pistons prized back, it was soon clear that one of my rears and one of my fronts was suffering. Pads would not come out no matter what I tried so I had to take the calipers off. I immediately set to work on the caliper screws and to my surpise all apart from 2 came undone fairly painlessley. Clearly they had been off beforehand sometime in the last 5 years or so and the mechanic then had refrained from using loctite and had tightened them gently.
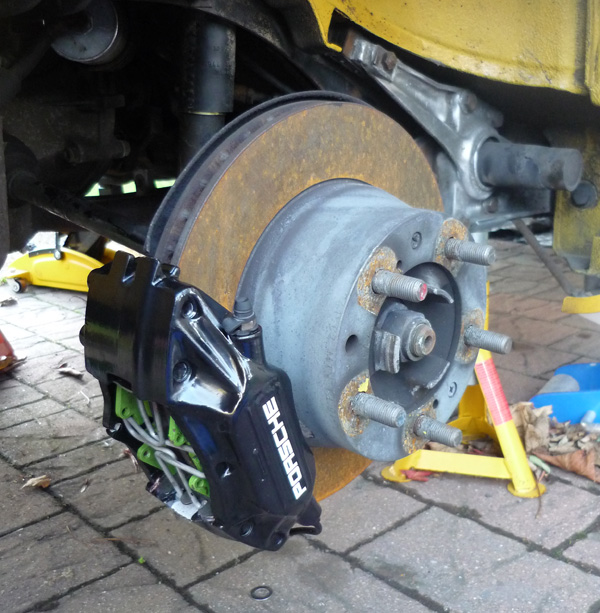
Looking at my fronts though things weren't good. They needed new seals as the rubbers were split. Cosmetically there were also an absolute mess. I was going to have them refurbished by Classicar but with the spirit of Christmas looming I decided to go for some brand new M030 front calipers straight from OPC in Exeter. These are a bigger uprated caliper that offers a lot more stopping power and they were fitted to the M030 option 968cs cars back in the 90's at the factory (also the same front calipers as seen on the 944 turbo and 928 S4.... see my 968 brake upgrade page). I am a great believer in doing a job to the full and with everything already disassembled I may as well go the whole hog. I can also now be almost certain that once everything is finished with M030 fronts, refurbsihed rears, new racing fluid, a bleed, goodridge hoses, new pads etc.. stopping power will more than satisfactory and I won't need to revisit the brakes again for many years to come.
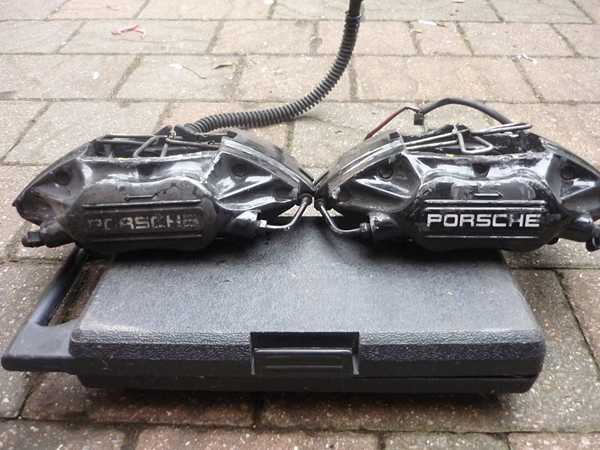
my front calipers, a little worse for wear... they needed a full refurb including seals
I eventually ebayed them for around 65 quid
lucky to get 3 of those plates off so easy !
There was one caliper screw on my rears that would not come undone. I don't have a welder, couldn't split the caliper in two either and ran out of luck quite quickly so I took it down to a local motor engineer who removed it for me and tapped a new thread for the grand sum of 20 quid. The corrosion under the plates wasn't too bad (it has been known to completely destroy the thread or hole where the screw goes leaving a totally worthless caliper) so I decided to go the DIY refurb route and get them shot blasted by another local outfit for just 10 quid then paint them myself with some one the Foliatec two-component caliper painting kits that halfords sell (high temperature paint and highly recommended).
When I removed the calipers the existing hoses were also badly seized so I just ended up cutting them and buying some stainless goodridge hoses which hopefully will help a little with the feel as well.
rear calipers now shot blasted and ready for painting

rear calipers painted with Halford Foliatec high temperature paint kit and stickers applied
I didn't do the best job in the world with the painting of the calipers. It's well worth using a decent brush, plenty of good light and a dust free environment but I broke all of these rules. If I did it again I would probably go for a more foolproof powder coat route. The stickers were from ebay from seller supergraphicsf1 and seem to work very well. Although not entirely necessary (because they weren't really bent at all) I bought 4 new stainless caliper plates from Porsche and a couple of new bleed nipples because one of them rounded as I tried to remove it and I had to extract it eventually hammering a small socket onto it.
When I reassembled the rears, I decided to do things slightly differently to Porsche in an attempt to future proof things a little better. Firstly, I removed all traces of thread lock from the torx head caliper bolts and actually screwed them up using a little copper grease and took care not to do them up too tight. Once the pads are in those the fit is quite tight and in any case, those plates are not going anywhere so why thread lock is used i'll never know. If you can get these off easily in 2 years time during inspection then it will be easy to file away any new corrosion that has developed.
high modulus, high temperature resistant sealant applied underneath the caliper plates
The other preventative trick is to apply a layer of sealant between the new plate and the caliper body. Some people use regular copper grease but some refurb companies use a high temperature sealant. The idea is obviously to help prevent water ingress between the plate and body and hence delay the build up of any corrosion. I used a bostick 100 HMA sealant that is readily available on the internet. This is a "high modulus" sealant which means it is generally harder and tougher and more suited for this type of application.
Calipers that have already been corroded once in their life will often have porous and pitted areas once the corrosion has been removed. If you bolt a plate down onto these there you are only inviting water to come in and get trapped into these little pockets. Filling them in with sealant beforehand is a much wiser approach.
That's about it for the rears. Read on to my next article about the front caliper upgrade.
plates back in and not over tightened
refurbished rears fitted with new pads, copper grease on all brake pipe unions and a smear of Waxoly once tightened to protect. Caliper bolts were cleaned up and given a small amount of medium strength thread lock and tightened to 85nm.
|