993 Suspension overhaul
(PLEASE NOTE that since I fitted the KW and reset the ride height and wrote the following article, I realised that the KW should really be operating round RS ride height so bear his in mind. Kw are not designed to run the car at Sport height.) and you will have too much preload on the springs if the platforms are too high.
Whilst this article does describe how to change your suspension, there are already some great detailed pages out there to help as well (here and here). In addition though, I will describe how to check over all the suspension (not just the dampers) and make sure it is spot on before you waste money on getting your geometry done and then have to do everything twice. Whilst you are down there there are plenty of things to check and plenty of pitfalls to avoid so I will be pointing them out here as best I can. I'll also be looking at cleaning and some interesting and effective ways to battle all the unsightly grime that you see down there. Full geometry settings for RS, sport and standard cars is also given at the end.
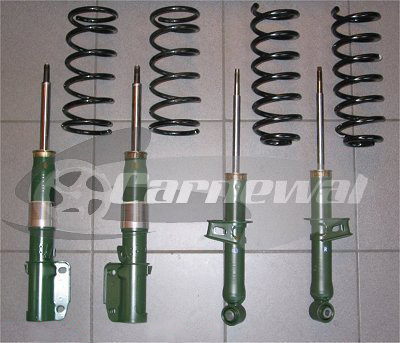
SHINY BITS It's common knowledge that the standard Monroe dampers on the 993 are only good for 30 or 40k miles or so. My 993 was on original suspension when I bought it yet had almost 60k under its belt and sure enough it felt a little baggy and wayward compared to at least one other 993 I'd driven. As my first 911 experience, it's something that has been waiting in the wings for many years and it's not worth doing unless it's done right. I want the handling to be as new, 100% 'right' and the best experience it can possibly be. Lets look at the common refurb or upgrade routes for 993 owners:
All of these (apart from the first option) will be firmer than a standard 993 but firstly you will more than likely be used to shot suspension so upgrading often has the effect of making the car feel a lot more composed and compliant. Also, more modern technology means they will be firmer but actually the ride quality will improve. The Monroe dampers weren't exactly cutting edge back in the early 1990's so you can expect big improvements from almost any upgrade path.
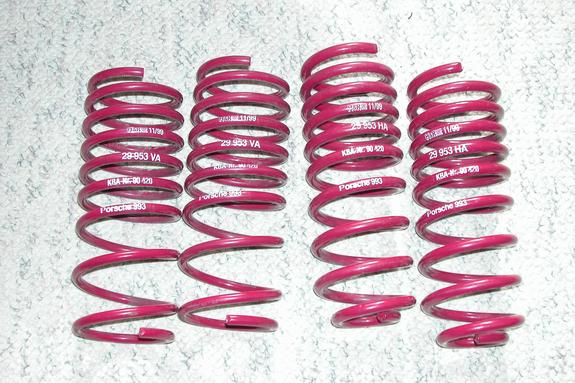
M033 springs are just lowering springs and do not change the spring rate. If you wanted a standard car with a slightly improved lowered look then that might be an option but then you're still stuck with very average and ancient technology dampers that won't last very long. M030 springs and dampers gives a more tied down firmer ride but again, its an old factory option that dates back to the 1990's and partly because of that it will feel very hard. It's very similar with the 968; although M030 suspension is desirable and well thought of on the secondhand market, the truth is that today, far better alternatives exist.
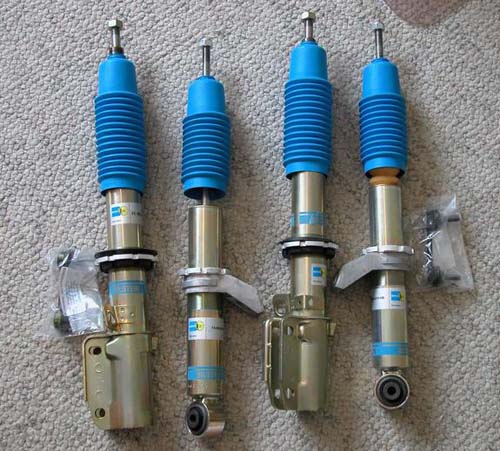
Next we get to the Bilstein HD dampers and these are a very popular one size fits all solution within the 993 community. You have adjustable platforms so you can still corner weight the car and although the ride is a little firmer than standard it's still a setup that works very well on UK roads. If you opt for the H&R springs instead of the factory M030 springs then it will be slightly more compliant (but not as soft as the standard springs). The H&R coilovers are based on the Bilstein HD's but revalved by H&R and are reportedly a small step up again. Although these solutions will be an improvement over standard, they are still limited and won't react as quick as the best options.
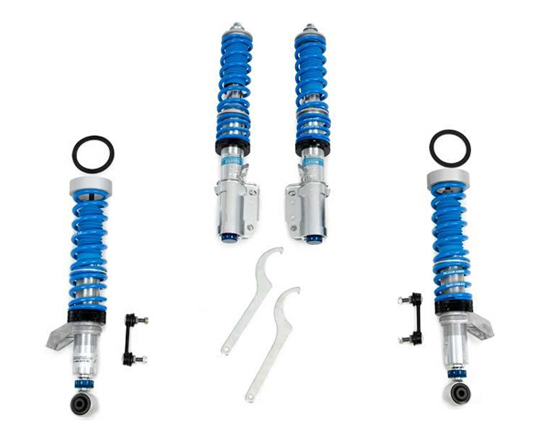
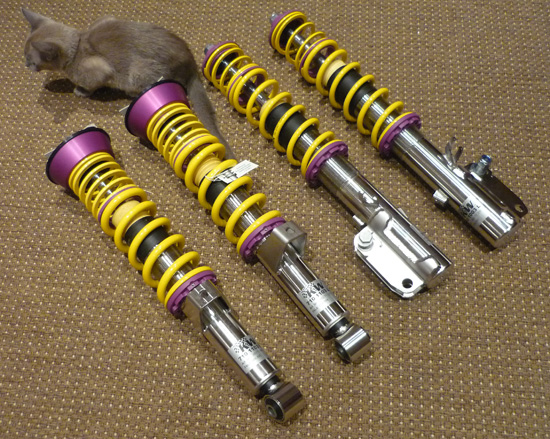
Moving on we get to the real modern age, the KW variant 3's and the Bilstein PSS-10 kit. These popular choices for 2 way adjustable suspension are newer in design than the bilstein hd's or H&R's and with separate bump and rebound adjustment obviously offer the most flexibility when tuning everything exactly to your tastes. I chose the KWs simply because I was confident of their performance from their widespread use amongst 968 owners. My thinking was that if I was spending 1000 pounds or so on the bilstein HD setup then I may as well go the whole hog and get a lot more adjustment and better technology and design. No point trying to make a saving on something as fundamental as this, especially given the cost of the actual car. The KW stuff isn't necessarily the best build quality stuff in the world but it does produce good results, is cost effective and is well recognised with good resale.
My plan was to fit the KW kit and at the same time give the whole suspension a good inspection and replace anything that needed doing. No point visiting everything twice. Also it would be a good opportunity to give everything in the arches a good cleanup.
FRONT SUSPENSION
1. disconnect all wiring and plastic wiring housings from front struts 1. loosen, clean and lube castor eccentrics
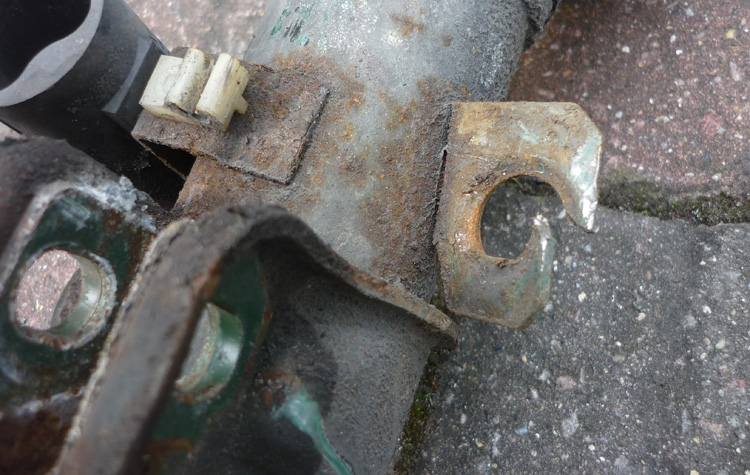
Changing the front suspension is an easy enough job. Removal is a case of simply undoing the 2 bolts that go through the strut and the upright and then undoing the strut from its top mount via the bonnet. First though is probably the only tricky bit; after you have unclipped the brake and ABS sensor wires from the strut you will need to cut a break or a complete slot in the side of the strut brake line bracket. Access is very poor here so whilst you might be able to get a dremel with a small rotary cutter in there, I chose to just use a blade from a hacksaw in my bare fingertips and I elected to create just one cut then bend the bracket open with some mole grips. Of course the proper way to do this is to disconnect the final brake pipe but then that would mean bleeding the brakes and since the dampers won't be worth much to anyone once they come off it's obviously really not worth protecting their condition.
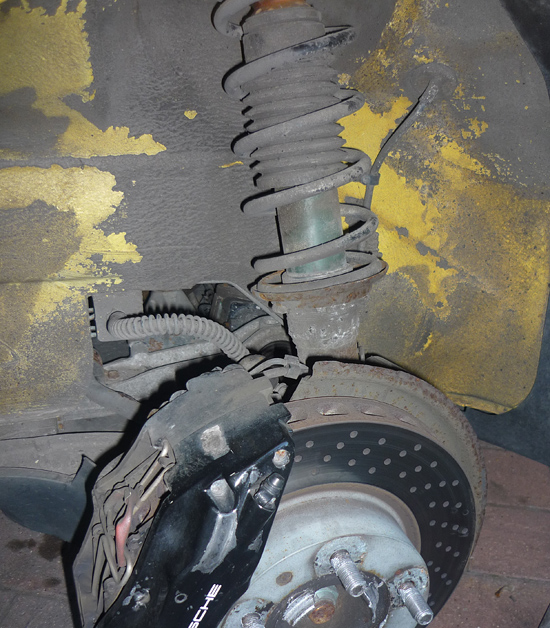
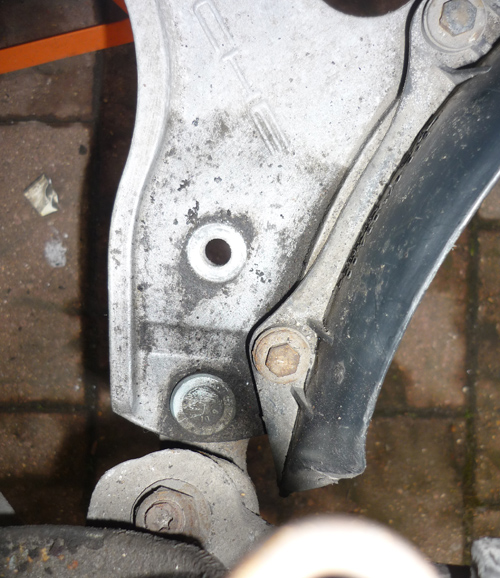
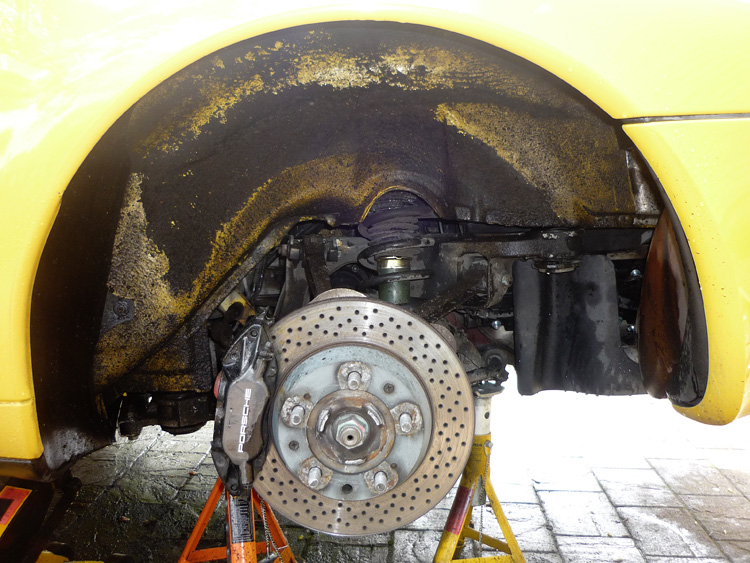
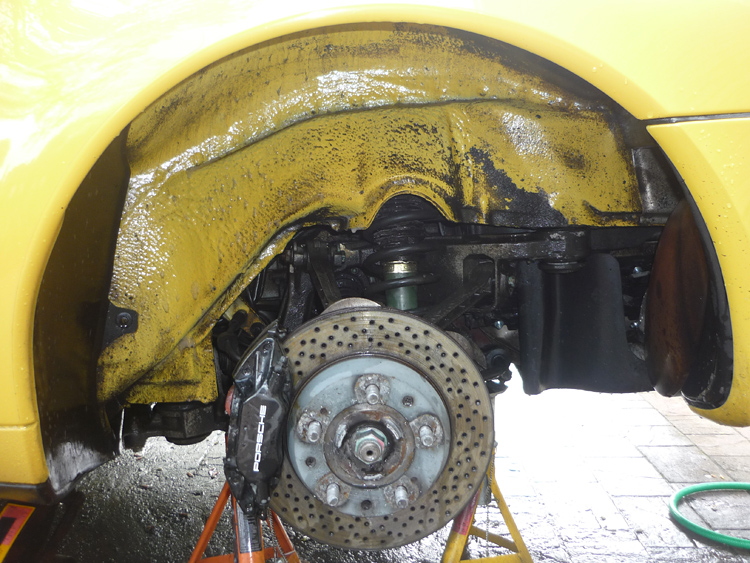
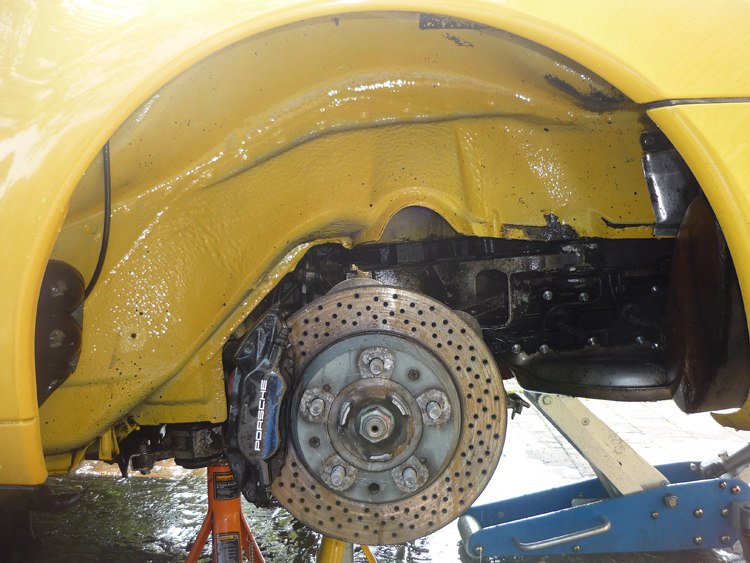
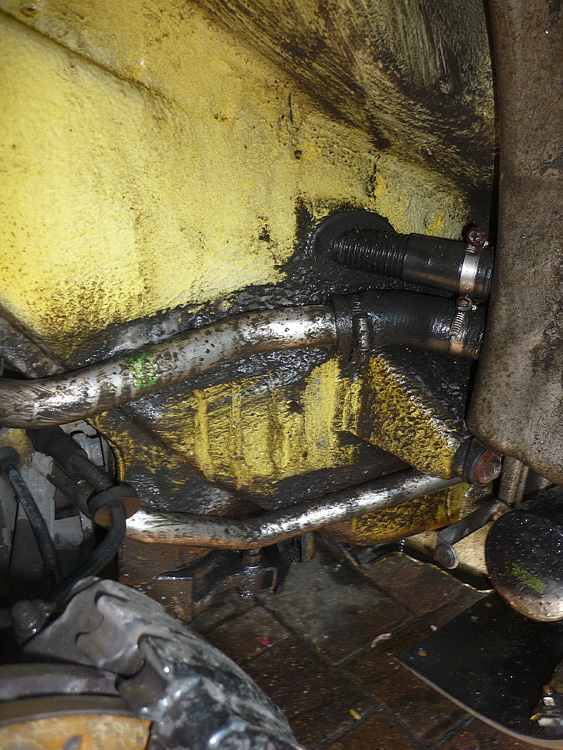
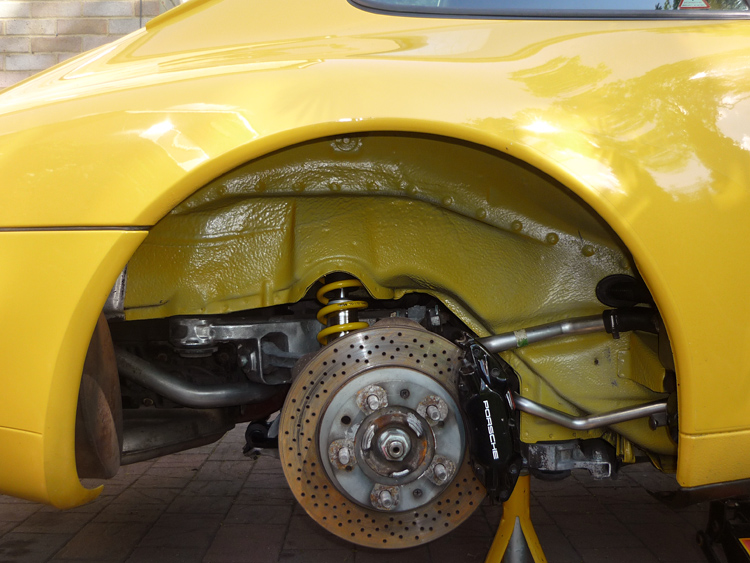
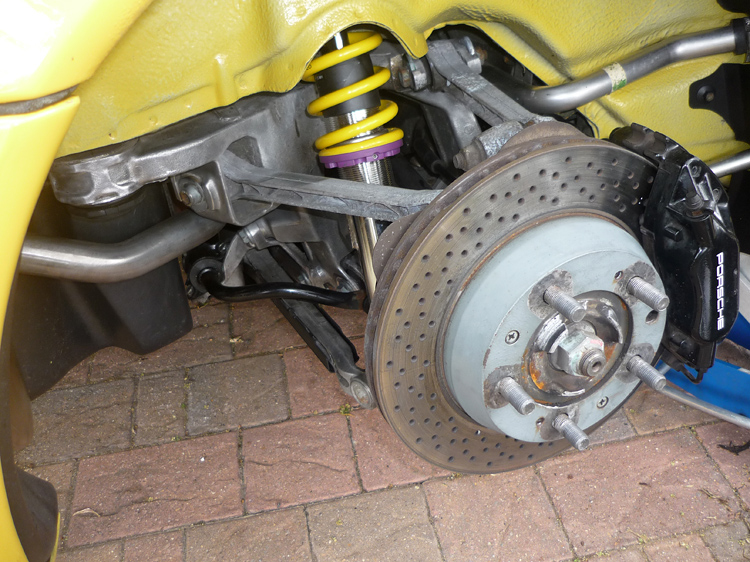
So here's the front nearside arch as it started out. Some of that grime has been caked on for possibly 13 years or more so I knew it wasn't going to be easy to remove. We'll have a look at techniques later on but take a look below for the final result.
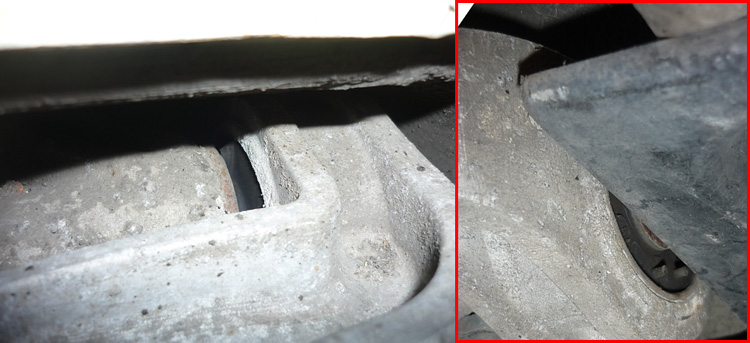
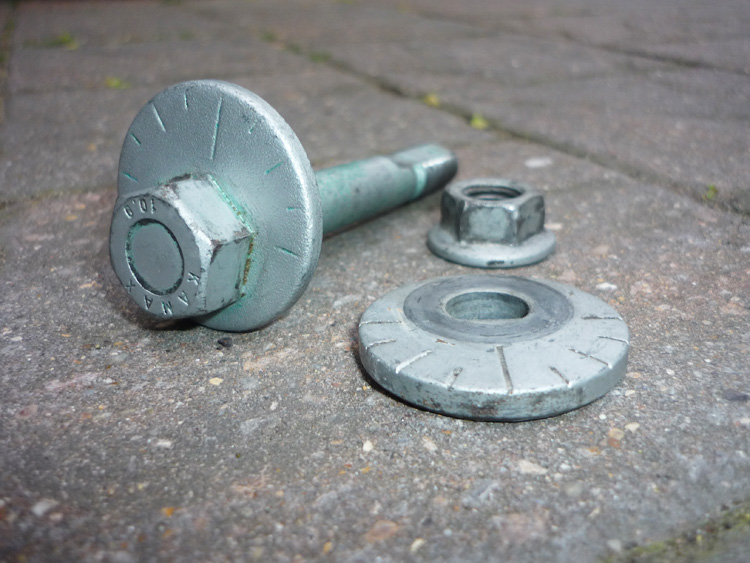
CHECKING ECCENTRICS & BALL JOINTS & WISHBONES Here we have the front castor eccentric bolts. These are positioned on the underside of the front wishbones and do have a habit of seizing stuck. So if you don't want any nasty surprises and long waits when you get your geo done, it's a good idea to get these loosened, cleaned & descaled and lubed up again with copperslip. mine came off pretty easily and leaving the second outboard bolt in place means that the castor isn't actually changed at all.
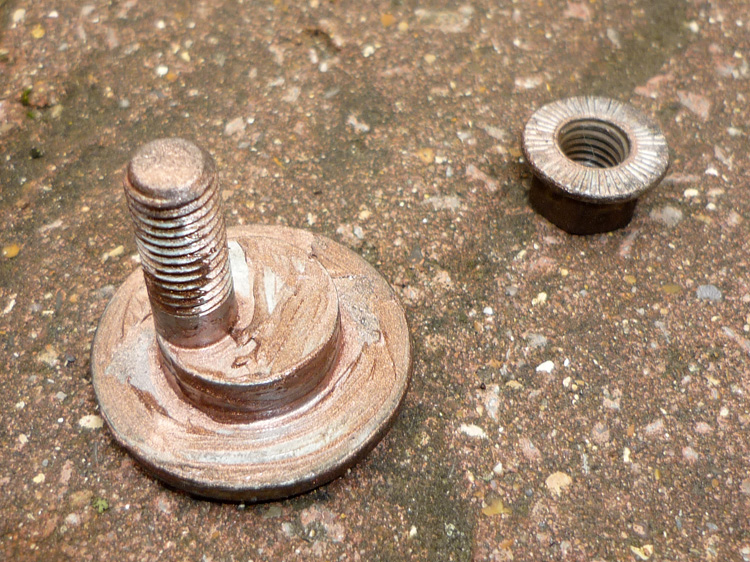
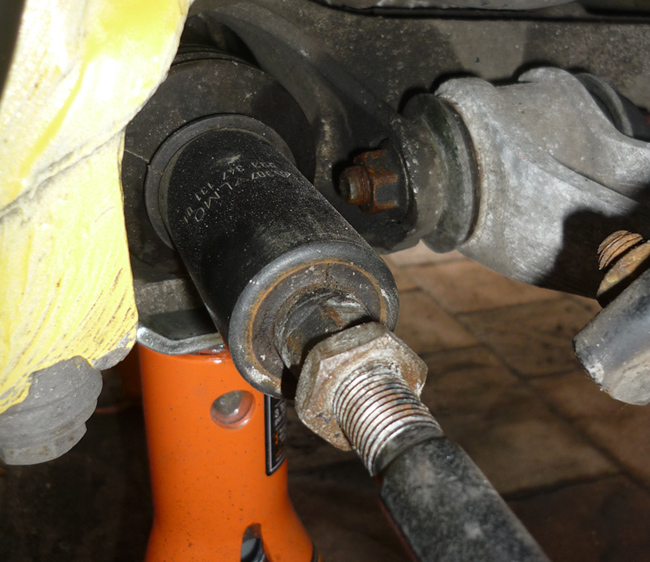
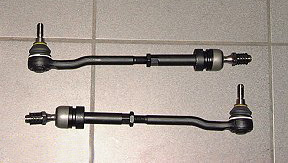
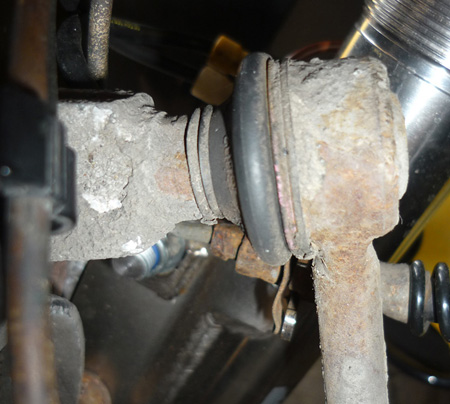
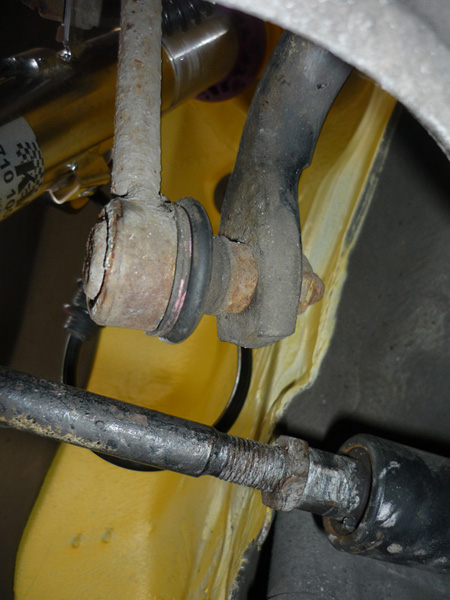
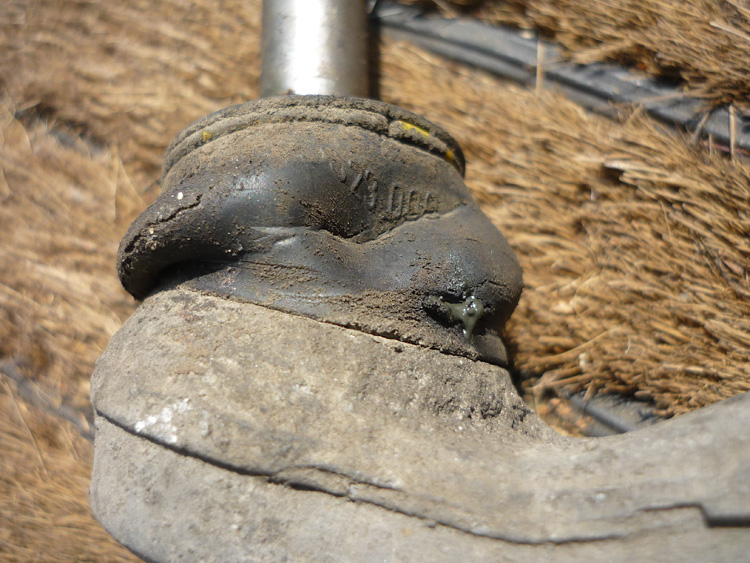
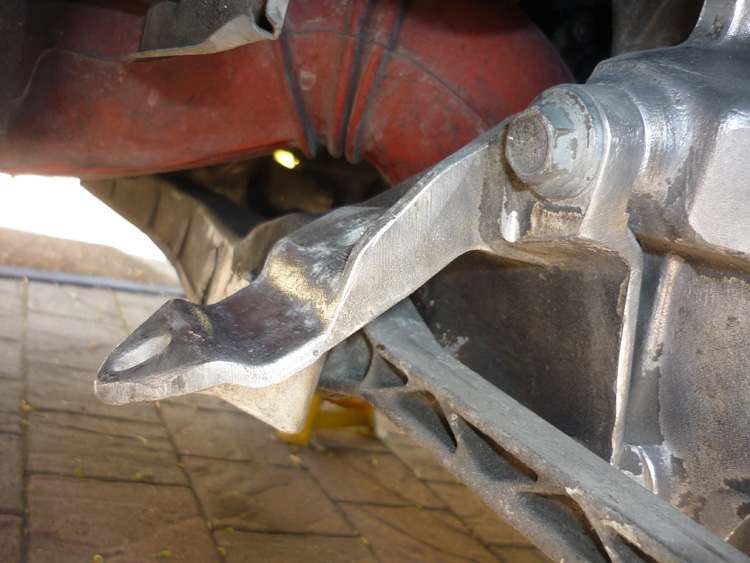
Another item to check at the front is the tie rod inner ball joints. Work back from where the track rod meets the upright and you will see a thick metal cylinder that is filled with rubber. Just beyond this inside the rubber boot is a ball joint. Now these are known to fail prematurely and they will introduce looseness into the steering and sloppy handling. Again, you don't want to have all your corner weighting and geo done only to discover that these are shot and besides, it's an MOT fail if i'm not mistaken. First of all check that the boots are intact (dirt will get in so replace if they are split) and then pull the boot back. Next, with the car raised, have someone grip the wheel at the 3 and 9 o'clock position and rock it from side to side. Whilst this is happening you want to get a good feel of the inner metal barrel and put your other hand on the ball stud where it is threaded onto the rack. You will easily feel any play in the ball joint as your helper rocks the wheel. Whilst you are there it will be worth repeating the same thing but with you holding the upright (near where it meets the tie rod) and the outer tie rod shaft (just before the threaded section you see in the following picture) just to check for any play in the outer ball joint as well.
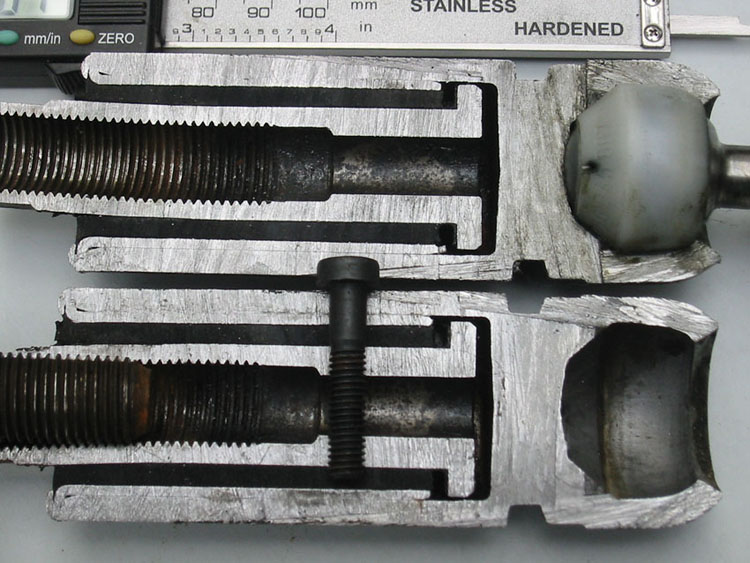
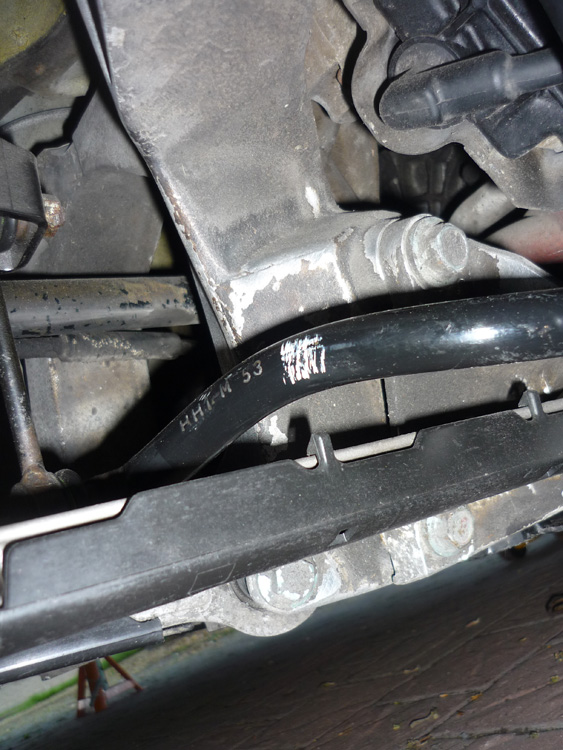
A word on those inner tie rod ball joints. That cylinder that you see in the picture above is an outer sleeve and inside you can see a large layer of rubber into which the free track rod end inserts. If you look at the picture below you can see that this is designed to allow +/- 2.5mm axial play in the steering. Porsche deemed it necessary to have this there when they designed the 993 (the 964 has totally different link but without this play). My guess is that it represents Porsche's intention of biasing the 993 towards being a more mass market car, softening or restricting the flow of unwanted bumpsteer and steering directness up through the rack in the name of comfort. Some people do complain of a slight vagueness in the 993's steering compared to older variants as well. Well the good news is that for a more focused predominantly fast road or track orientated 993 you can do something about this, namely fit the RS tie rods which have less play or for a real hardcore ride the motorsport tie rod ends which is just a solid connection.
The RS tie rods are what they are. The motosport tie rods were fitted to the 993 GT2 EVO only but you can get them directly from porsche Motorsport (your local OPC will have to call the motorsport division). Some dealers seem to be able to order them on their own (about 80 pounds each) but then other dealers quoted me for the ball joint and actual tie rod end and said they couldn't be separated so best to do some digging around. I discovered just a few people who have fitted these (one chap on pistonheads and a couple over in the States) and all of them said that the steering is improved with greater feedback especially round the straight ahead. Once 993 RS owner stated that it made the steering as good as his 964RS. There are are some compromises though in the form of the steering jiggling around more especially on the motorway so if comfort and a daily driver is your priority then think long and hard first.
The other areas to check at the front are the anti roll bar bushes and the bushes inside the lower wishbone. The ARB bushes inside the saddle brackets are fairly easy to visually inspect. As for the wishbones, jam a pry bar between the wishbone and the subframe and check for excessive flex or play (although bear in mind they flex a fair bit as normal). Look at the rubber; it will tend to crack and seep out when they are gone.
The wishbones bushes don't last that long and are a common source of handling ills, including vague steering and a wandering, excessive tramlining front end. If you do need to replace these then the normal course of action is to replace the whole wishbone at around 260GBP each. It is possible to remove the bushes and refit new ones but I understand it's a bit of a job. Without a hydraulic press some home amateur mechanics have reported that it took them over 10 hours and they'd wished they'd never undertaken it ! A halfway house solution would be to buy exchange wishbones from Hartech that work out a lot cheaper than buying new.
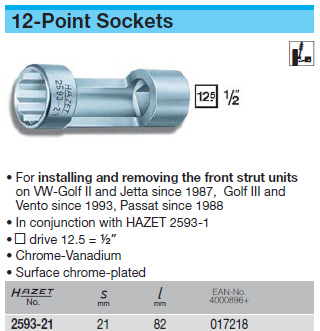
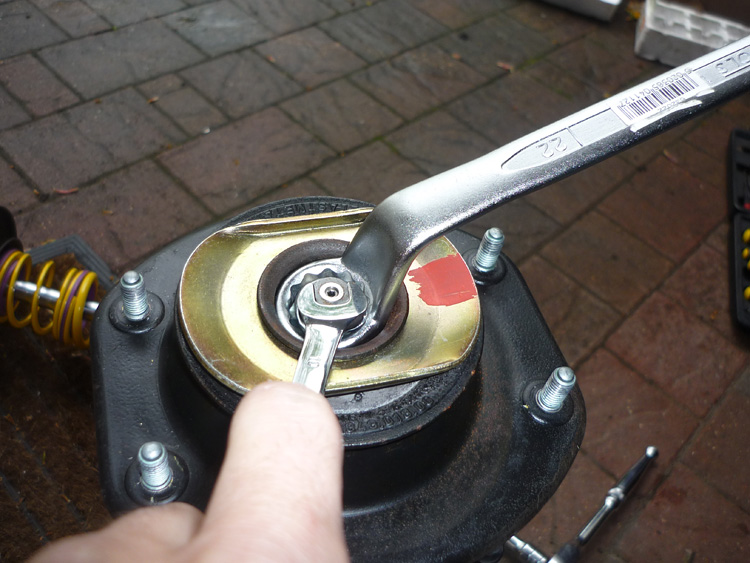
MIGRATING THE TOP MOUNTS To loosen the top piston bolt of the OEM monroe shock (and hence get the top mounts off) you need to stop the centre piece turning with a 7mm allen key whilst the actual 21mm nut is loosened. Now the proper way to do this is using a special 'cut open' socket made by german company Hazet which allows you to keep a hex key down the centre whilst you crank round the socket. If you want to do this the proper way then you can order this socket from this uk company. You want page 6 of this catalogue as well and part number 2593-21. Just be aware that delivery will be at least 5 days and cost will be almost 50 pounds just for one socket.
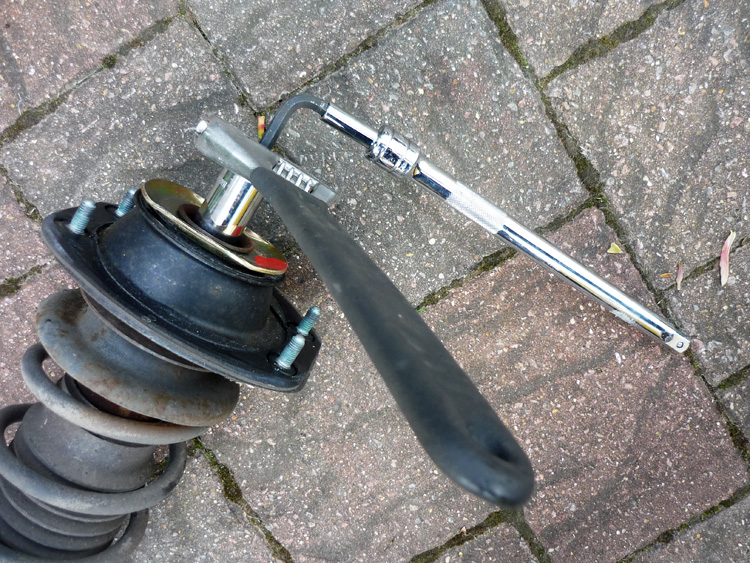
There is an easier way of course and that's to use a deep 21mm spark plug socket which has flats on one end. The hole for the ratchet will be big enough to insert a hex key down and meanwhile you can grip and turn the socket with a large adjustable wrench. Mine was on pretty tight so I lengthened the allen key for more leverage by inserting it into a deep socket that had an extension bar on the end of it.
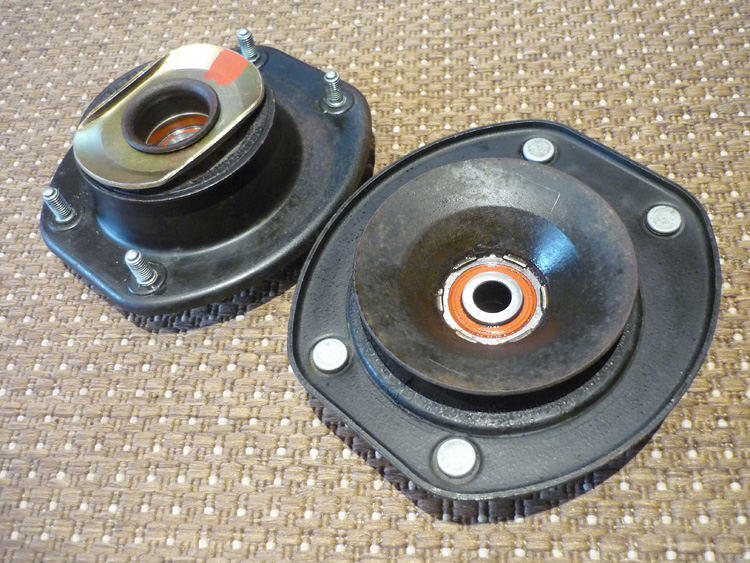
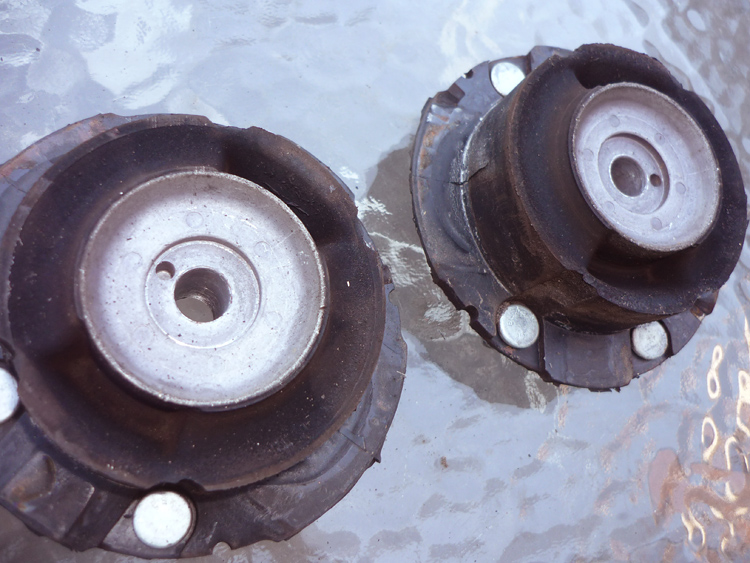
Here are my freed top mounts. I gave these a good cleanup and inspection. Check all the rubber on the underside (one on the right in the picture) and make sure there are no cracks in the rubber or no new rubber exposed. The best way to do this is to hold it on the bench in a vice and then with the strut still attached, wiggle the other end of the strut around watching the rubber deform as you do. If there are any splits of cracks then this is the way you'll definitely spot them. Also, turn the bearings with your finger and check that they are smooth. Give them a clean and then some fresh oil. If they are shot then I understand that it is possible to replace them. To be fair, front top mounts on a 993 are under less stress than the rear and unless your car has done interplanetary miles, then they should be ok. Front top mounts should be fine up to 100k or so. Always worth a detailed check though. If you are laying out all this money and time then you want to make sure that nothing compromises the job.
Fitting the front KW struts to the mounts is a reverse process of what you did above. This time though its a 22mm nut and not a an allen key but flats on the centre that mate to a 10mm spanner. This is a little bit trickier and took me a little longer. My technique was to angle a deep offset spanner into the opening. It's not that easy because the angle on the spanner is quite precarious and I found it easier to keep the nut stationary and turn the 10mm spanner instead (but obviously anti-clockwise). One thing that also helped hugely was to compress the main spring on the KW so that the top mount fell down as low as possible, creating more space for the large offset spanner, more of the time. I don't especially like bodging stuff like this and it bothered me slightly that I wasn't able to torque the nut up properly doing it this method. KW recommend a setting of 60nm but I was advised by my friendly Porsche specialist that nipping it up tight without going bonkers would more than suffice ( it's a nyloc as well). One last word on the top mounts. It's not unknown for the 13mm nuts to have been over tightened, stripping the threads and ruining the whole top mount. The internet appears to advise sticking to around 20 ft/lb.
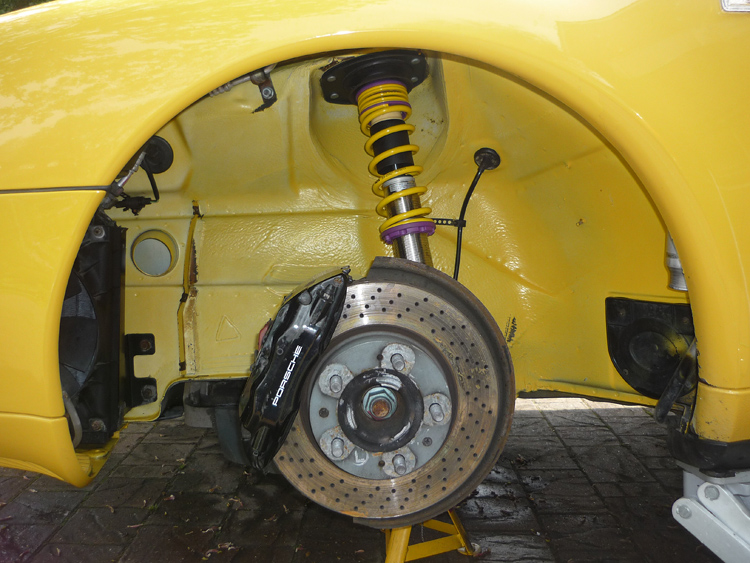
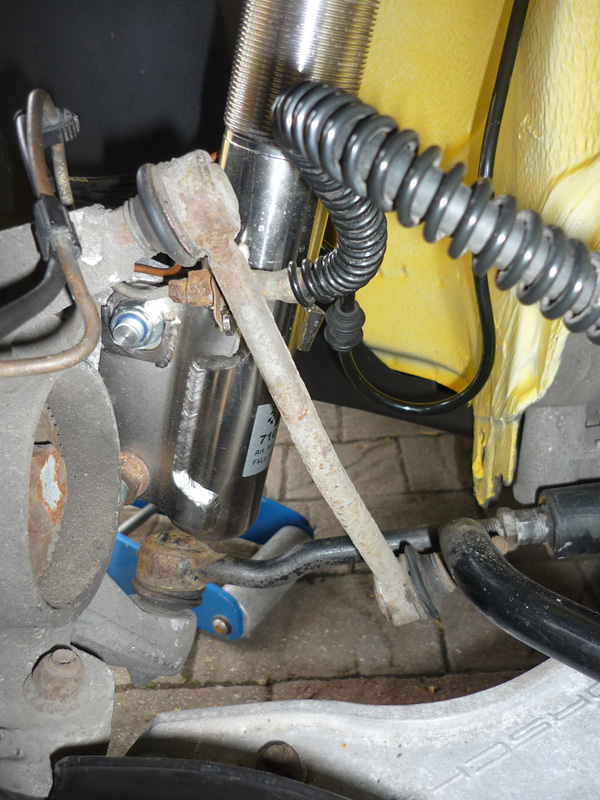
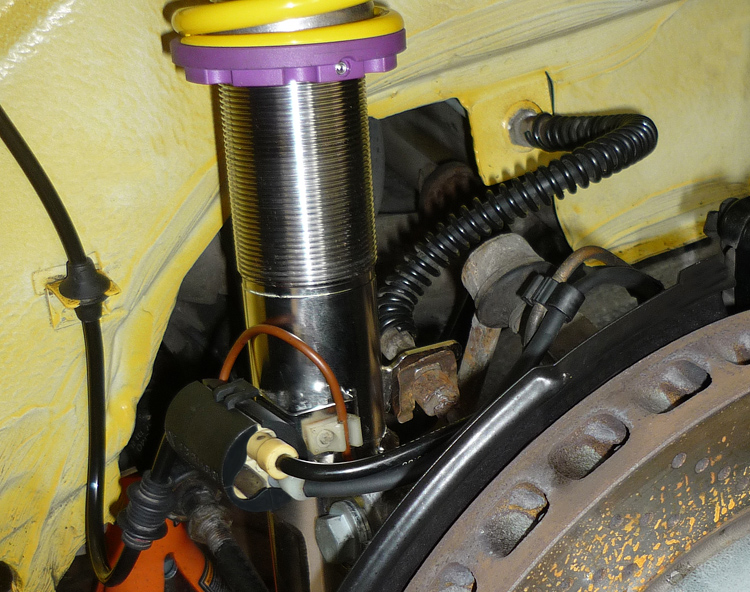
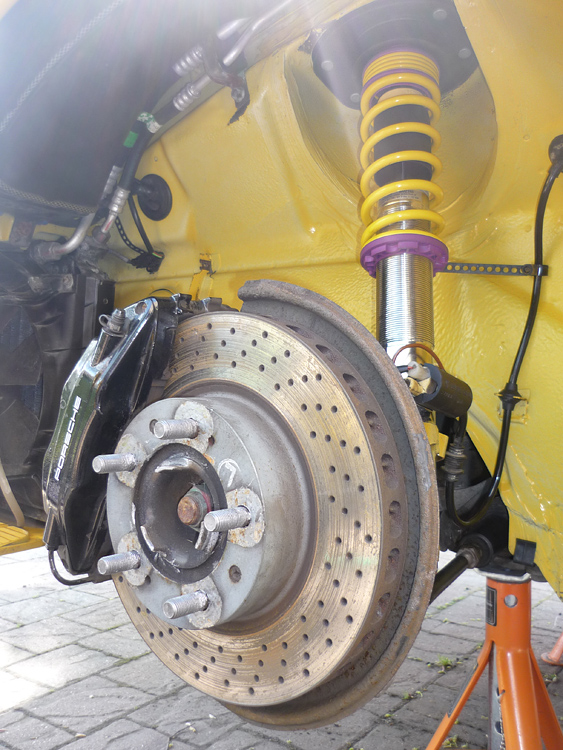
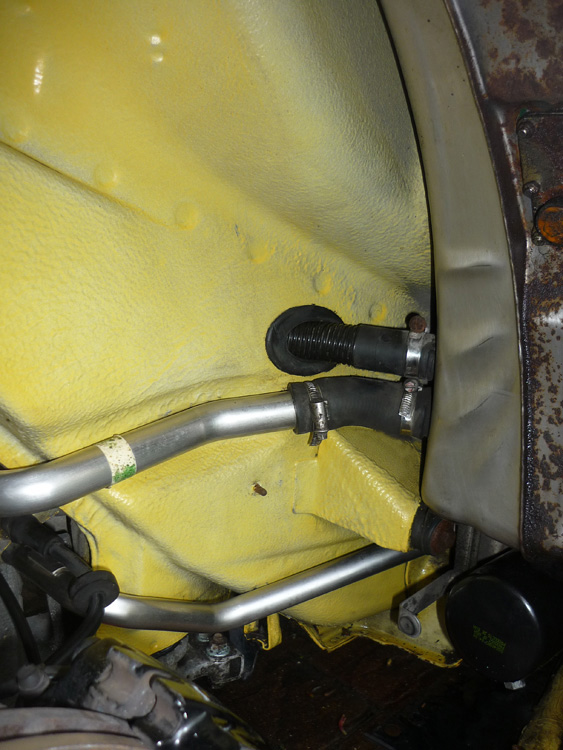
Here's a shot of some of my wiring with one of the front struts in place. Regarding ride height, I made the KW's roughly the same length as the old Monroes before I put them on. As you can see, that means keeping the lower spring platforms pretty high. I think I started out with 30 threads exposed from the start of the threaded section to the underside of the platform. You can also see the brake line back in place here. The position of the KW bracket doesn't appear to match the original one but the actual solid brake pipe that feeds directly into the caliper really is very very flexible so it's a doddle to coax it into its new home.
REAR SUSPENSION
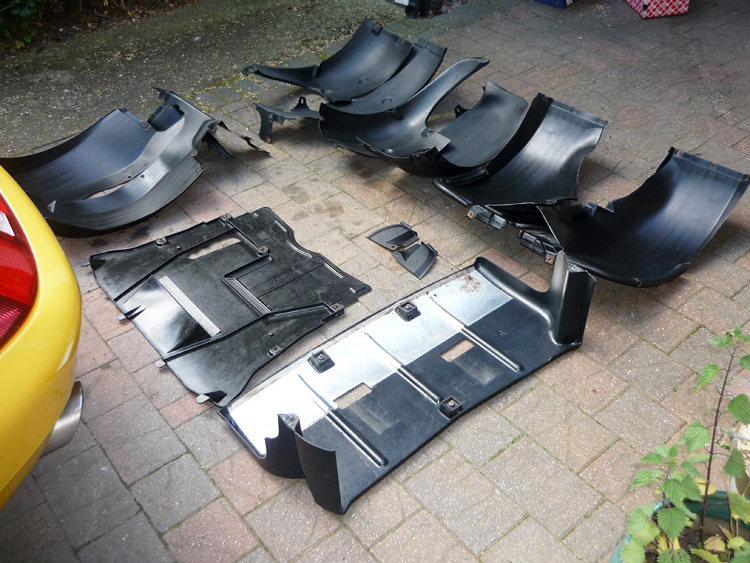
1. remove engine and gearbox undertrays 1. inspect ball joints and boots of all rear arms
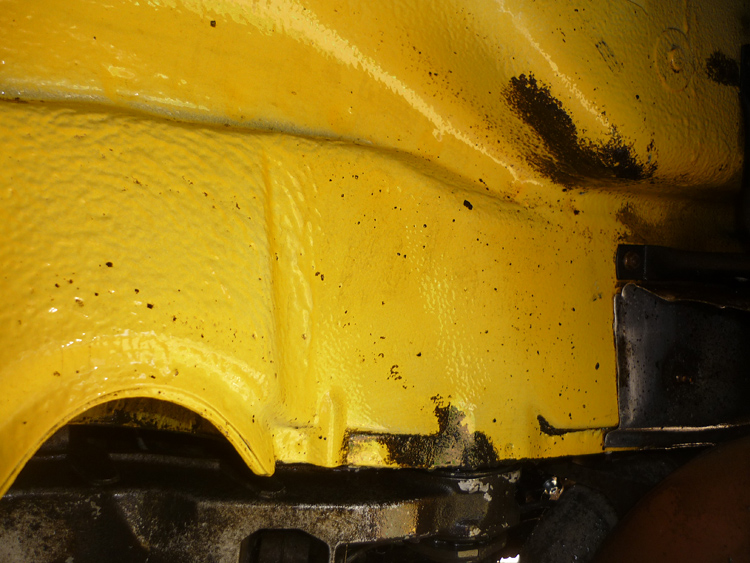
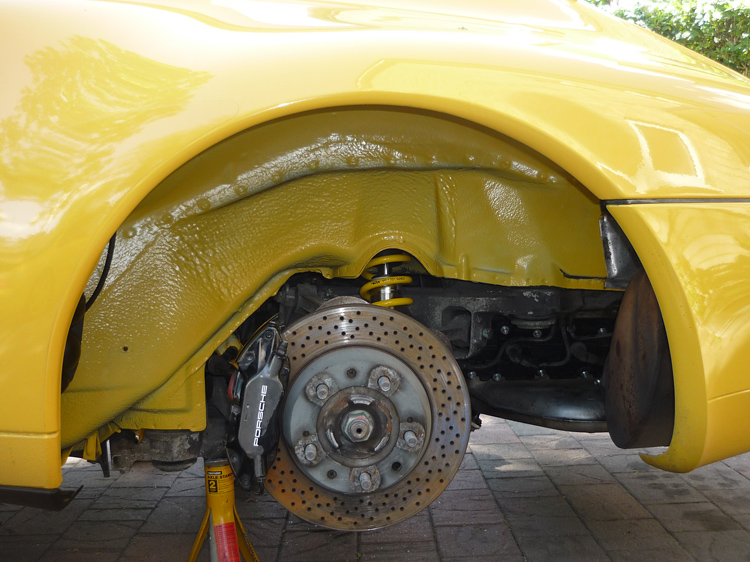
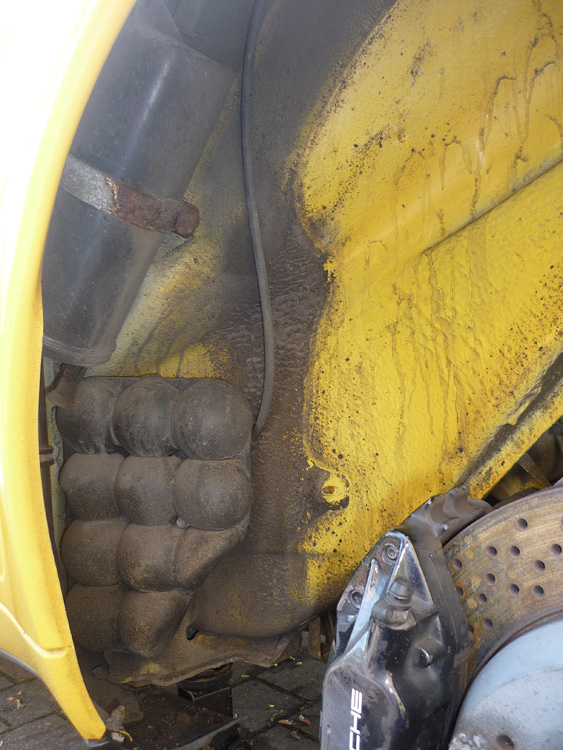
Turning to the rear of the car, let's first look at the clean up process. The first picture was actually taken after a good preliminary wash and scrub. This is 13 years of grime here and it takes some serious power to shift. My technique was multi angled; first off I removed the arch liners and then gave the arches a regular wash and scrub with a hot soapy solution which was allowed to soak in for 10-20 minutes. After that I scrubbed again with a very concentrated solution of neat fairy liquid and soap. This helped a little more with breaking the dirt down.That gets you to picture 2.
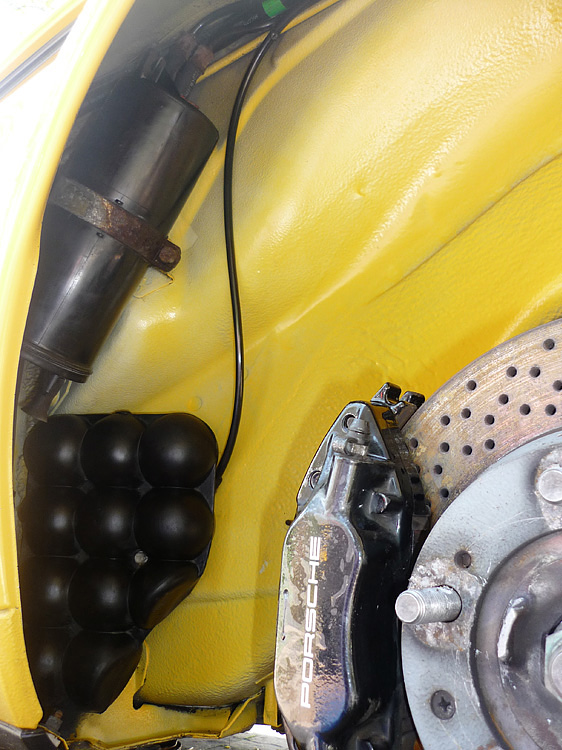
After that I used a product called Bilberry wheel cleaner. This is an amazing product for alloy wheels, the best I've ever come across by far but it's actually pretty effective at removing thick grime. Diluted in a 5:1 ratio I sprayed it on and allowed it to soak though for 10 mins or so and then got to work scrubbing again. After another rinse I would then do a second round with the Bilberry on really stubborn areas and really go to town on them with a good selection of brushes. Now we are at picture 3 & 4 here. You can see that its all starting to look clean but there is now a whole microcosm of tar spots visible. For these I wiped the entire surface with Turtle wax tar remover, let it soak then got to work with a dense microfibre cloth and really rubbed hard. Also, on all the large tar spots I picked them with my fingernail so that the top of them sheared off and then that made it a lot easier to remove them with the cloth. This was a VERY time consuming part of the process but well worth it when the final results were revealed. Bear in mind that the Turtle Wax cream probably isn't the best there is and other tar removers would be better to buy. The detailing guys all swear by Autosmart TARDIS. Its a very strong product that only comes in bulk industrial tins but I am told that it nukes tar spots with very little fuss. I am not sure if it is suitable for thin, non lacquered paint like you get in arches though so be sure to check up on that.
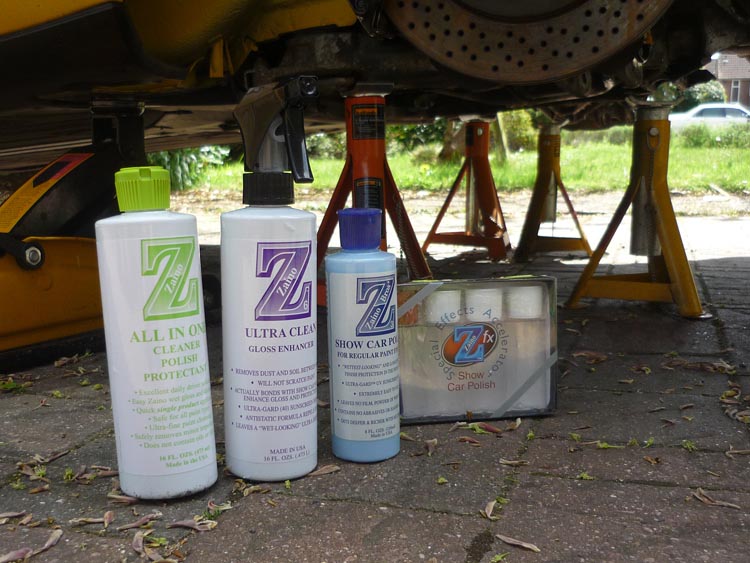
After quizzing every detailer in the known universe, my decision was to use Zaino products to seal or protect the arches in the future. Now aside from using some sort of semi-permanent anti corrosion coating like waxoyl or bilt hammer, multilayered Zaino is arguably the most durable sealant there is. The arches will get dirty again of course but they will now be protected by 3 layers of sealant and will be a lot easier to clean in the future. The Zaino range is slightly complicated to get your head around but the products used are Z-AIO which not only is an all in one cleaning/polishing/protecting product is also the best way to prepare your surface for the application of the sealants. The actual sealant is Z3 which is for single stage paints (Z2 is for clearcoat) and this gets applied after the Z-AIO but it is first of all mixed with a few drops of a special flash cure additive called ZFX which not only quickens the drying time but also allows you to coat on 3 layers at a time and ensures that it bonds to the surface in the most durable way possible. None of this is cheap of course... but it's been proven over and over again by some of the best pro detailers out there. If you wanted a simpler product then maybe consider FinishKare 1000p. This is a wax that is proving to be very durable, longer lasting that Collonite and it too should protect your arches for many months to come.
Let's go back to our suspension. After a good poke round all 6 rear control arms I noticed that my nearside toe control arm boot (the lower one that you remove) had a small puncture in it, a larger crack in it and a strong crease, almost as if it had spent some of it's life twisted. This arm has plenty of life left in it of course but really, it's only a matter of time before it needs attention so I decided to fit a new one there and then. Again, hartech will do exchange arms for almost half the price if that's the route you'd prefer to take. Make sure that when you fit the toe control arm back again, you don't tighten it at the damper end then rotate it upwards into the chassis. This will obviously completely twist and crease the boot. It's not something you'd necessarily do but it's not unknown to have happened in the past. Its well worth checking all 3 arms whilst you are down there. The one immediately above the rear lower toe arm adjusts the kinematic toe and the upper front arm is for the rear camber. Again, check all rubber boots and ball joints for play and loosen these eccentrics, clean, grease the tighten back up to make life simpler when you get the geometry done.
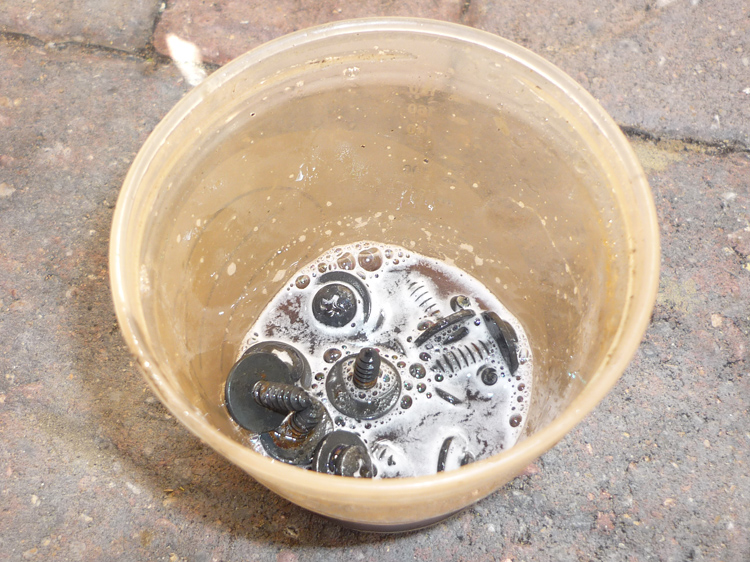
Here are my rear drop links after a clean up. I use a product called 303 Aerospace Protectant to clean and protect all my rubber boots. It leaves a more natural finish and whilst you can't actually restore the health of rubber, it will help repel dust, dirt and oils. On all my components I also take care to descale and clean any screw threads, grease if applicable and also treat for rust if necessary. Below you can see the toe eccentric bolts after a good cleanup.
With the rear top mounts, again make sure you check them fully. No bearings this time obviously but get the mount in a vice and then wiggle the old damper around and watch on the underside for cracking or splitting rubber. The rears do take more weight and I elected to just change mine. They probably didn't really need it but knowing that my front top mounts were less than 10k miles old, I wanted the rears to be new.
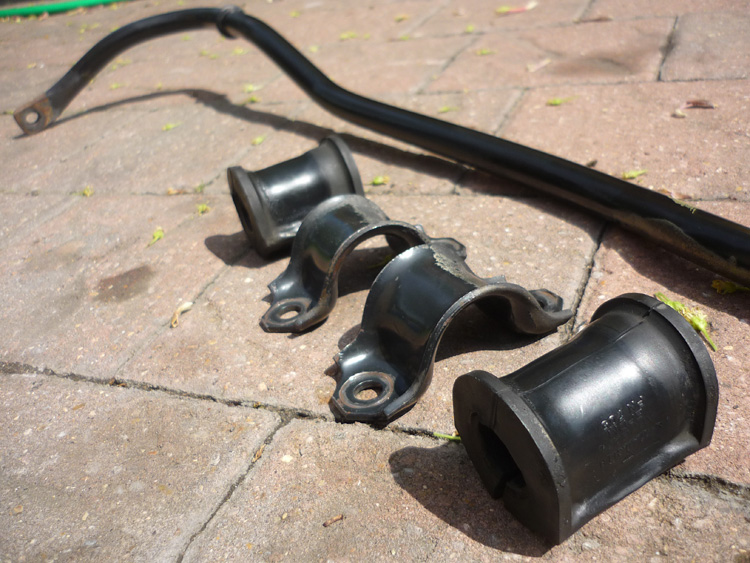
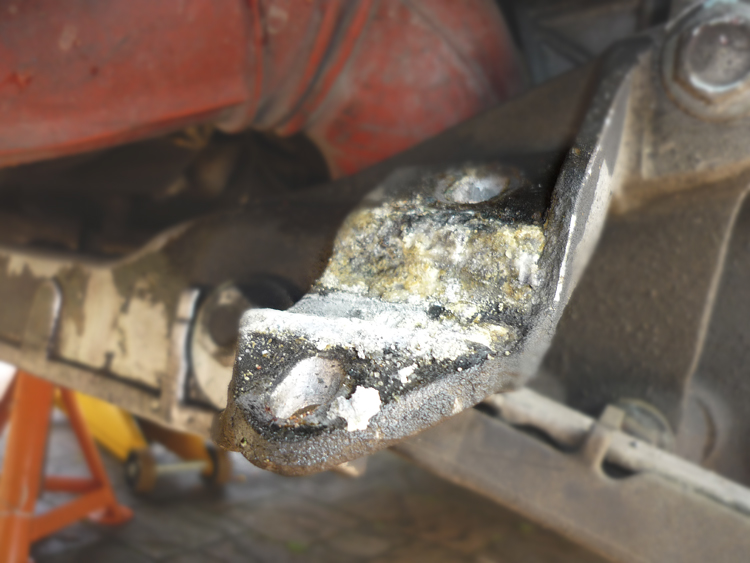
Here you see my rear arb, the covers of the saddle brackets and of course the rubber bushes which are clearly in a good state. Be sure to regrease these before it all goes back together. I also discovered a LOT of white corrosion all over the bush and on the chassis seating point. I scrubbed this with wire brushes but it was so stubborn and thick that I eventually took a drill to it with a rotary wire attachment.
The only other point I wish to make about the rear install is how you insert the new KW/top assembly. You don't want to tighten the top mount first and then have the damper hanging there and equally you don't want to be trying to compress the damper once its up against it's perch so really you have to set the platforms so it is shorter or a very similar distance to the upright mounting point at droop to top mount location. In this way you can then fit the lower damper end into the upright, slide the control arm shaft in to secure it and the top mount will be a few cm short of the 4 mounting holes. Then you can slowly jack the damper/upright upwards. I had a jack pointed toward the rear of the car so I could actually look down the side of the engine and at the same time jack up the lever with my foot. By visually I checking, I was then able to go back on my knees and rotate the damper slightly to ensure that the 4 bolts of the top mount perfectly met and penetrated the 4 holes in the body. Once that was achieved I loosely tightened the four 13mm nuts up by hand and then dropped the car to get the weight up against the top mount and then tightened them up fully to 20 lb/ft. Check your arb is not fouling anything once the car is sitting on its wheels. Same goes for the bolts and screws of the rear drop links. Ensure that they cannot foul any part of the chassis or the toe arm during compression or droop. Although you can only fit the drop links and KW's together one specific way as the drop link mounting points are fixed, on other dampers you need to tighten everything with the car on its feet and ensure that the drop link brackets are rotated on the damper so that the connection is directly above where the arb meets the lower end of the drop link.
GEOMETRY SETTINGS
SOME COMMENTS ON THE KW's TO FOLLOW ONCE MY GEO IS DONE AND I HAVE DONE A FEW MILE
|
|||||||||||||||||||||||||||||||||||||||