Air Conditioning delete
My air con has never really worked. I've also never once needed it. On average, it's hot in the UK about 4 or 5 days a year (if you're lucky) and besides, I just wouldn't drive my 993 on hot days, its not that sort of car. So I always had it in mind to take out the AC. It probably weighs a fair old amount and it also clutters up the engine bay which is something that really bugs me. Of course I can retrofit it if I ever feel like it but for now my plan is to remove. At this stage I don't think I will be removing everything. The refrigerant pipes that run down the side of the car might get removed but I will probably be leaving the evaporator in for now as this sits buried right behind the fuel tank and is a bit of a pain to get to. The spec of the complete job is as follows:
1. get a professional to safely vent gases at the compressor ( simply venting to atmosphere is dangerous and illegal) 8. to go the whole hog change the dash climate control unit to a non AC one
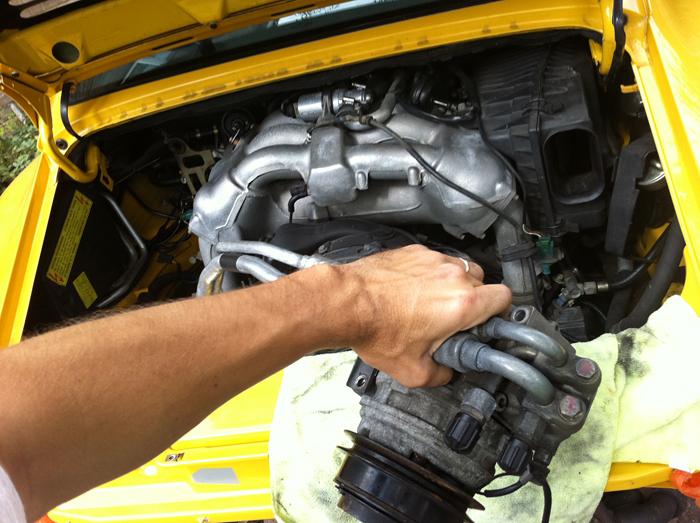
COMPRESSOR
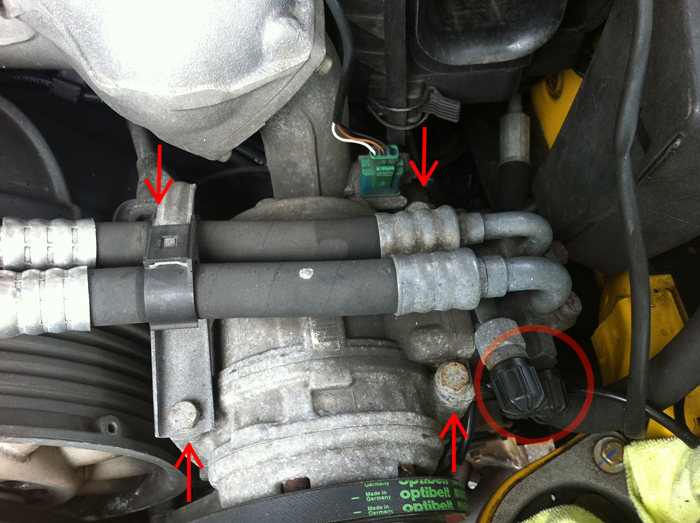
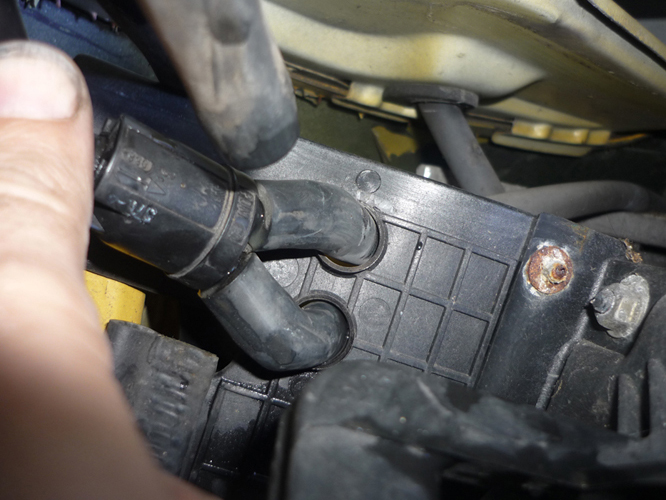
The two plugs circled are where gases are bled off. The thicker one is the high pressure line, the thinner the low pressure line. Get this done by a professional garage or AC expert who will collect the CFCs safely. You must do this before anything else. Look at the top of the compressor. It's held on by four screws which you can undo. Note that the left rear screw goes through a support strut that extends back into the engine bay. More on this later.
As you undo the compressor mounting screws watch underneath because there are a couple of square M8 nuts which can just fall and disappear forever.
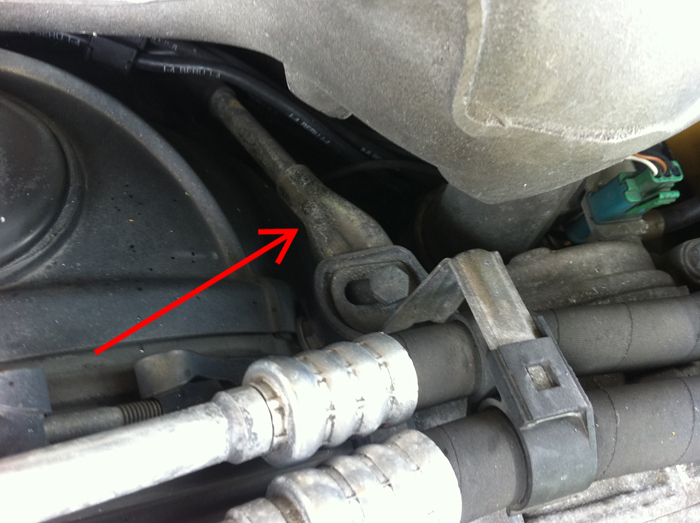
The wiring from the compressor goes to this single connector here so unplug it.
Undo this screw as well to relase a spade terminal.
Wiggle the compressor towards you and then free off the belt.
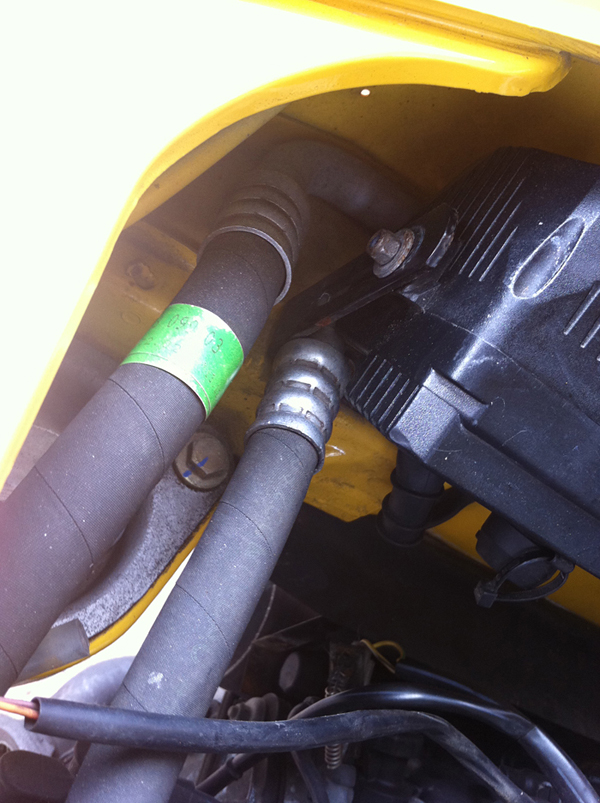
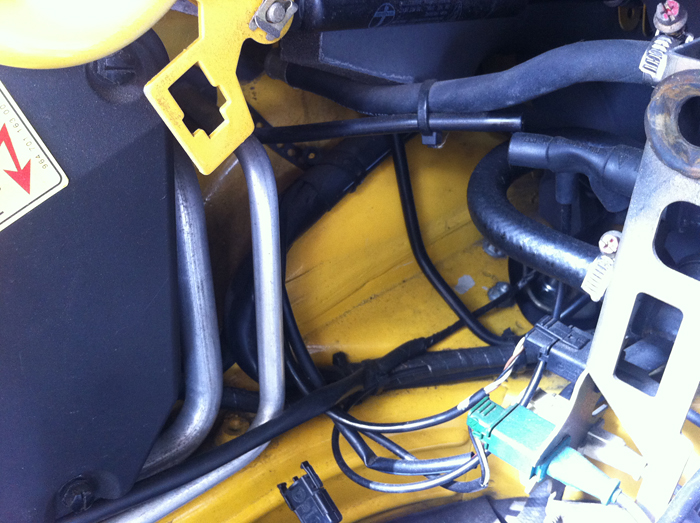
Take a note of where the AC lines run in the engine bay. Mine go over the fan housing (where there is a clip which yuo can undo) and then behind my alarm.
I took my alarm off and there they go through another plastic bracket. Simply undo with a hex key. You'll be pleased to know that that alarm bracket came off sraight away and was thrown into the powder coaters pile !
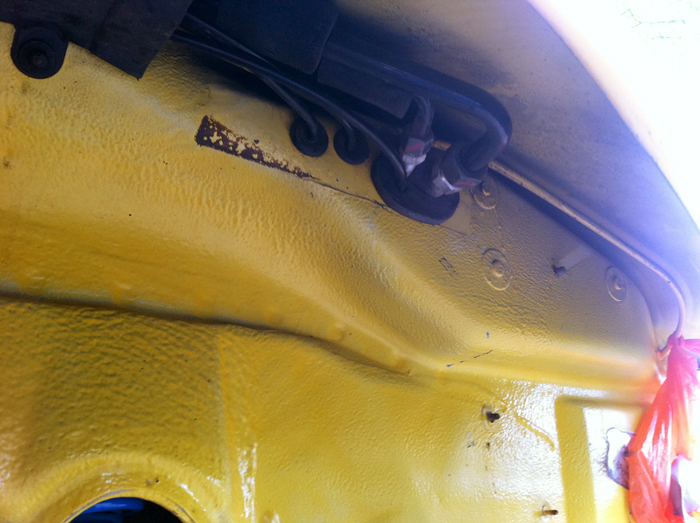
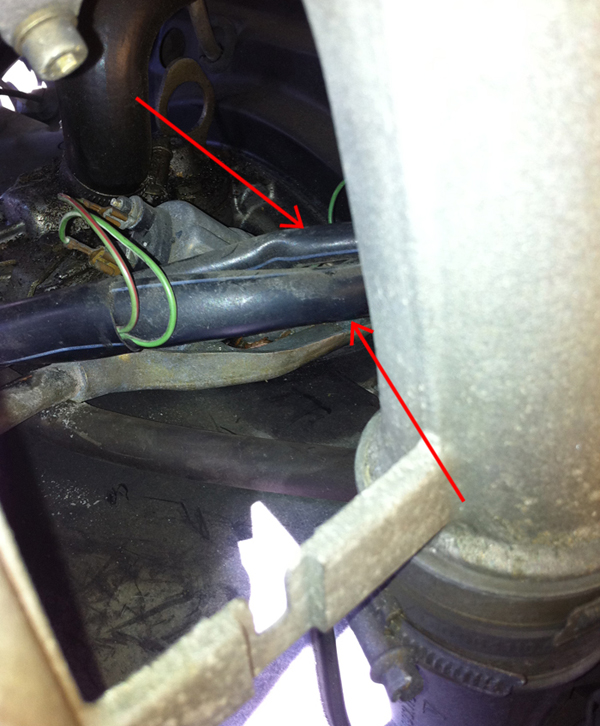
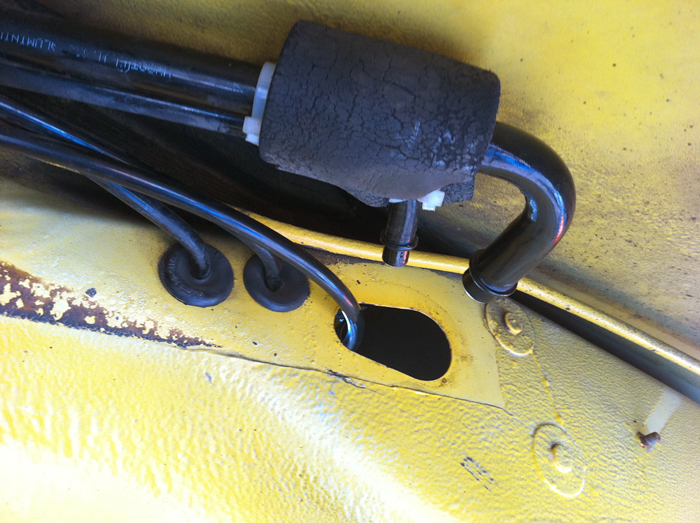
The two lines exist into the nearside wheelarch through a hole here.
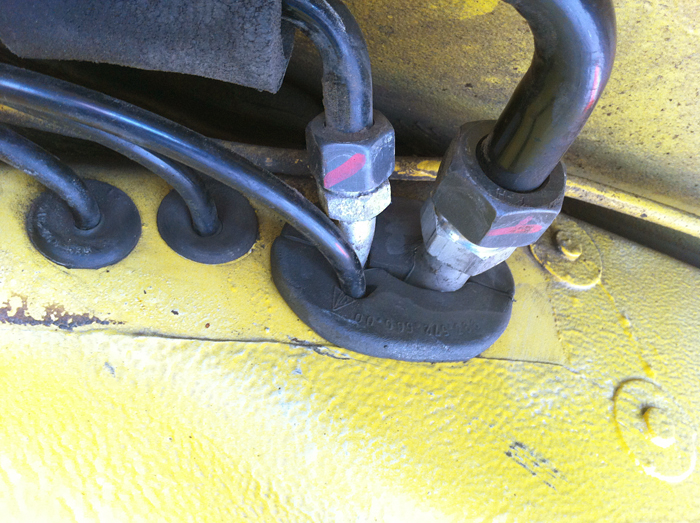
Go into your wheel arch (remove the rearward liner) and spy the two connectors.
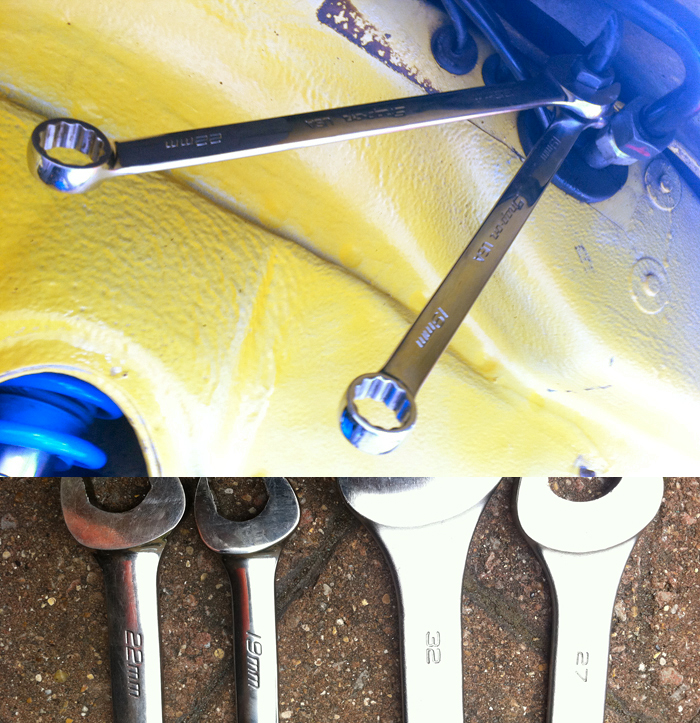
You will want 22 and 19mm spanners and then 27 and 32mm for the larger coupling. They will need a bit of force most likely so try and use long spanners for maximum leverage.
Once they are loose you can pull the compressor out of the engine bay and get it settled and rested on some sort of suport, being careful to protect the cars bodywork. Tthen carefully wiggle each line inwards and then out of the engine bay.
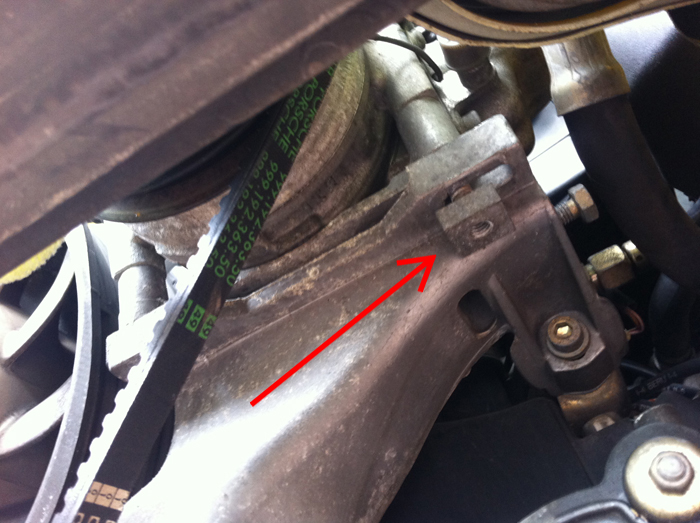
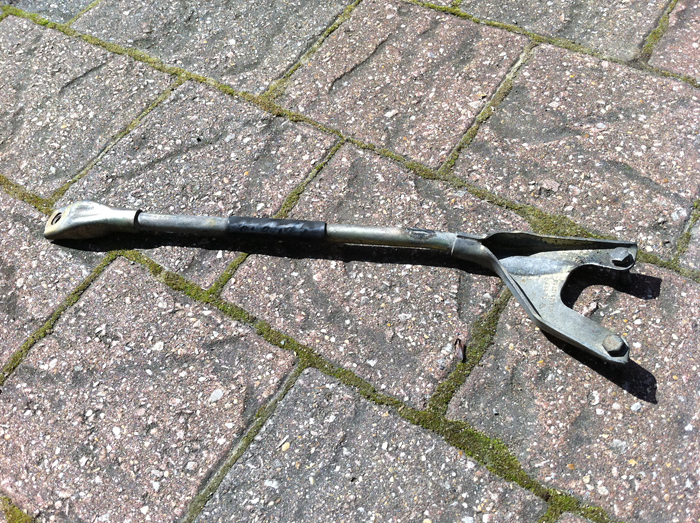
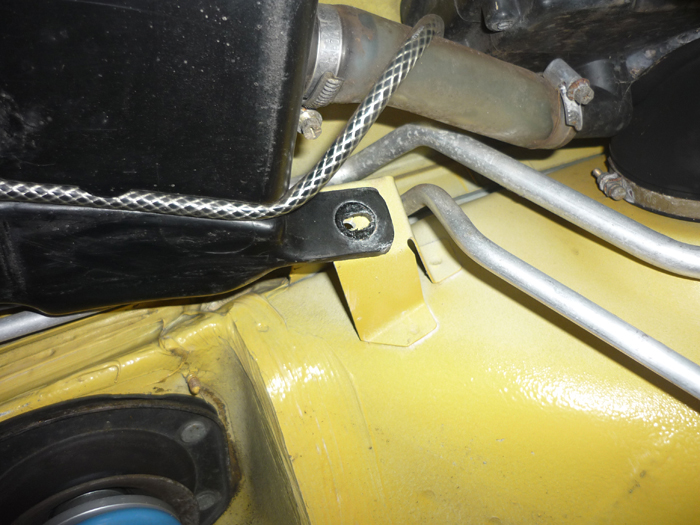
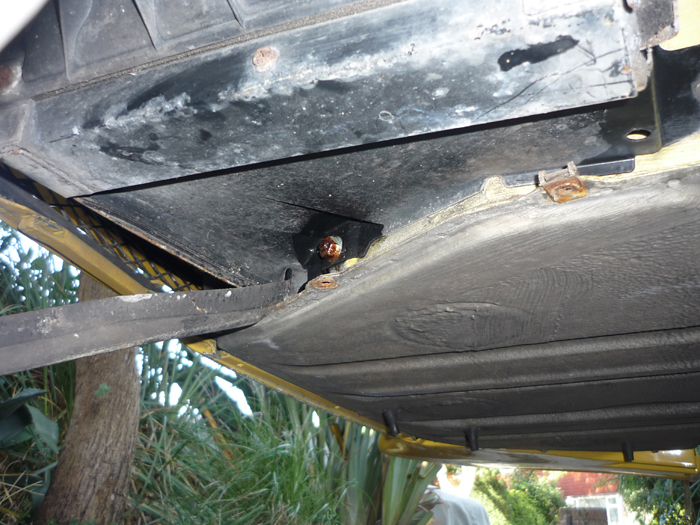
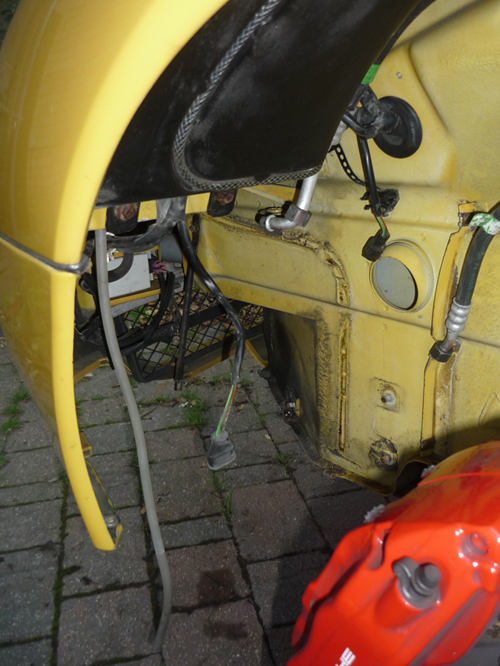
Back in the engine bay you will still have that long support bracket that extends back into the rear of the engine shroud.
Best bet is to remove your airbox so you can get to this. The picture is looking left from where the airbox normally is. You can see the triangular shape fork of the bracket end which mates down onto the top surface of the engine shroud. There is some sort of sender between the two ends of the fork. This is held down with two 10mm screws. Slide you arm and a small ratchet down the RHS and then through the intake manifold and take off. It helps to shine some light down the front or get your other hand in from the other side to help locate the position of the screw heads. NOTE THAT THE SENDER HAS TO BE SCREWED BACK IN PLACE INTO THE BLOCK ONCE THE SUPPORTING STRUT IS REMOVED.
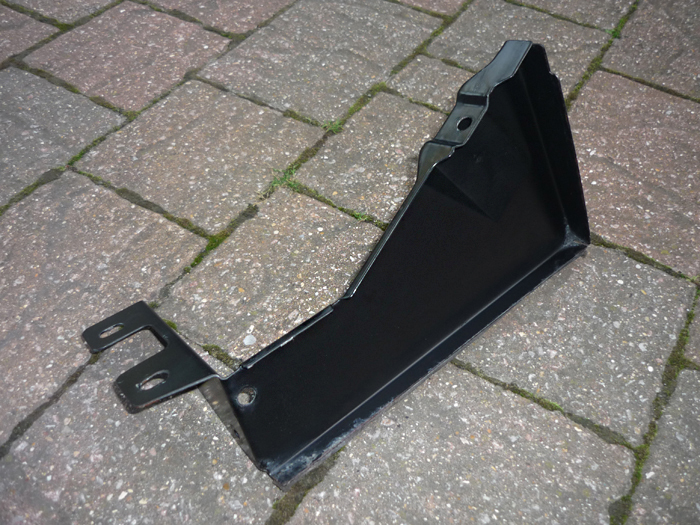
Here is the bracket removed.
Finally back in the wheel arch I slid the unused coupling ends into the rubber tubing and then cable tied everything up. The foam tubing will prevent the pipes from rubbing against any bodywork.
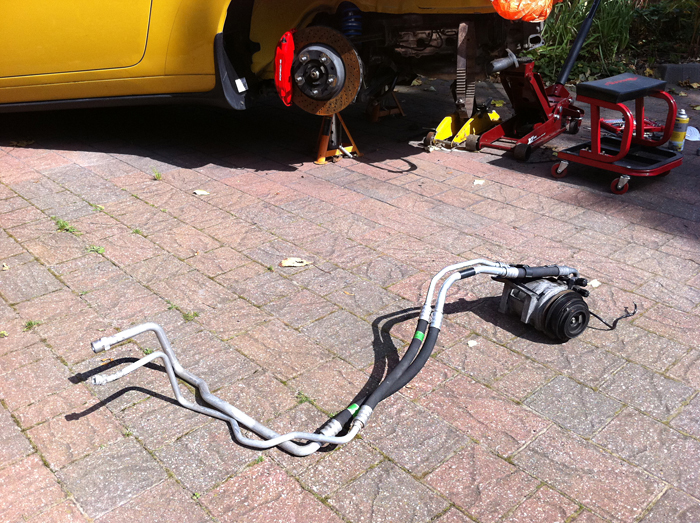
Compressor and engine bay lines removed.
CONDENSER
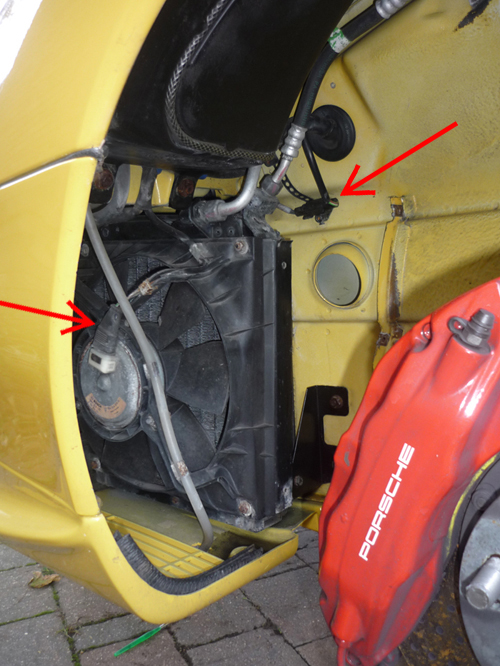
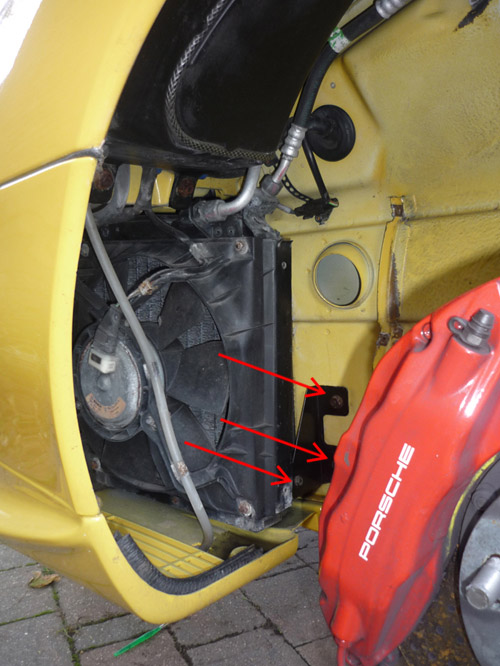
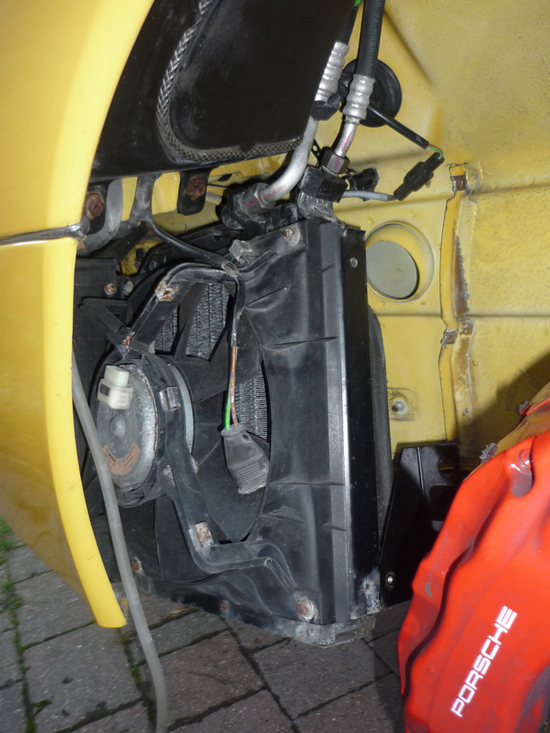
Undo both wheelarch liners on the nearside. Take a look forward and you will see the condenser and fan. You have a couple of electrical multiconnectors to undo first as indicated by the arrows. The two refrigerant lines that run into it originate from the other side of the arch. The thicker one goes into the sill with no break or coupling and the thinner one is attached to the dessicator. You can't really start this job by undoing these lines from the condenser here because the large couplings are inside the front bumper and its difficult to get decent sized spanners in there. You can try it on an angle or use midget spanners but the best thing is to drop the condenser first and then pull it out slightly away from the bumper so you can get long spanners onto it.
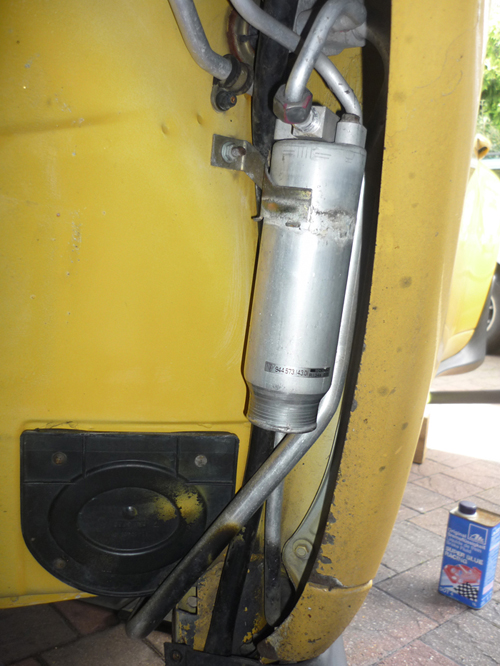
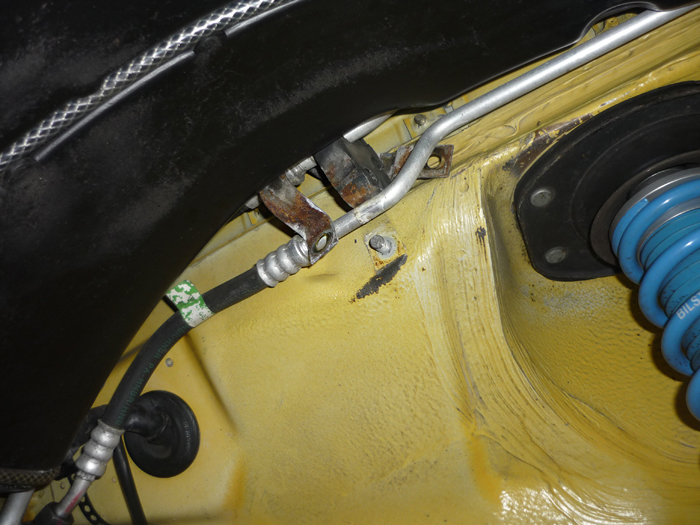
Look at the rear arch where you will find that dessicator (sometimes know as the drier). You will need to undo that coupling you see there to free it, but as said, the thinner line that goes from here to the condensor will still be attached to it.
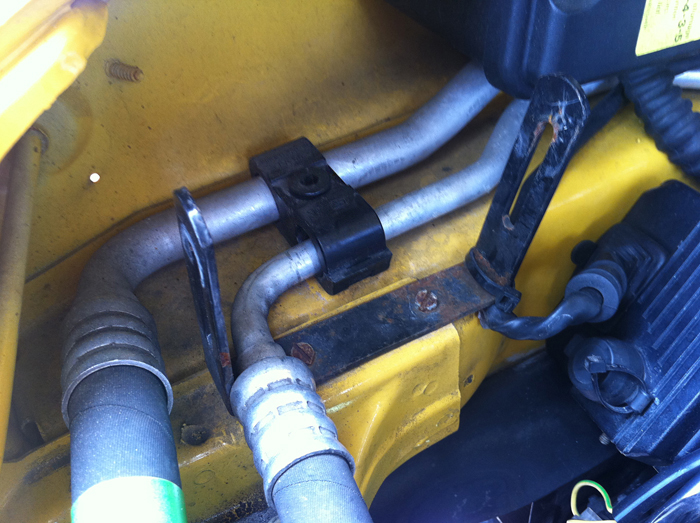
In order to release the smaller of the lines which is attached to the dessicator you need free it from behind the screewash reservoir so undo this nut here which affixes the rearward end of the reservoir to the body.
Just to the left of this is a circular bracket encasing a rubber fixing through which both pipes are held. Remove all of this and free both lines. If you're doing a zinc plating run like me, then its another rusty bracket to add to the pile !
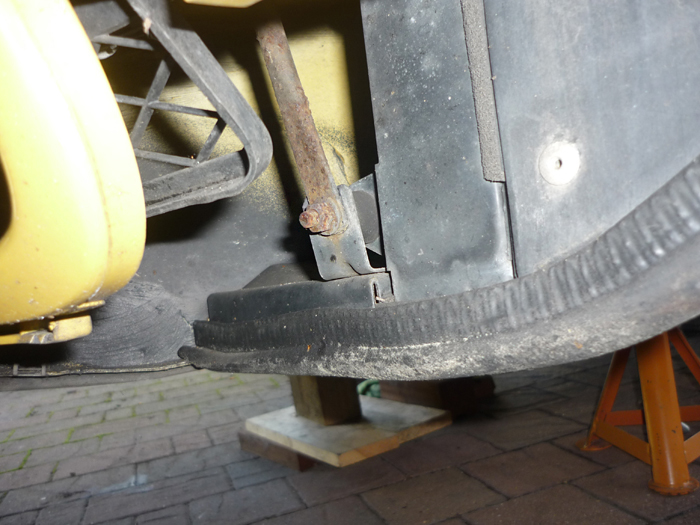
Now take off your nearside lower splitter. This should be 3 main screws and large washers that run down the inboard side and then you need to push down on a couple of tabs at the front (get your hand inside or push the black grill in the bumper out the way and gain access that way). Squeeze down on the tabs to allow the splitter to move forward freely and then pull from the side as well.
With the splitter off you will see a vertical bracket here that the condenser is attached to. Undo this 10mm nut.
At the middle of the lower back edge is another 10mm nut. There's a strip of rubber trim to remove here as well.
Now look into the bumper from the arch and you will see that coming off the condenser is a sheet of black textured plastic, a kind of flexible curtain which has 2 holes in it and the water pipes for the headlight washers go through these holes and then join up onto a Y connector. This plastic sheet is riveted onto the whole air guide cowling, so in order to completely free the condenser you will need to take the pipes out by first disconnecting them from the Y connector. Have a bucket below to collect all your screewash. I found this a bit of a pain. A couple of small size trim tools, L and C shaped sharp hooks, helped enourmously to free the rubber from the plastic Y connector. A quick blast from a heatgun wouldn't go amiss here either. Pull those 2 headlight hoses through the plastic shield.
Finally undo the 3 nuts on the main triangular bracket pictured here just to the left of the caliper.
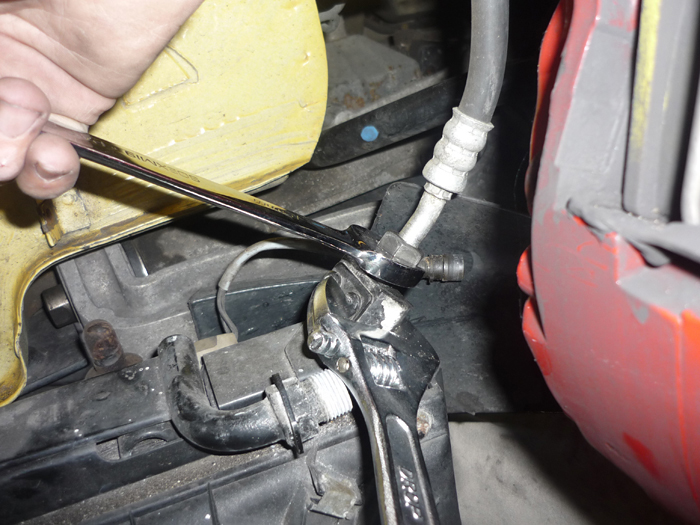
The condenser will now be loose and you can orient it such that you can get long spanners onto those connectors.
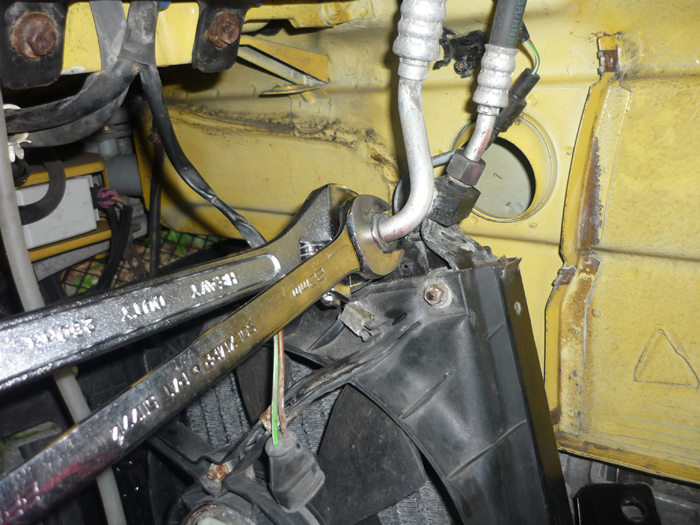
For the larger its a 22mm and then an adjustable wrench to counter hold.
Just a 19mm if my memory serves me correctly and a wrench to grab onto the metal block behind it to stop it twisting.
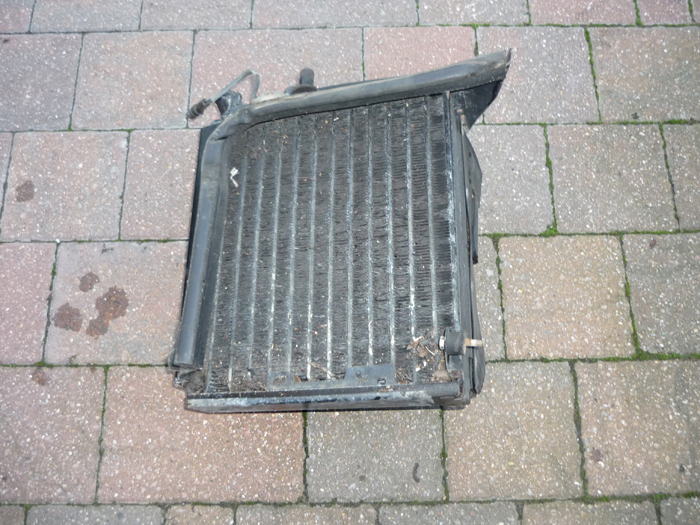
One condenser.
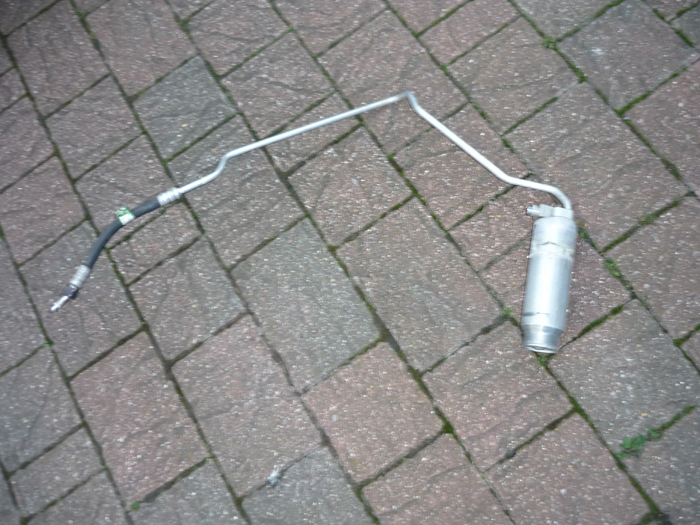
Wiggle the drier out too and pull the thinner refrigerant pipe past the screewash bottle by yanking it outward temporarily.
It looks nice and simple in there now ! Time for a cleanup. If you're not taking the larger line out (as it has no break and goes straight into the sill) you will need to secure it up again in the foam bracket. You also have a couple of connectors that were previously attached to the condenser so best cable tie these out of the way.
The condensor bracket cleaned, polished and waxed with FK1000P.
To be continued at some point if I ever get round to removing the evaoprator and side pipes.
|