M002 Aero
M002 kit
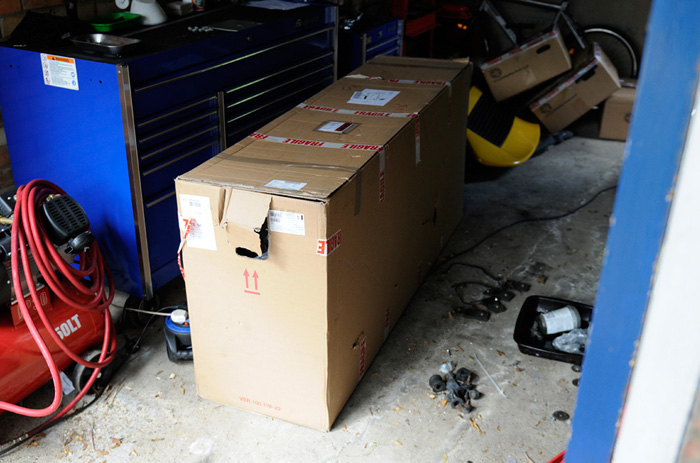
If you order the complete M002 kit it'll probably the biggest box that you ever get from Porsche.
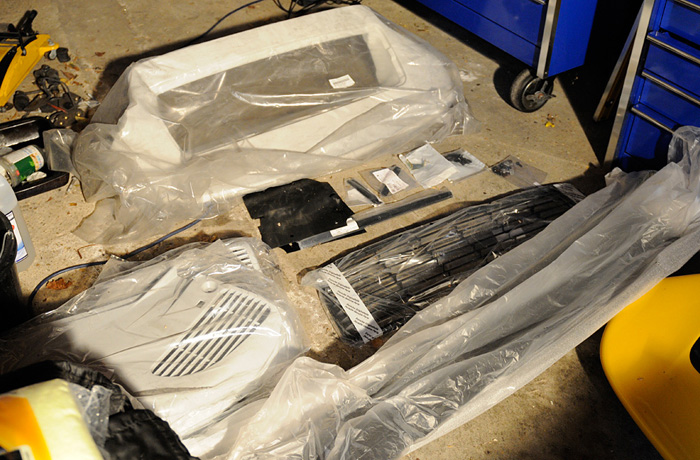
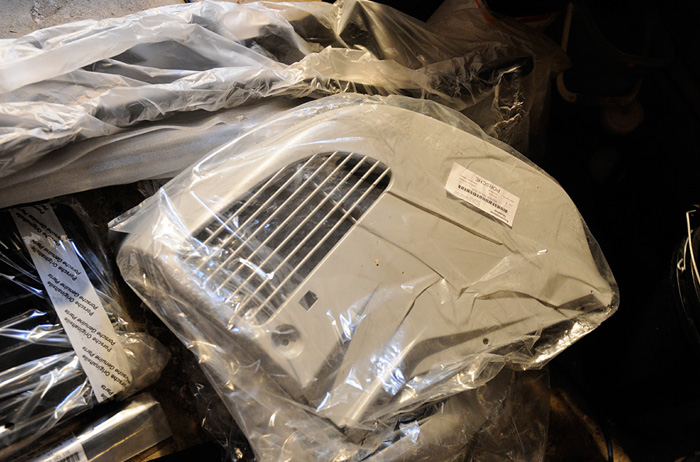
Inside you have the rear spoiler, 2 side skirts, a new rear spoiler vent, 2 black plastic rear wheelarch extensions (because the rearward part of the skirts is situated further back and therefore not flush with the standard wheelarch liners) ....
2 front splitters for each corner ...
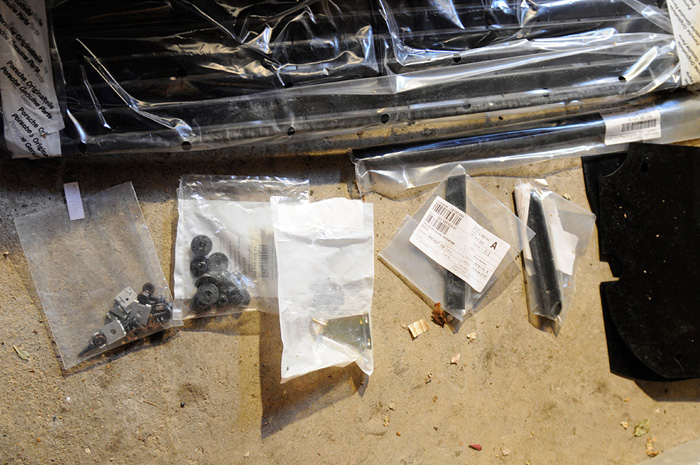
Various screws, speed nuts, plastic trim nuts, a bracket for the frontmost attachment point of the skirts, 3 tiny black front spoiler lip extensions....
and even a blanking plug for your interior centre console spoiler button.
The M002 RS side skirts are very expensive. Over £700 for a proper set from Porsche and the offical fitment requires you to drill into the side faces of your bodywork in 8 places ! Luckily I have devised a way of doing it without drilling into metal. I don't plan on going back to standard skirts but I don't fancy having loads of holes in my car whether you can see them or not. The trick is to use a very high bond double sided tape. Look no further than 3M's VHB series. I used an all purpose tape named 4611F with very good temperature properties. When using bonding tapes surface prep is everything. I polished all bodywork with a straight intensive polish and then cleaned the surfaces with isopropyl alcohol. If you also prepare your surfaces with 3M's primer 94 you give everything the best possible chance of the very strongest bond. If you are in the UK then http://www.vikingtapes.co.uk are a good source for all this stuff.
TOOLS phillips screwdrivers
Get the car onto axle stands and its easiest if you remove all the wheels for access.
First of all remove the old skirts. Start by removing the small plastic wheelarch panel in the aft section of the front wheelarch and then undo the plastic nut on the very end screw that protrudes up from the end of the skirt.
Underneath you have 2 cross head screws which release the outboard piece of the front undertray.
And then proceed to undo the 10mm plastic nuts that flank the skirt's length.
Gently pull down on the tabs, pushing inwards slightly. Take care here though, you so not want to rip them off or be too forceful.
Here you'll expose various oil and AC pipes.
It may well be pretty mucky under here.
I elected to give things a quick clean up.
Get your new RS skirts and first of all transfer all the speed nuts (the flat metal clips that your trim screws affix into) over onto them from the old skirts. There are 2 this end (the left most 2 holes are secured by the engine undertray) ....
... and two here at the front as well. I actually had a few new ones supplied with my RS kit but not enough so I had to reuse some of the existing rusty ones as in the picture.
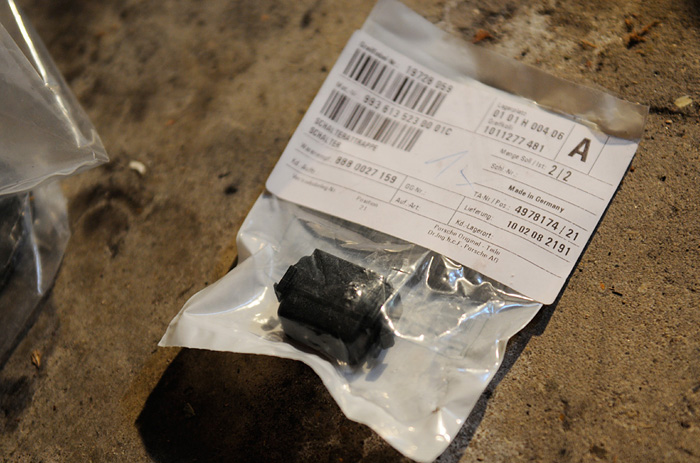
On the frontmost end of the RS skirt you will need to attach a bracket (993 559 509 00) which allows it to be fixed to the bodywork that is seen in our very first picture. You will need 2 screws here and some 10mm plastic nuts.
Tighten the bracket into the inside of the skirt.
First roughly place your skirt on the car and then get someone to hold it in place while you draw a line with a crayon onto your car showing you where it's rearmost boundary is.
Then you want to place the rear wheelarch extension pieces on. These mate the end of the skirt with the existing wheelarch liner. Fit the skirt back on, centralise the two lower holes in the extenstion plate with the holes in the skirt and then mark the original wheelarch through the top two holes.
You will then need to drill through here with a small bit so that you can then tighten some self-tappers through the liner.
Here are the two 3M products which will allow you to fix the rear portion of the skirt onto the bodywork without drilling through your precious metal.
Now the skirt is ready with all its fixings and the rear arch liner is prepared you want to start preparing all the surfaces. You will need some decent polish preferably just straight polish that has no filler or anti scratch properties. Do not use Autoglym SRP. The idea is to strip the surface of all contaminants and grease/grime. Polish the area just inside the crayon line you drew that will mate up with the Double sided tape that you will place inside the skirt (seen below as the red dotted area). Polish and clean and then wipe it with a small amount of 50% isopropyl alcohol 50% water (i use nail polish remover). You can also use panel wipe here. Halfords sell some useful cloth wipes that are suitable for surfac prep. Once your alcohol has evaporated off, apply a small amount of that 3M primer and give it 5 minutes to dry.
Now do the same to the inside surfaces of the skirt that will sit flush against your bodywork. Isopropyl alcohol then a small layer of primer.
Carefully cut off lengths of your High Bond tape and apply it to the flat faces of the rear end of the skirt that will press against the car. Note that ordinarily there will be a metal bracket here with protruding screws which is supposed to screw through your bodywork but you can simply twist this out and remove it.
That's your skirt prepared with tape. Note that the lower picture shows the back edge of the skirt which will actually curl around the inside of the bodwyork where it is rounded into the arch. In case you missed it above, make sure that before you apply the tape, that you have cleaned these surfaces with the alcohol and then applied to primer and allowed it to dry. You want to promote adhesion of this tape on both sides. Press the tape down firmly for a bit once its on.
You can now start to affix the skirt for real. I used a jack to hold it roughly in place.
Tackle the front first. It is a careful rubiks cube of getting the faces circled above to mate properly...
and getting the end of the skirt to slide under this piece of undertray where the 2 screws are
You can start to pop in the tabs one by one into the holes in the bodywork. Be very careful not to bend and then snap any of them. If they are not free to go in then pull the skirt away and have a rethink and an investigation into exactly what's going wrong. You do NOT want to lose any of these tabs.
At the rear you can loosely fit your wheelarche extension flap.
Then carefully pull away the protective tape on your double sided and push the end of the skirt into place. Now you only get one chance with this so make sure you get it right ! The tape will stick immediately and you want to apply firm pressure for some time. It might be useful to have a helper push against the corner here while you push the remaining rearmost tabs in and then go under the car and tighten all the remaining trim screws and plastic nuts. Tightening all the 4 nuts on the wheelarch extension can also help keep this corner in place as well.
My last step was to rub in a layer of 303 aerospace protectorant onto the skirt which gives it a much nicer finish. I do advise doing this at the very start however as it makes it esier getting to all areas and edges.
Voila !
Fairly easy this one but there's a bit of DIY and some of it is a bit anxiety laden - taking a drill and some very messy sticky stuff to your very expensive new spoiler and pulling welded nuts off your paintwork - so if you're not comfy about this then maybe avoid.
I have a suspicion that some cars may differ in this respect but when you take off the OEM spoiler off my 1995 C2 the boot lid has some 6 nuts welded onto it so that they are captive and create a thread for attaching the electronic spoiler. The upper and lower ones on each side get in the way of the RS spoiler meaning that it can't sit flush so you need to take these off.
The way to do this is get a good socket onto them and twist them firmly but very gently and carefully and by very small amounts clockwise and then anticlock alternately. Keep doing this and you will eventually work the welds free. Just keep your movements small and controlled as you don't want to twist any metal here.
Of course you will take some paint off in the process but its not as bad as you imagine and afterwards you can cost the surface in dinitroyl or something similar. Note that the middle one doesn't need to come off as it does not hit the lower footprint of the RS spoiler.
The next job is to drill holes. This is a little tricky and takes time. You need to use your black grill to very carefully mark out where the holes are. I did this by sitting the grill exactly square with an equidistant gap all the way round between it and the spoiler aperture and then I moved it down every so slightly and then used a centre punch to mark a hole where the tip of the foot on the grill was. In a way you are estimating but if you are anything like me then the brain seems to be good at working out where the cylindrical foot was. Of course as you pull the grill down a cm or so, it is still in the right x axis so you can't really get the x position of each hole wrong. I would make sure you use a good center punch that makes a definite hole. When all your marks are done, select an appropriate sized drill bit and use one with a thin pointed end and fine cutting edges that will mate into the punch hole nicely and not walk or drift at all.
When all your holes are done its time to see if the grill fits. I found that a handful of the plastic feet went in but then for at least half the holes I had to enlarge the hole in a certain direction using a small round file or in at least one case, drilling again with some sideways pressure.
This took me some time and I kept going back working those holes and trying the grill until I got a really nice fit with all the feet going in but most of them with a little resistance so the grill was far from loose when fully flush. Here you can see the end result.
Now the next bit can be done in 2 ways. You can either glue the grill on first which is probably the most sensible way, or you can attach it first which was the way i did it.
Your spoiler goes straight onto your boot lid and then you should have been supplied with 8 black cap head screws with a self tapping groove in them. I didn't get any washers but decided to add my own for peace of mind. I also mounted 2 strips of foam cushion tape on the top side of my boot lid, one on the upper horizontal edge and one on the lower. The idea here was to provide a protective gasket between spoiler and lid. You can see it in the above picture as a strip of black. This stuff is pretty useful. I have it left over from my Caterham days and its freely available from a decent kit car builders retailer. It's sticky on one side so a synch to place in all manner of places.
Get these in loosely into the spoiler and then go round again tightening them more, pulling the spoiler in close to the lid. If you look back on top you will see the edges being pulled together. It's kind of a forced tight fit that only works with the pull of the screws.
Next up comes the sticky bit. I used some all purpose Sikaflex 221 that I got cheap from ebay for around £7. You need to place a dollop (or a series of beads if you are neat !) on each area on the grill that mates with a flat tab on the spoiler. Note that the flat tabs on the spoiler where you drilled your holes are actually taller than the grill and you don't really want black visible underneath the grill once it is mounted. So the only option really is to put the sikaflex onto the grill first. I would be reasonably generous and remember that once you put the grill on, there's really no going back. This stuff is very messy and gets very stringy if you start trying to remove the grill multiple times to adjust or add more for example. So have a careful think, perform some practice runs, work out where you need to put the sikaflex and then go for it.
I found that on the two upper corners (furthest toward the front of the car) of the grill don't sit flush by default. They actually bend upwards to you need some pressure here while the sikaflex dries. I solved it by piling some magazines up each side and left it like that overnight... no big deal after all and you'd have to use a similarly heath robinson weighting system even if the spoiler was off. One last thing. You might want to remove your electronic spoiler loom here and/or disable it so that you don't get a warning light in the dash. Now you can short the plug on the loom that runs across the underside of the lid but a more elegant solution is to go underneath the passenger footwell and you'll see a little oblong box there with a multiconnecter plugged into its side. SImply unplug this and you will no longer get any warnings.
|
.JPG)
.JPG)
.JPG)
.JPG)
.JPG)
.JPG)
.JPG)
.JPG)
.JPG)
.JPG)
.JPG)
.JPG)
.JPG)
.JPG)
.JPG)
.JPG)
.JPG)
.JPG)
.JPG)
.JPG)
.JPG)
.JPG)
.JPG)
.JPG)
.JPG)
.JPG)
.JPG)
.JPG)
.JPG)
.JPG)
.JPG)
.JPG)
.JPG)
.JPG)
.JPG)
.JPG)
.JPG)
.JPG)
.JPG)
.JPG)
.JPG)
.JPG)
.JPG)
.JPG)
.JPG)
.JPG)
.JPG)