RS Engine Mounts Engine mounts on the 993 need to be replaced every so often. We are not talking every year or 2 years but they do have a habit of sagging and leaking and its something that creeps up as you build up the miles. Certainly if you buy a used 993 it's well worth checking them out and getting them changed so that you know where you are. I knew the week I got my car that mine were shot. The first tell tale sign was that the gerabox used to crunch a bit going into 2nd when cold. Today I replaced the mounts but also went a stage further and opted for the 993 RS mounts which are a solid rubber bush. The regular 993 C2 mounts are fluid filled and a fair bit softer but if you are looking for something a little more solid but not as hardcore as the RS mounts then a popular route is to fit the 993 C4 mounts which are only partially fluid filled so a bit stiffer but with no increase in noise, vibration and harshness (the 4wd setup has to restrict engine movement a little compared to the c2). If you want to go the whole hog for a trackday car then maybe consdier the Wevo mounts. These are available from the USA and are even stiffer than the RS. You will see later if you read my test drive report (scroll to th bottom) that making the jump from shot stock mounts to new RS mounts made a MASSIVE difference. In fact the difference it made to my car's overall feel, handling and stability is so enourmous that along with the KW suspension, it's the biggest change I have done so far on the car. It follows that even going from tired standard engine mounts to new standard mounts would still make for a significant improvement. It's also now obvious that the old saggy mounts that I have had in the car for the last year were actually playing a very important role in colouring the whole experience of the car. The effect of engine movement is so enourmous and all-pervading that it's my opinion that loose mounts will completely taint your whole driving experience.
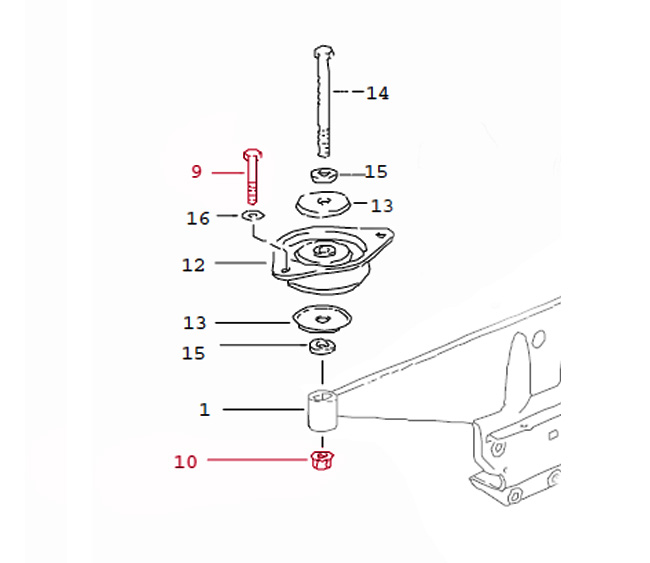
PARTS Let's look at the parts you need (refer to diagram)
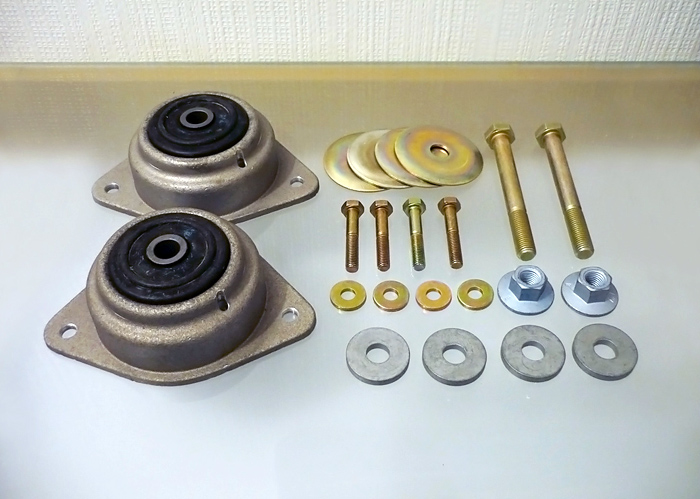
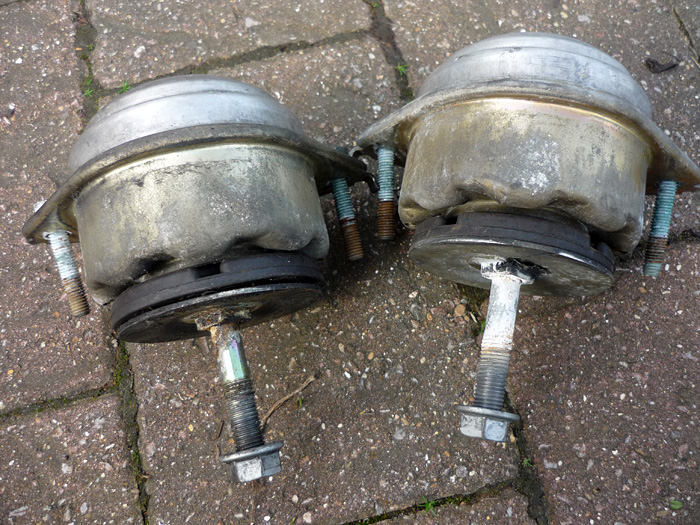
You need the two mounts, the 2 long 105mm M12 screws that go down the centre, 4 seats (one upper and lower each side), and 4 thick washers (one upper and lower each side). You can reuse the 4 M8 bolts that secure the mounts into the engine bay and you can also reuse the 2 M12 lock nuts which tighten the mounts to the engine carrier. These items (in red) are not RS specific but I personally don't like skimping when scres and fasteners are concerned so I ordered new of everything. The engine mount bolts are also likely to be quite corroded when you remove them. This all came to around £265 with a 10% discount.
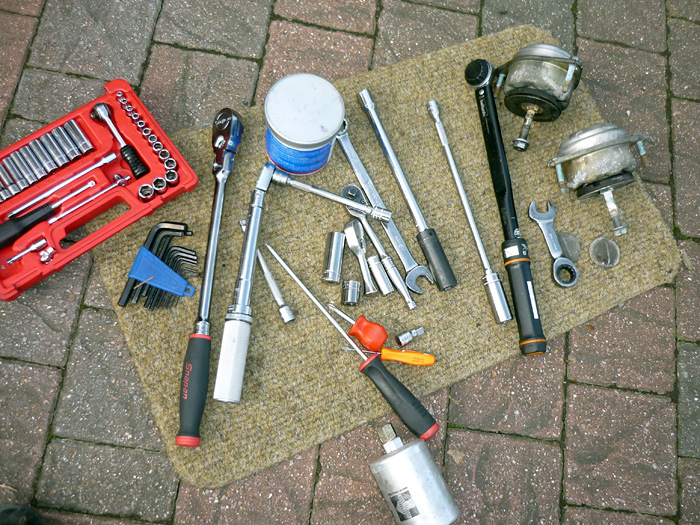
TOOLS You'll need the following: Deep 18mm socket for bottom lock nut
RHS/OFFSIDE MOUNT
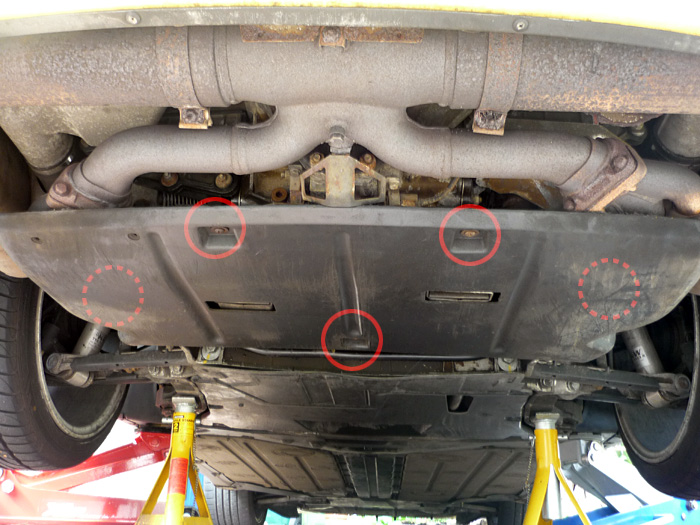
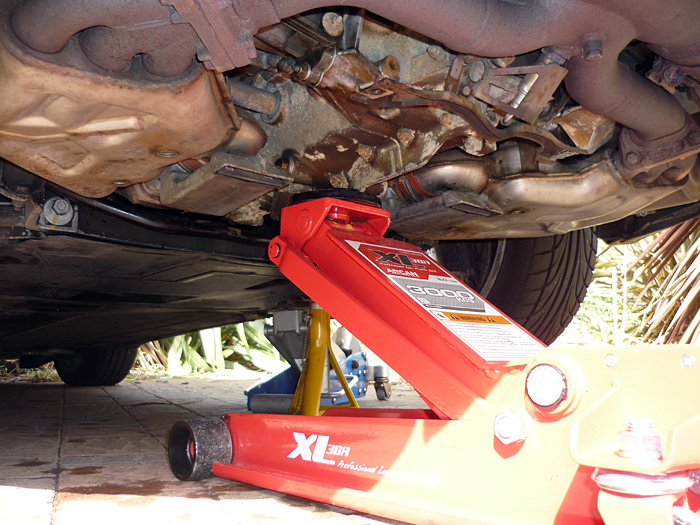
Jack up the car onto axle stands and remove your engine undertray.
Place a jack underneath the engine and lift gently until you just start to feel pressure but do not lift the car off the axle stands at all.
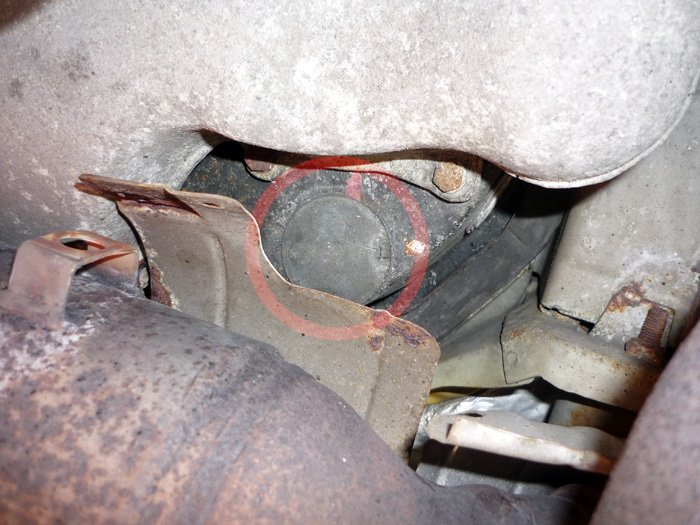
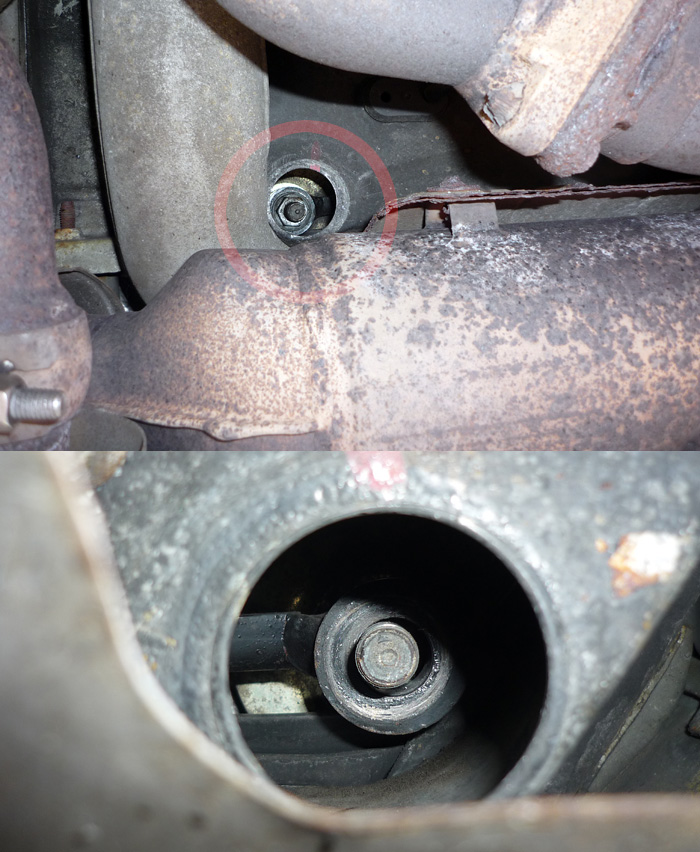
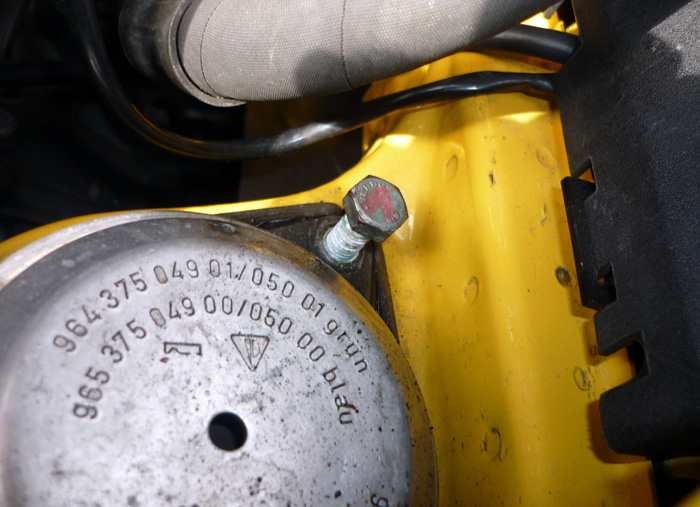
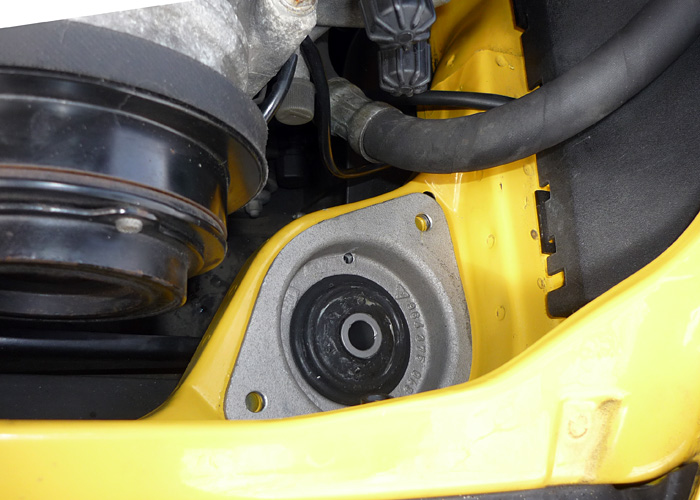
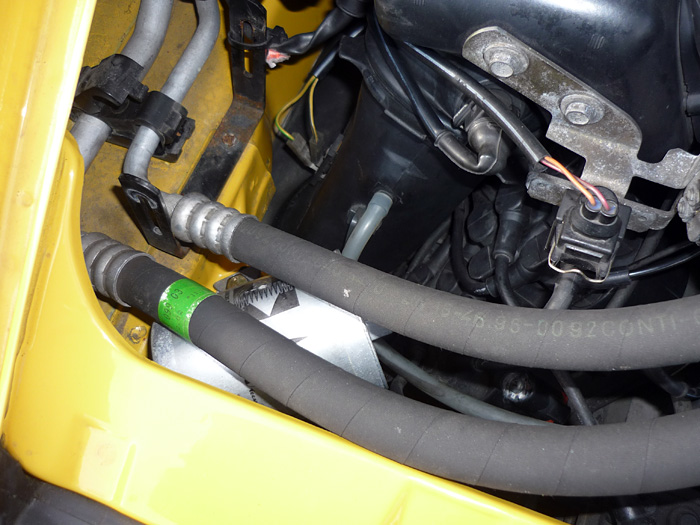
Go underneath the car and directly under where the engine mounts are just forward of the ends of the catalyst you will see round discs. These are flat metal plugs that have a clip running across them that acts as a spring. Simply flip these out with a thin bladed screwdriver.
Still looking up you can see that you have revealed the underside of the end of the engine carrier. In the top portion of the picture you can see the locknut on there. You will want to tackle the RHS or offside mount first (although the bottom portion of my pic above shows the LHS with the nut removed). This guide will get onto the other nearside mount later as restricted access makes it slightly more complicated.
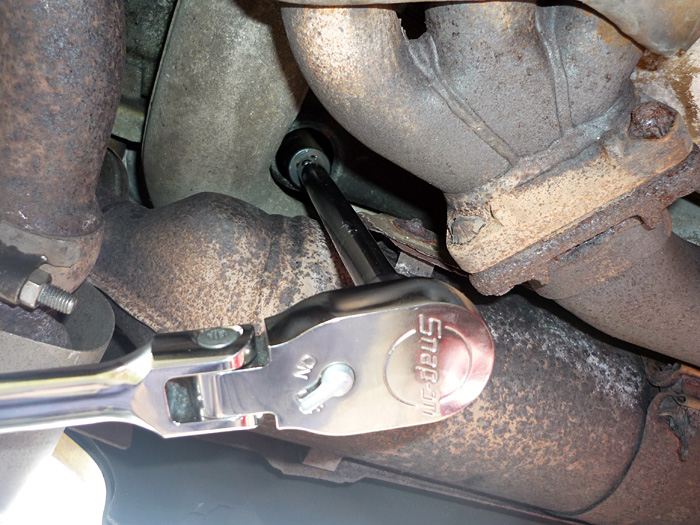
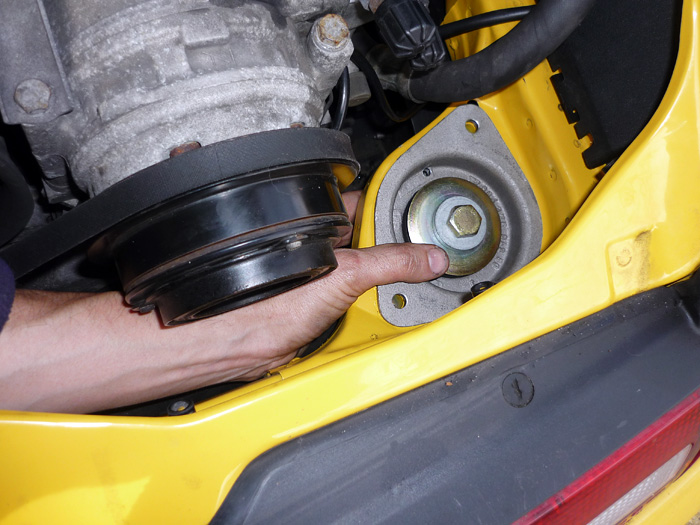
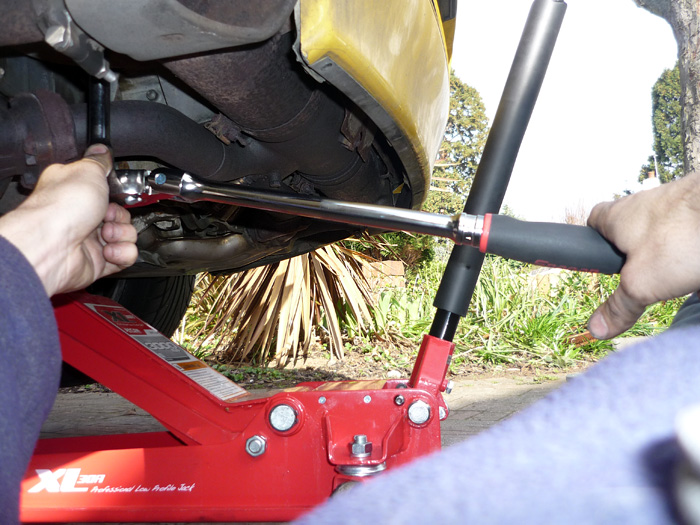
You will need an extension of 10" or so and then a long ratchet or breaker as these can be pretty tight. Undo and remove the lock nut.
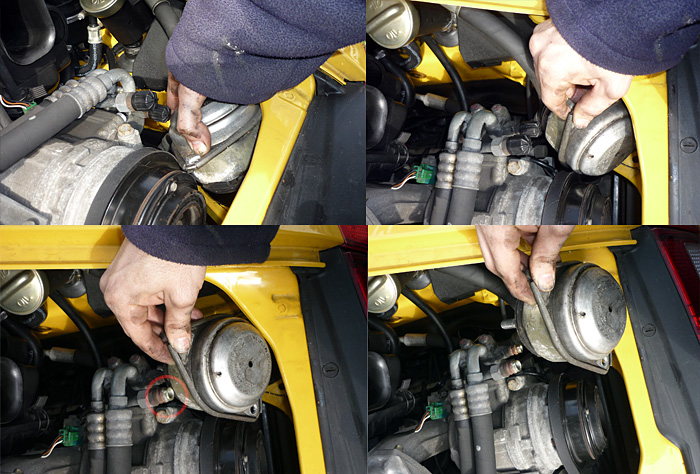
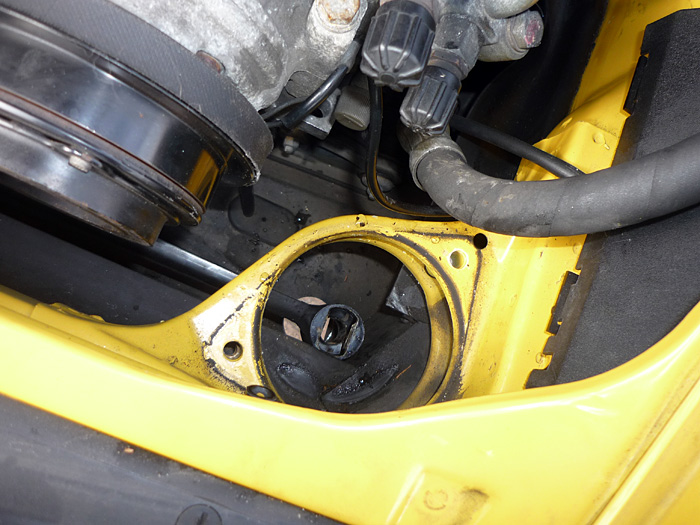
Back in the engine bay, undo the 13mm bolts on the RHS engine mount.
Now you can prise it out with your hands. It helps enourmously to unscrew those 2 black plastic covers/ends off of the AC compressor. I also lifted the engine almost as high up as it would go with my jack. Then I was able to rotate the mount 90 degrees to the left and then rotate it anticlockwise towards me and then up and out. Slightly rubicks cube like this one but if you take those plastic terminals off the compressor and raise the engine you shoudl be fine.
Feel free to give it a good clean.
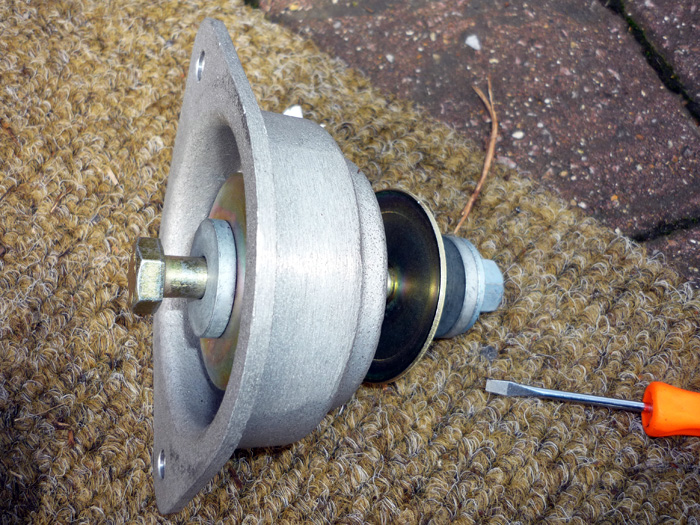
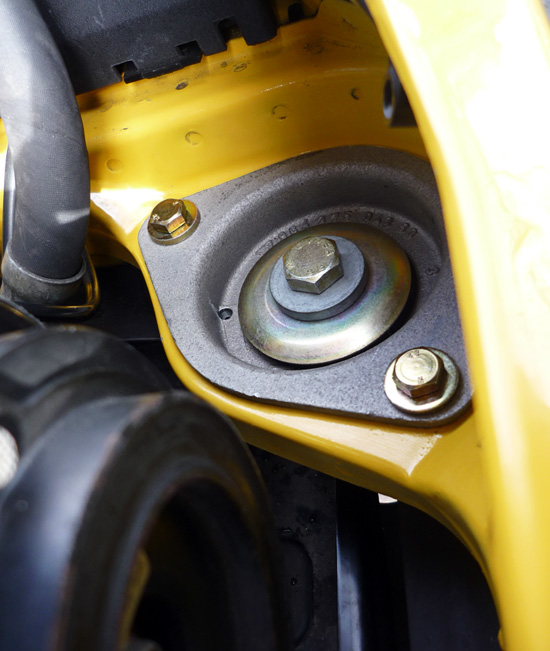
Here is how the RS mount is assembled. From top to bottom, M12 bolt, washer, seat, Mount, seat, washer, lock nut. I also decided to apply a thin layer of grease on the underside of my mounts. I didn't like the idea of rough metal against the engien bay paintwork.
Put the mount in place.
Then push the bolt + washer + seat through the top of the mount. I then found it very easy to put the other seat + washer into my palm and then slide it underneath and onto the underside of the bolt. Lift the bolt up with your other hand, push it through the underside washer + seat and then back into the hole in the engine carrier and then you can let go. The other method is to 'sit' the lower seat + washer on top of the engine carrier then place the engine mount on and then square up all holes be levering a screwdriver through the centre. Not a great way though. If my hands were too big to do it the way I did it, I would probably have used some wax or some gaffer tape to very loosely stick the lower seat + washer to the underside of the mount and then quickly slip it in place.
Pop your two M8 bolts into their holes, not forgetting their washers. Just tighen them a little so that the mount is definitely sited in its correct position. Counter hold the top lock nut with a spanner or ratchet whose end gets obstructed and stopped (in my case by the front of the AC compressor as seen in the pic). Or alternatively have a helper hold the bolt from this end. Then go down underneath again and tighten your lower lock nut onto the bolt and then torque it to 85nm. You will need the engine raised at this point as well. I found that the RS bolts are shorter than the bolts that are affixed into the stock mounts. You also do not want to have to lift the engine with the lock nut as its being tightened as you'll get a false torque value. My lock nuts came with blue thread lock on them. Not very much though so I added a dab or so. I would suggest doing the same. You don't ever want these coming loose !
Now tighten the two engine mount bolts. There seems to be some misinformation on the web about over-tightening these. There is no figure in the Porsche workshop manual but it should in fact be no more than 23nm. If you reuse the orignial bolts they are also quite easy to strip so beware.
LHS/NEARSIDE MOUNT
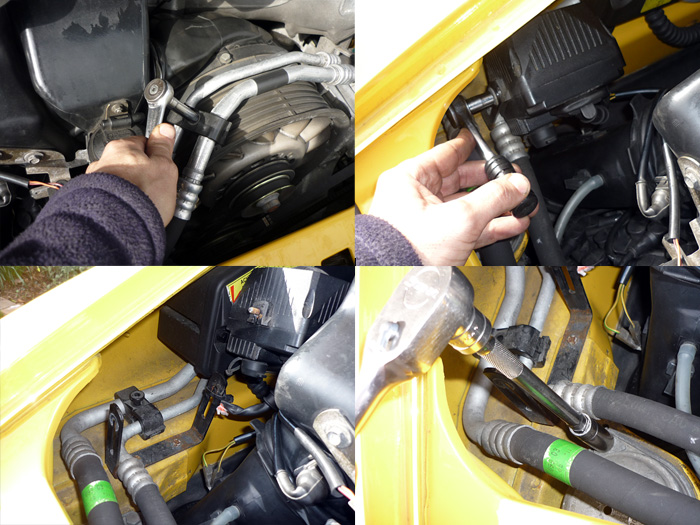
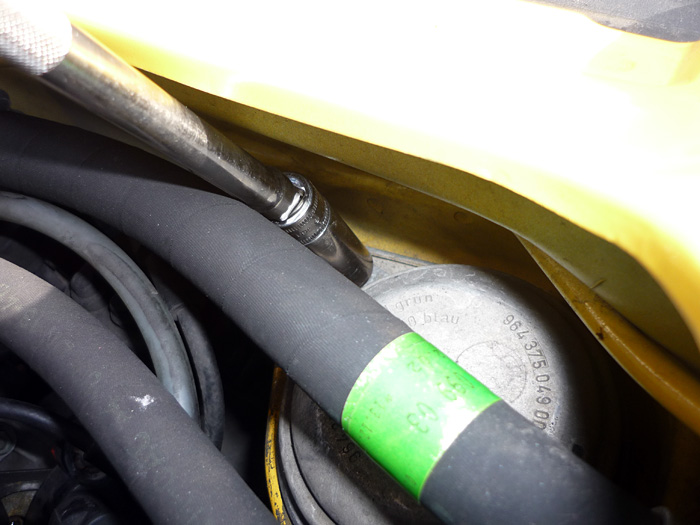
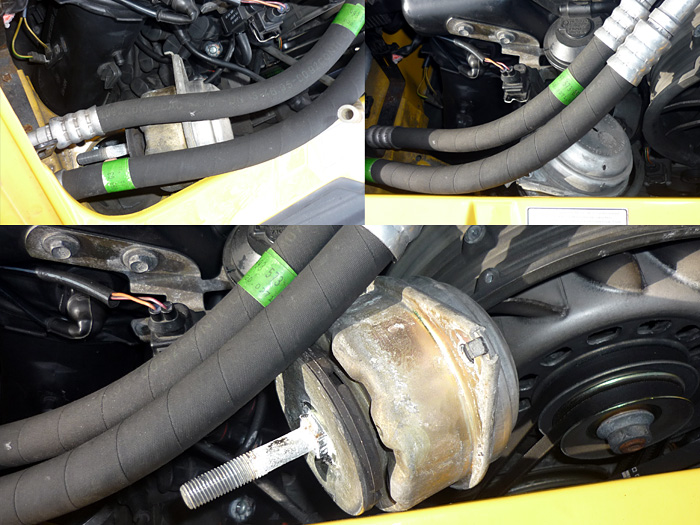
The left side is trickier because you have the AC lines in the way. If you need to, undo the Ac hose clip on top of the fan housing. Then if you need more room undo and clear away the alarm and undo the fastener that is situated underneath. Loosen off your two 13mm bolts.
Then again underneath undo your central lock nut.
I used a wobble extension here to remove the rearmost bolt here. The other one was accessed easy just by pushing the Ac hose forwards.
The way I removed the mount here was to lft the hoses high as possible and clip the lowest one over the lip of the bodywork. Rotate the mount right into the middle of the car on its side. Pull it right and then rotate it back over again so you can get it passed the gubbins on the front of the air blower. When it reaches the fan housing you can then rotate it back on it side and then give the hoses one final shove upwards towards the front of the car and gently pull it free, being very careful not to scrape the lower lip of the engine bay.
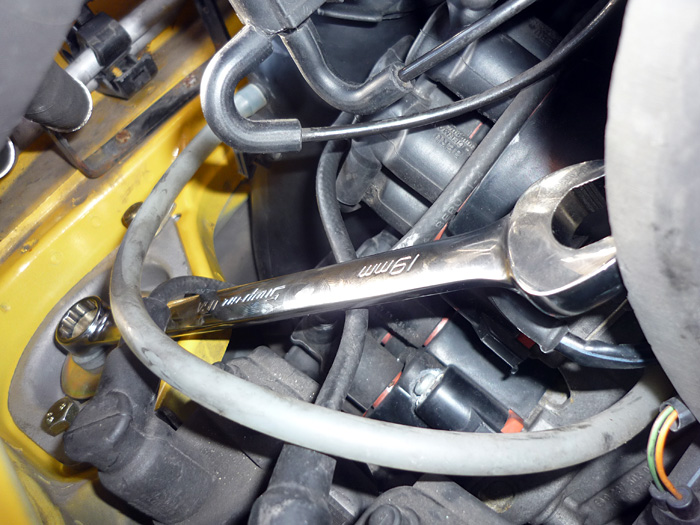
The left hand mount can be placed in the same way as before. I found it easy to get a hand in underneath again to centralise the lower spacer + seat. Counter hold the main bolt with a 19mm spanner or ratchet.
To get the lower lock nut initially onto the thread I also wedged an old fuel filter in between the bolt head and the AC lines. That way when i press upwards form underneath when tyring to get the nut to first catch on the threads, I didn't pop the bolt back out the top. After than, tighten the lock nut fully to 85nm. Then come back up top and tighten your two engien mountscrews to 23nm. Replace any alarms or AC hose brackets. Replace the two small round covers underneath the car and then put the engine undertray back on.
TEST DRIVE IMPRESSIONS The RS engine mounts made a collosal difference to the feel and handling of my car. In part, this was because I was actually comparing them to perished standard mounts so it was a double jump if you like. For me this upgrade was up there with renewing all the suspension to KW. Subjectively along with the KW it made the biggest difference to overall driving experience.
Let me articulate what has changed
1. The gearchange has become noticeably stiffer. I think I actually prefer it a bit looser as it was but this is only slight and I am sure I will acclimatise to it in good time. 2. The gearshift no longer crunches when going into 2nd gear when the car is cold. Good news. 3. There is a small but perceiveable increase in NVH (noise,vibration, harshenss). You are aware of feeling 'closer' or more connected to the engine. The car feels just a touch more raw. Also the noise of the engine has changed a little. I am not sure how and hope to expand upon this when I have racked up some more miles. 4. The feeling of the car has changed massively. The car now feels so much more planted. Even in a straight line at sklow speed it feels lot more tied down and secure. Compared to how it was, it feels bolted to the road like a rollercoaster on tracks. It feels as though someone has doubled the width of all the tyres on the car and increased the level of grip and the footprint by a very large amount. The effect is VERY startling. 5. The stability of the car over bumps and the body control has changed hugely. The car feels more settled and planted over bumps. Now it just thunders over then seemingly unperturbed whereas before the whole car always felt very edgy and precarious and would jostle laterally a lot more over undualtaions and rough roads. Now it feels like a hovercraft being sucked into the tarmac. The suspension (on the same bump and rebound settings) now actually feels stiffer than it was. The car feels less sloppy and harder. It would seem that the movement of the engine before was in turn, moving the car aroudn and giving a false sense of looseness or compliance. 6. The handling has changed markedly. When you turn in the car feels far more reassuring and balanced and eager to turn. Everything is a lot more predictable and when you are in a bend the car stays on the line much better and just seems far more stable and secure. Long constant radius sweepers are a particular source of pleasure especially if they are rough and bumpy; the 993 now just sits in them with a whole new level of plantedness and oozes confidence. I was able to instantly drive roads I know well another 5,10,15mph quicker with so much more trust in the car. It was like I had been let into a alchemists secret, an epiphanic moment where I became Luke Skywalker down the spine of the death Star (ok, so not quite but you get the point). 7. Probably for the first time, the car felt a little underpowered. The level of composure and solidity is now at a point where I found myself yearning for a bit more acceleration. I hope this isn't a prominent and persistent effect. Let's hope it was just a function of the mood I was in during this short test drive.
So there you have it. Check your mounts and get them done. It's pretty clear to me now that some of the handling issues that I have experienced with the car since I purchased it were in part due to my old saggy mounts. The effect of a loose engine is so intrusive and powerful that it's my belief that shot engine mounts will completely taint and colour the subjective driving experience. My car often felt very wayward, unpredictable and very corkscrew-like. I sort of got used to this and started to enjoy weilding and managing those feelings and motions, and whilst some of it has over the months been due to other areas of the car like bad geo, too much spring preload, bumpsteer etc.. what is certain is that the old engine mounts played a big big part in all this. In just 3 months since I have had the RS uprights fitted, new geometry and now the RS engine mounts, the drive of the car has changed immeasurably. Exciting times ... Stay tuned for more upgrades. |
||||||||||||||||||||||||||||||||||||||||