The 993 post GT3 The past year or so the GT3 has been keeping me fairly busy and I've been bonding with it more and more. It was my companion of choice for last years big Euro road trip and in just a few weeks time it will also be taking me to Vienna and back on our Austrian 2014 road adventure. The 993 in all that time has had a well deserved break. Truth be told it's been resting up on the trickle charger for most of the time and has barely seen the light of day. I did recently take her out for a few satisfying workouts though over a couple of weekends. After such a long aircooled sabbatical I have to confess it was a bit of a shock getting back into the old girl. How can this be, the machine that for 3 or 4 years I rated as the very best and most complete drivers car i'd ever owned now felt clumsy, mushy, inaccurate, leaden-footed, flexible as hell, too heavy to the touch and almost medieval in its responses and road manners. Well of course all of that and more is true and the more time you've spent in things like GT3's, the more this will be sharply pulled into focus. What's also true however, is that once you get her up to speed, lean on that chassis and make the connection, it's many of these things which make the car so damm wonderful. Little unconcious inputs, small nuances of managed weight shift, split seconds where you subtley cajole and caress, moments which would be invisible to all but the diehard aircooled veteran; this is the poetry of the 993. It's true, by many of todays dynamic standards the car really just isn't that good, but together as an honest team, you and the early 911 can be something far far greater than the bare car would ever suggest and something far more rewarding than most modern cars can serve up too. As well as the way it steers, the other great thing with my personal 993 is that if i want, it's still a blank page or a work in progress. The GT3 will religiously remain factory standard but the 93 is there to be tinkered with and enjoyed as a never ending project and us men, us husbands, us dads certainly need our projects ! Modifying keeps things alive, it keeps your interest up. The fact that my 93 will never be an exact nut and bolt identical RS replica is a good thing and the finishline is often when people get bored and sell up.
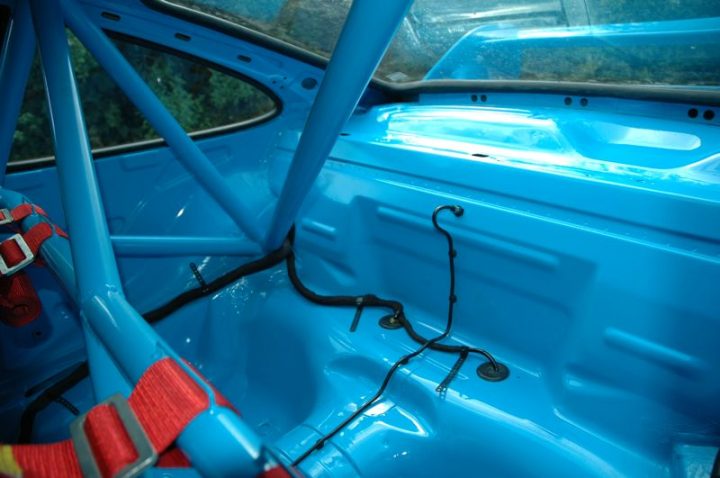
M003 I am not sure when these next round of plans completely crystallised but for some time now I have been having thoughts of moving more in the clubsport direction. I think the origins of this might have begun after my 2013 road trips where I came to realise just how rubbery and lacking in rigidity the 993 shell is and that with all the RS stiffening this comes to light more and more. When I got my GT3 the impressive torsional rigidity of the 996 shell underscored this even more (that's computers for you). That's when I think I started to have thoughts about fitting a full welded in cage to help with stiffness and make the car a little more accurate too (993RS CS is supposedly 40% stiffer than a base Carrera). From there, I think I looked around, did some reading, spoke to a few experts and soon became a bit obsessed with the look of carpet-less 993's with full CS cages and bare painted interiors.
In typical 'man maths' style, I calculated from there that if I went that route then the sunroof should get deleted as well as its actually easier and cheaper to weld in the cage and paint it when the roof skin has been removed. Losing the sunroof also shaves off a surprising amount of high up weight and helps with rigidity too. Now from that humble set of goals you soon start to think of a few extra jobs to do whilst you have paint and welders and chassis jigs lying around .... seam welding, brackets for battery cut offs, a proper M003 clubsport dash, manual windows, manual mirrors and central locking deletion. From that you then get to the unavoidable conclusion of clubsport front and rear spoilers (instead of the regualr M002 RS aero that my car wears at the moment) and then pretty soon you are into a big project with a fair amount of time and money involved. Why not take the engine out whilst you're there too ? RS gearbox mount, 3.8 litre M64/20 anyone ? G50/32 clubsport box with steel syncros ? For me this all has to follow a logical chain of fixed steps. Because I only like modifying in line with what porsche originally did at the factory my reasoning is that if you want a full cs cage then you have to go bare metal interior and then M003 spoilers etc.. Last year I was offered the option of a full replica CS cage with headlining intact but then the cage is fractionally lower than it should be and being honest, that bothers me. So the unavoidable corssroads i'm at is either a full cage and full clubsport spec like it was done back in the mid 1990's or leave the car as it is and just fit the rear RS carpet set and be happy.
8th May 2014 What has stalled me making this choice all along though was not knowing the noise implications of a bare metal interior. I still want the car to have long distance touring capability and I had no idea if that would still be possible with a CS makeover. Asking people is no good as everyones idea of these things and their tolerance levels are subjective and differ widely. To cut a long story short, last weekend curiosity got the better of me so I decided to rip everything out and find out exactly for myself how noisy and bearable things get when all the carpet and sound deadening has disappeared.
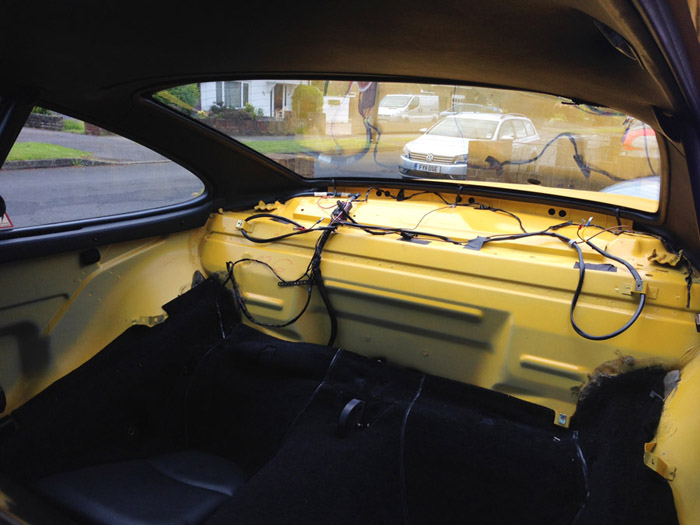
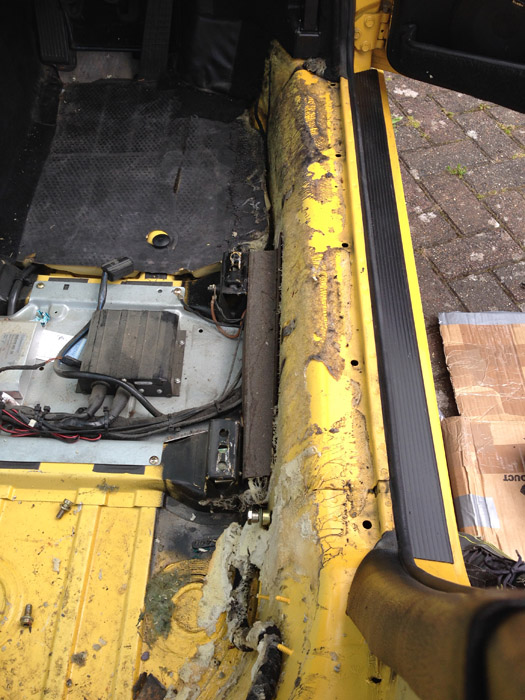
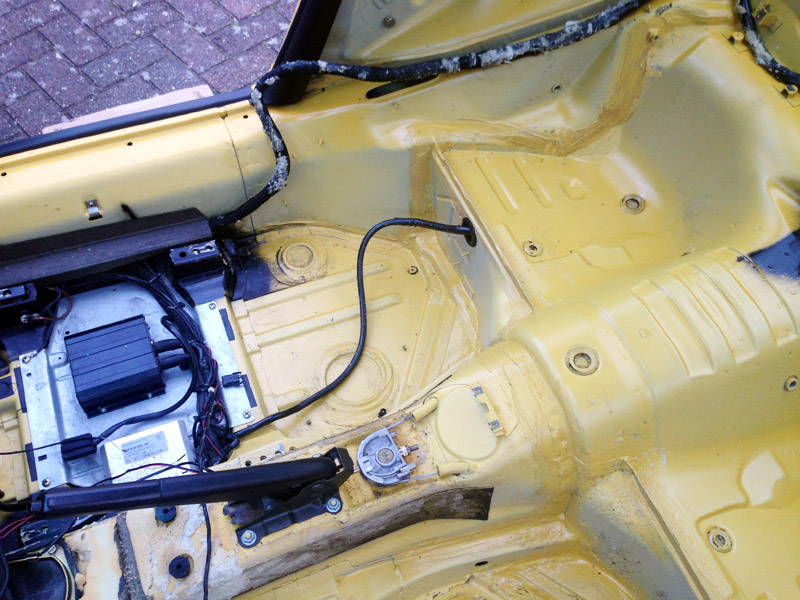
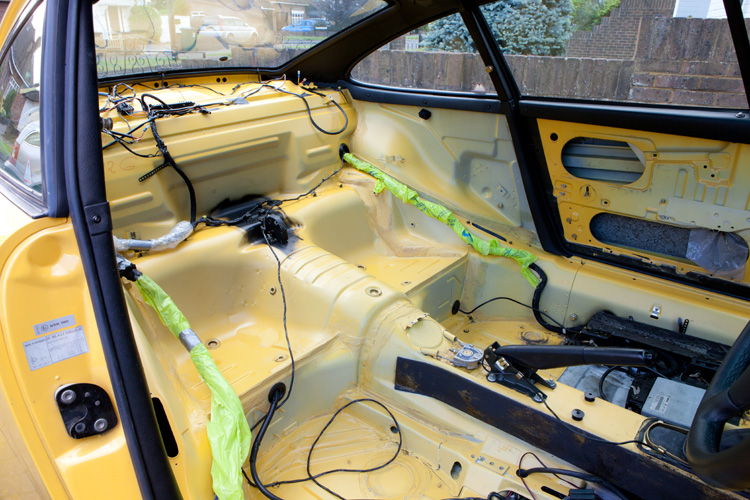
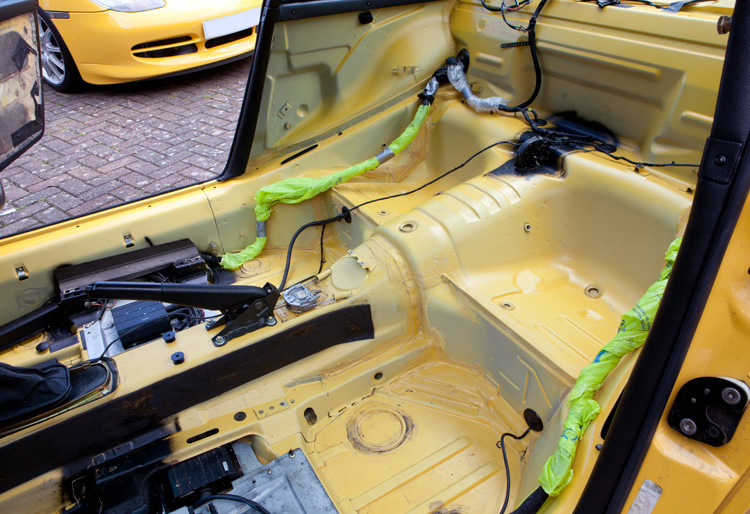
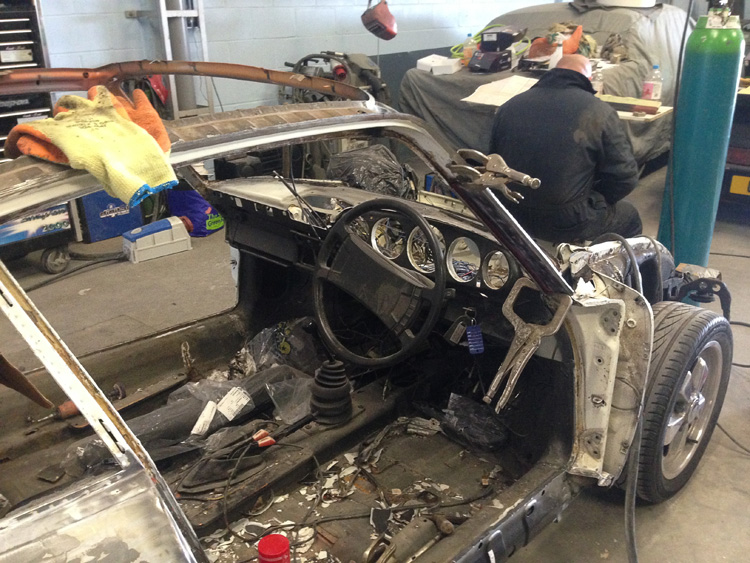
M003 - Carpet delete - You can see above my first stage. Rear parcel shelf and rear side panels removed. I drove the car around a fair bit like this. There was a small increase in noise. You just hear the engine a bit more but not really the exhaust note, more the whooshing of the intake and the dim whine of the engine fan. No big deal then I thought; if anything it actually adds a little to the involvement.
For me ripping the carpet out was fairly easy. Your fingers tend to hurt at the end of it all but generally it was pretty painless. I decided to cut the carpet at the end of the tranmission tunnel too as I hadn't been bothered to first remove that.
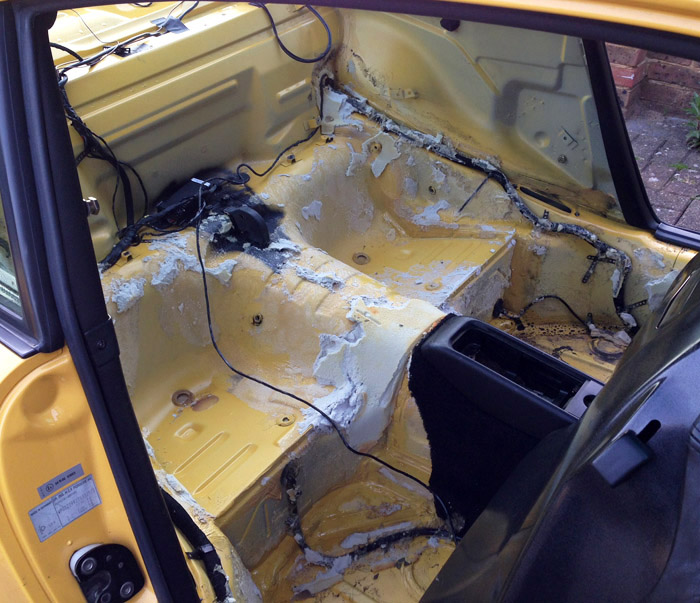
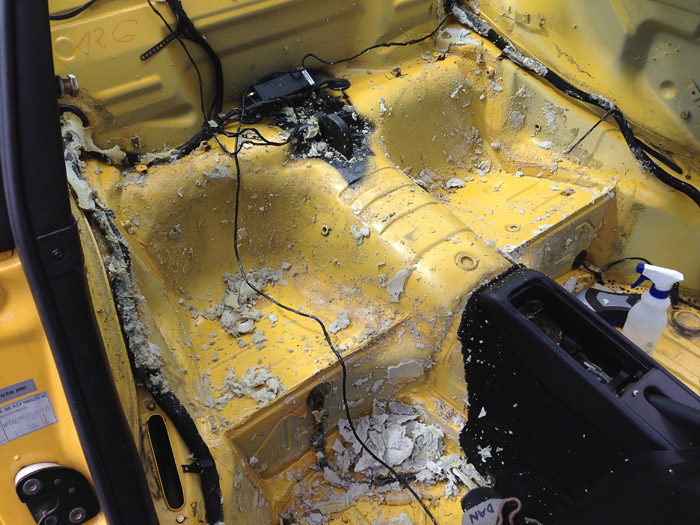
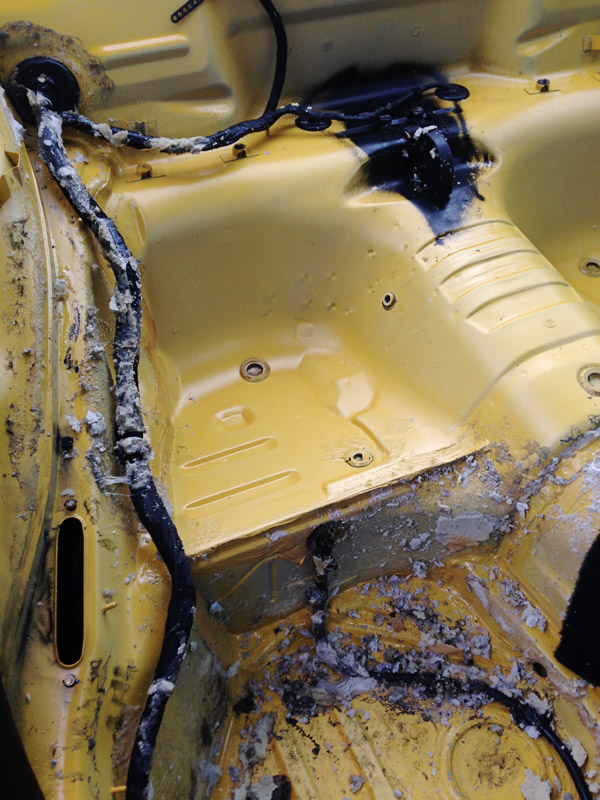
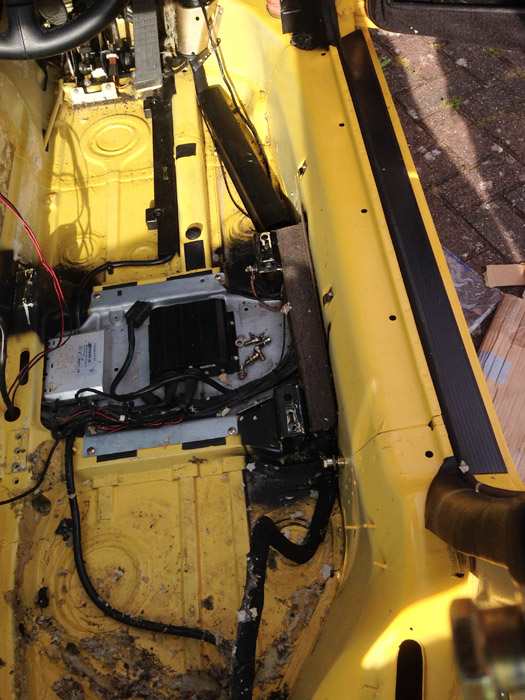
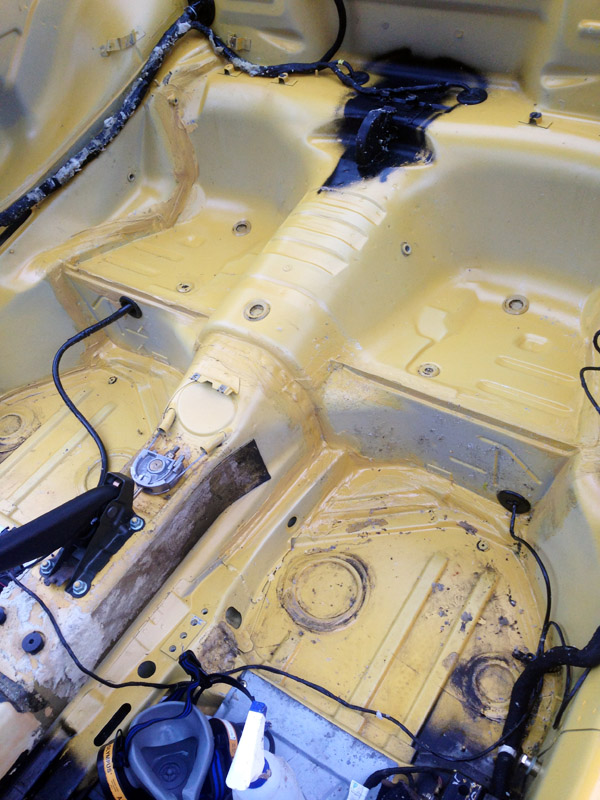
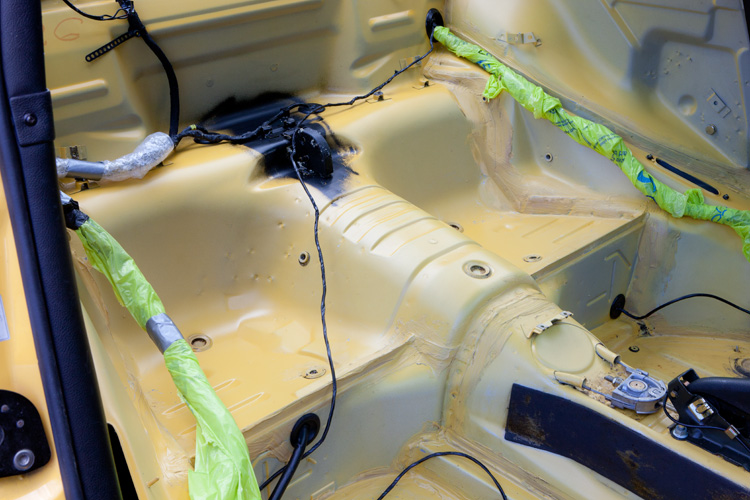
Across the seats and in the footwells lies the sound deadening. This tends to rip out in pieces and is stuck quite hard to the underlying glue in places. I ripped out most of it but didn't get too perfect about it as every area will be addressed with a fine tooth comb at some point.
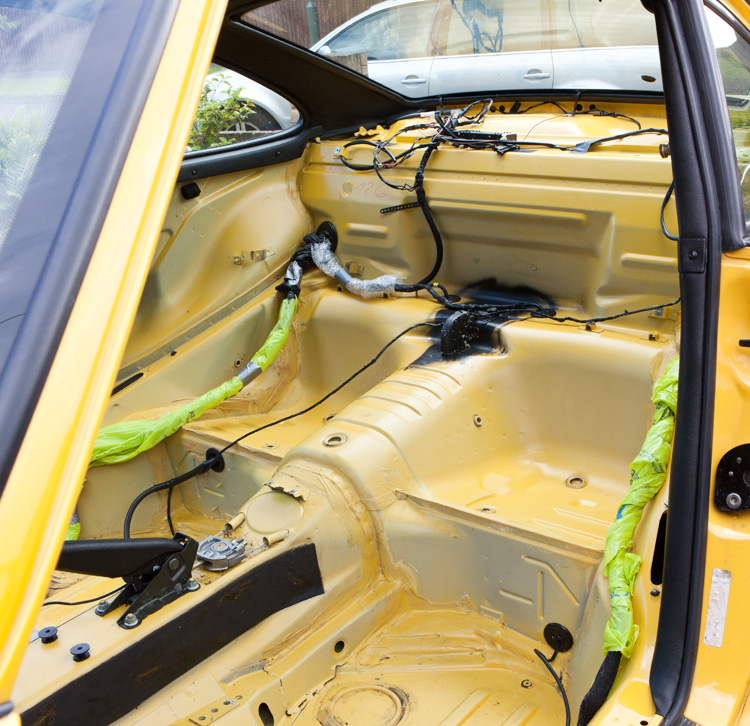
I drove the car again like this as another tester. To my surprise, the noise levels hadn't really changed that much. The whine of the engine fan was a little louder but that was about it. I also have no engine sound pad in my car and its something that i'll probably put back and I also intend refitting my catalyst too and making the exhaust less noisy so this is almost worst case scenario. During that test drive I also got a feeling of real simplicity. A part of me felt it was lighter and it just felt more raw and special. The effect was so powerful that when I arrived back home I was really excited about the whole idea of moving in an M003 direction.
That night, commited to my new path I did some more thinking as to where it all might lead to and what possibilities lay ahead. Let's just say that at the moment I am not completely sure how big or out of control this phase will become. The CS cage, carpet and sound deadening delete and sunroof delete is a given. Hopefully i'll not need to add any carpet or sound deadeing back in either. If I do then it can be on poppers or something similar as a temporary thing for touring purposes. I've yet to finalise things but it probably makes sense to do the M003 dashboard and some other metalwork and painting bits too like the seam welding and the battery cut off bracket. If the roof skin gets replaced and painted then it also makes sense to do the RS ali bonnet. The M003 rear spoiler and front splitters have to go on too to match the interior, thta is also set in stone. Yes, I'd love to do the 3.8 engine and the proper G50/32 clubbie gearbox but we'll have to wait and see what develops because cost and availability is an issue there.
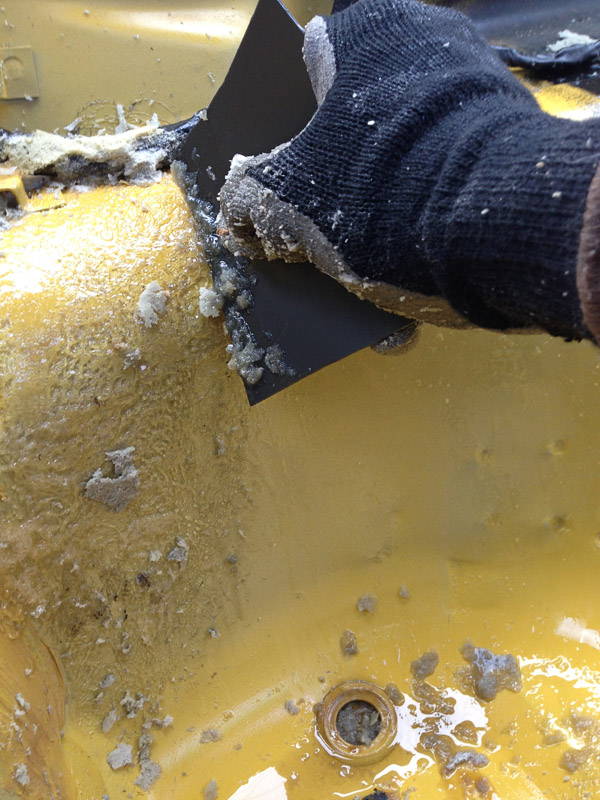
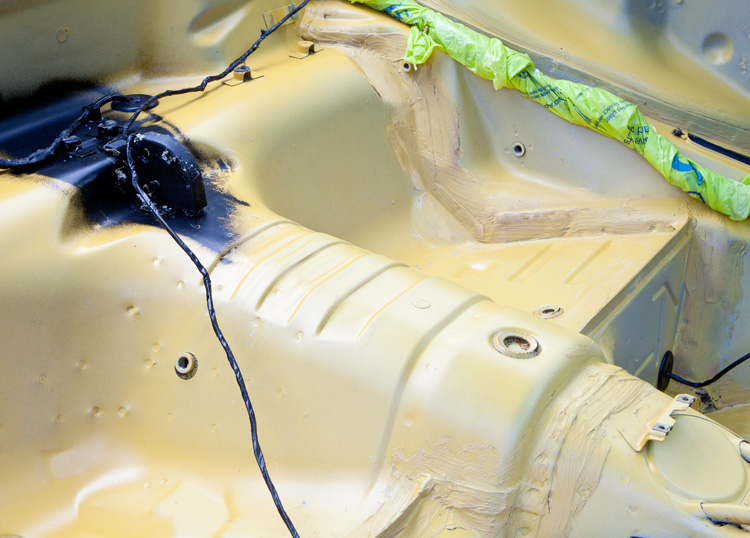
Back to the de-glue and that evening I tackled one of the sills. To my surprise these were really easy to clear but then that's because it's glue that had bare carpet on it rather than sound deadening. The technique for the sill was to pick at a few bits to start to form a ball. This then gets rolled back and forth and does a pretty impressive job of pulling more glue with it. Sometime it helps to twist the ball, sometimes to keep the ball close to the frontier of glue that is being pulled upwards. Sometimes it helps to go back and continually pad it on certain areas, coaxing the more recalcirant patches away from the bodyshell. The whole thing with this task is that you will pathfind and develop your own techniques as you go along and you'll get quicker and quicker.
My nearside sill complete. This took me all of about 45 minutes. If only it were all this easy.
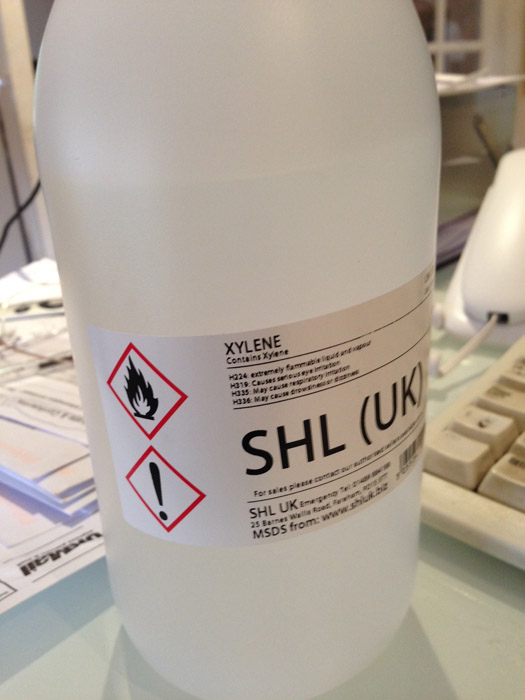
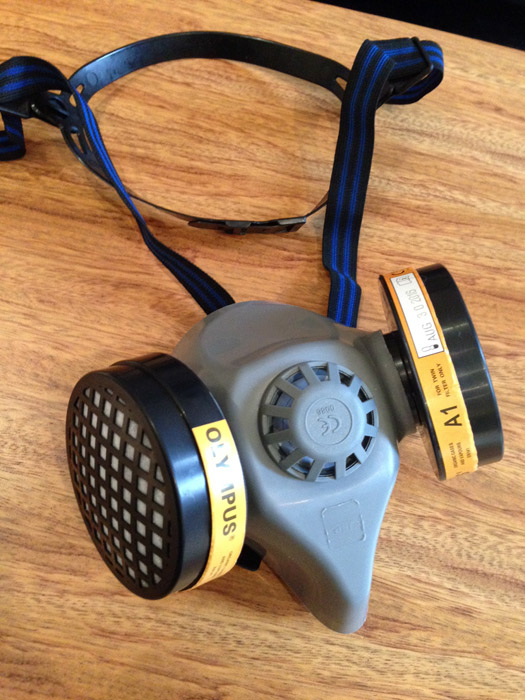
For the rear of the car i'd already figured that i'd need some serious help and that the ball trick wouldn't do a damm thing. Pure Xylene is the answer. In my tests I found this much more effective than petrol, goo-gone or bespoke glue removers such as Autosmart's 'Tardis' (which are 40% Xylene/60% hydrocarbon mix). Pure xylene literally disolves the glue away in front of your eyes. You need lots of it because the glue quickly soaks it up but it is pretty powerful copared to everything else I tried. If you are using this stuff though you absolutely must use a proper respirator with organic solvent cartridges or else you won't last very long !
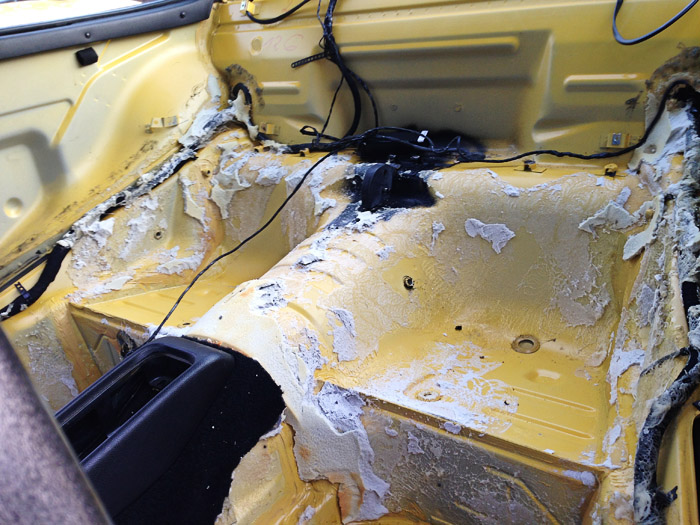
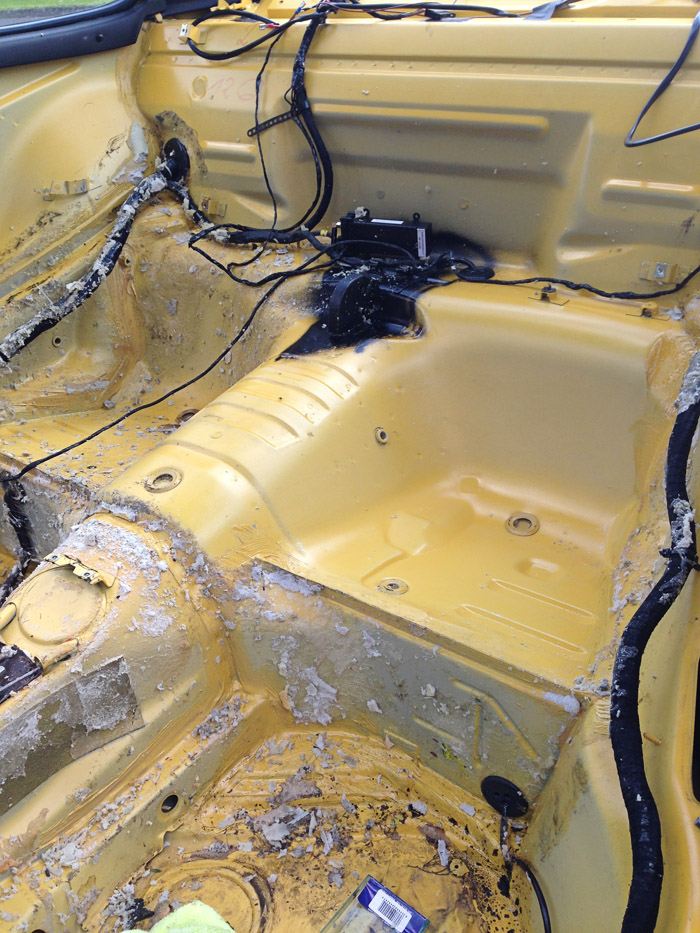
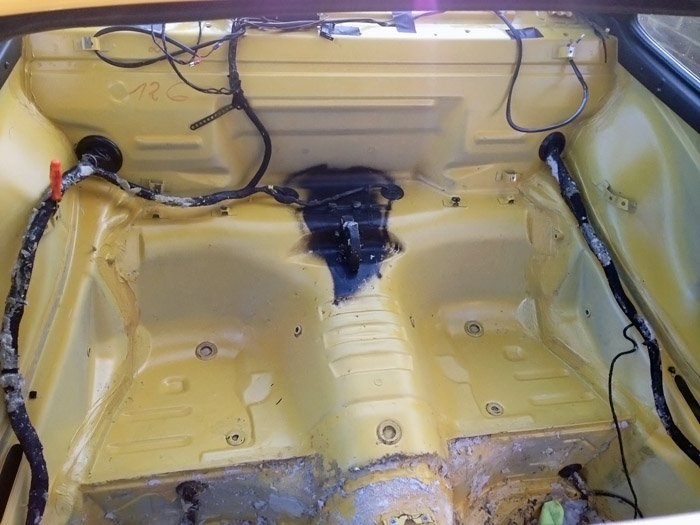
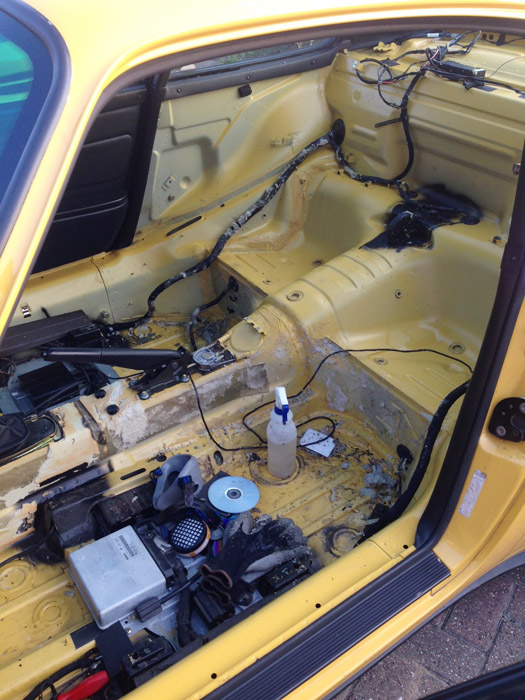
Day 2 started a bit like this. Still tons of sound deadening stuck on. Most of the remaining pieces you see here just can't be removed very easily with bare fingers. It's difficult to get a purchase and it's stuck on really securely. In fact picking this stuff off with your fingers is really time consuming and I came up with a better idea of coating a polishing pad on my electric DA polisher/sander with Xylene and running it over all the surfaces.
The polisher took me to this stage then. In just a few minutes most of the big chunks of soundpad are now broken up and loose.
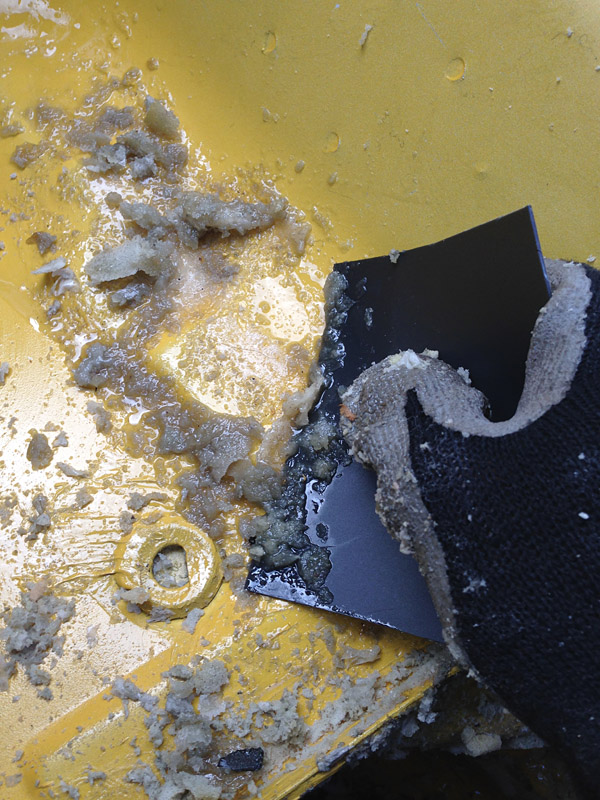
Moving onto the actual glue the next few hours proved to be a critical pathfinding phase. At first I tried spraying the surfaces with Xylene (I put the xylene in a plastic garden sprayer) then rubbing with a rag or a microfibre ... repeat ad infinitum. Where the glue was thin this technique showed limited sucess and started to break everything down but really in most places the glue was just way way too thick for this to have any effect at all. Wiping with Xylene sodden microfibres is really a final process, kind of like the final polishing stages to remove the last thin and small marks of glue.
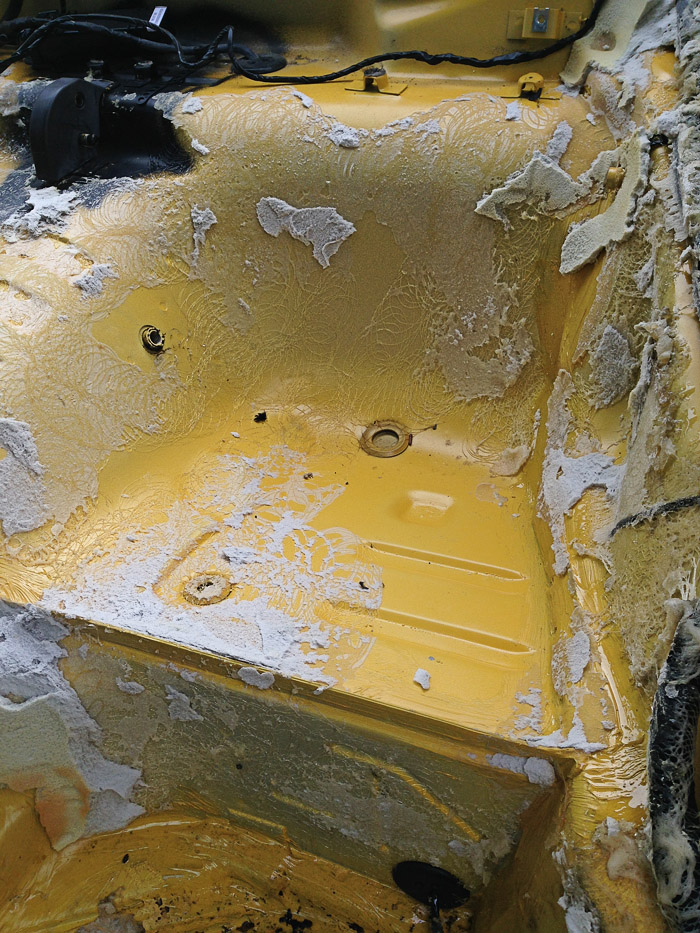
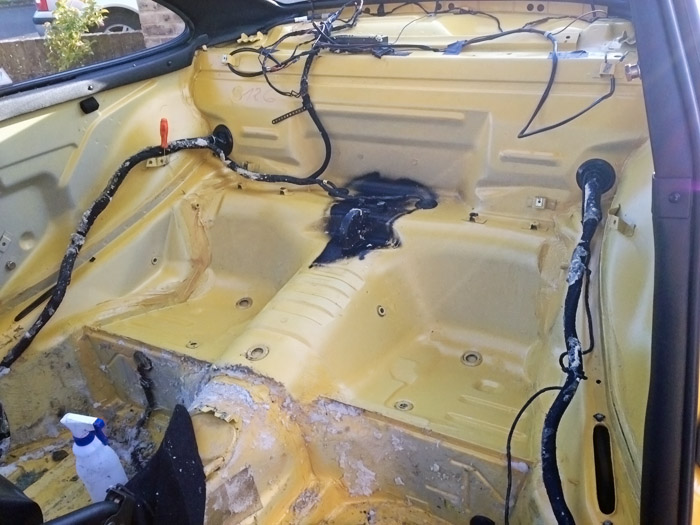
For the most part I found that the best method was to scrape and continually repleich the surface with new Xylene. I went into the house and cobbled together all sorts of implements for the job. Old credit cards, blank CD's, plastic boxes which hold photograhic filters and even an old plastic cooking spatula. What you want is a sharp-ish edge along something strong but reasonably flexible. It should not be sharp so that it tears paint of though of course. The edge of a CD is actually pretty good but they do eventually crack under the pressure. My technique then is to scrape with one hand and periodically spray xylene onto the surface with the spray bottle in my other hand. Do not underestimate the amount of solvent you need. Its almost like claying or a bit like going to the dentist where they are constantly suctioning and spraying water as well as drilling. The effect of your scraping will soon weaken after a few strokes and more Xylene will renew the effectiveness of your scraper in lifting, tearing and pushing the glue around. Remember that the Xylene does not soak right through thick layers of glue, it will only attack the uppermost surface so youneed to continually thin it down with more and more solvent. I have heard people talk of soaking everyhting in rags coated in petrol or solvent for an hour or so but this did nothing for me in my tests. In fact I am convinced that not all cars and not all glues were created equal and some folk find this job a lot easier than others. The other thing you will develop is different scraping techniques. Sometimes different pressures are required, Sometimes you want to really kink your credit card so it forms a stiffer bended section and then you will also be altering your angle to attack different pieces of glue in different ways. For the indentations in the tub like you see in the hump between the two rear seats, you might opt to use a corner of your credit card or scraper instead. Sometimes you will have to really zoom in and work furiously on a small bit less than a cm squared, scratching this way and that to lift a final obstinate patch.
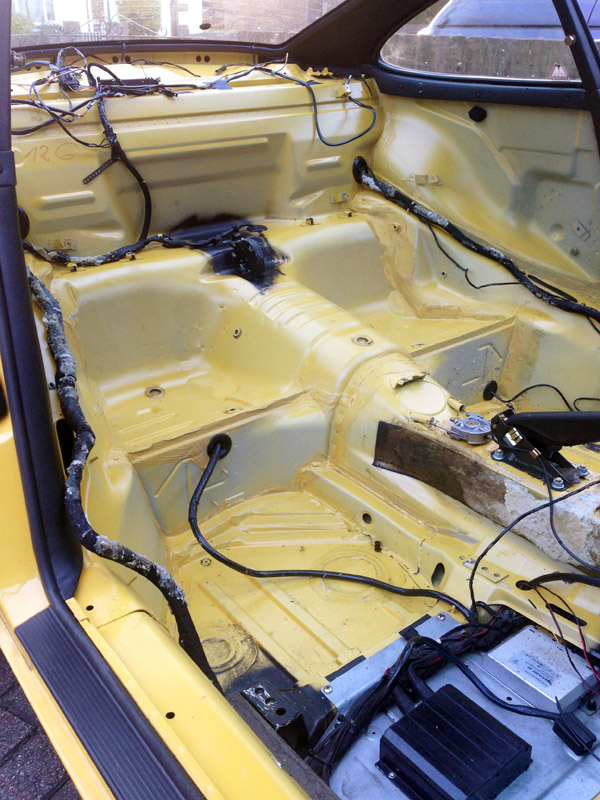
As you pathfind in this way you will no doubt get quicker and quicker. I got to a point where I could look at an area of glue and devise the exact techniques which were going to be most effective. On day 2 i spent around 4 hours in total but some of that was my DA polishing and freeing up the loom. I also removed the plastic tranmission tunnel from the car and pulled up some of the carpet there too. So actual glue removal of the near side rear seat and centre section that you see in the picture above probably took less than 2 hours. I was learning from scratch at the beginning as well so tomorrow I hope to get quicker still. The whole job still seems pretty daunting. I daren't look at the footwells because there seems to be a whole river of glue down there and after 18 years it still seems tacky as hell. Hopefully after I have completed the other rear seat and the outer sides of both rear seats i'll start to feel like i've really broken the back of the project. The good news is though that once you get stuck in and start to clear areas, it is a little satisfying in that 'cleaning' kinda way. More very soon ....
10th May 2014
Only an hour spent this weekend. Beforehand I scavenged the house for more and more thin plastic objects that could be used at scrapers. The back of a dvd box cut up in a suitable shape makes a good one.
After another hour the left had seat is now finished. Just have the sides of teh seats to go in that area now.
Another day, another 1.5 hours spent. I managed to get both sides done and have another good general cleanup of all treated areas so I now just have the footwells and transmission tunnel to go and the offisde sill. The loom wrapping won't be done as that will be taken apart and stripped back in any case and then re-wrapped. Speakers, tail light, spoiler, rear wiper etc.. there's a whole ton of wires that just won't be needed anymore. At last an end is in sight. It's only taken me 6.5 hours so far so much much better than I was originally thinking. __
15th May 2014
Today I completed another 2.5 hours. I suppose it feels like its dragging now. A part of me thinks i'm close to home but truth be told there is still a fair bit to do. When you're expeting to make fast headway you never do.
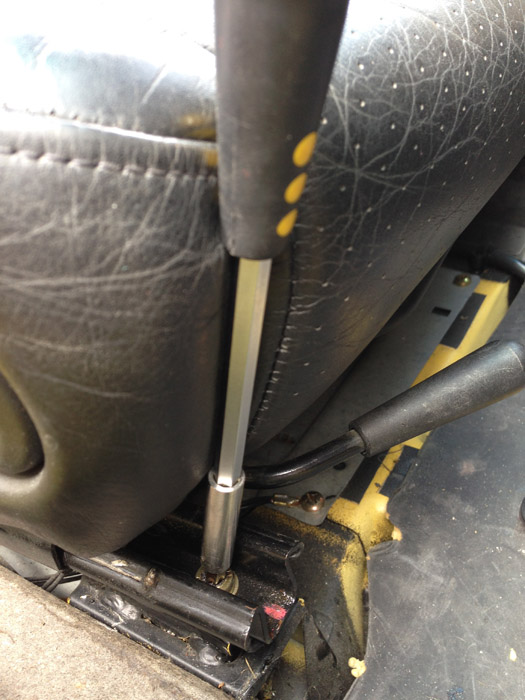
First job was to get the drivers seat out. Ran into a major stumbling block here as one of the cap heads was on so tight and it ended up getting nice and chewed and rounded. Took me 20 minutes or so but I had to hammer all sorts of stuff in there to force it round. Also had to remove all the other seat screws and rotate the whole seat around a little to help the thing budge.
Today I refrained from getting into the mask and equipping the Xylene, just was not in the mood to get into all that. I did what I could with the ball rolling technique, starting with the offside sill. I then did some ball rolling on the vertical panel of the offisde rear seat which did lift quite a bit of the thick glue.
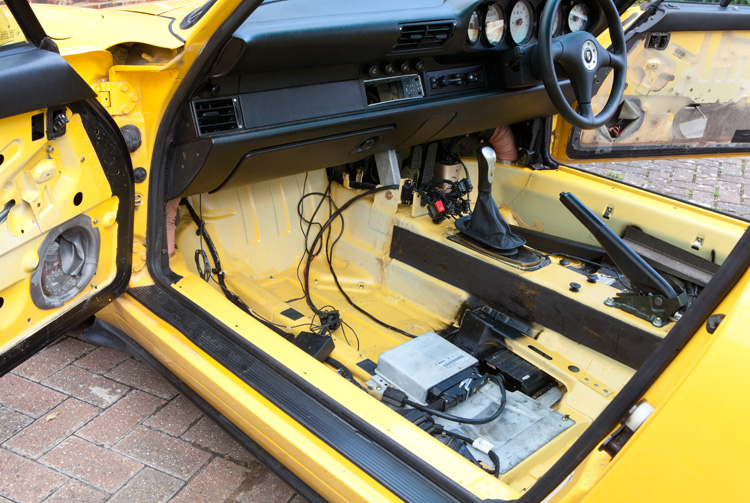
Also removed the carpet and sound deadening around the tranmission tunnel and in the front footwells.
So not too long to go now. Just need a really good session on those rear footwells and then attack the tranmission tunnel and we're done. Incidentally, I've been told to not bother with the loom as that will be unwrapped and re-wrapped in any case as the plan is to strip it back to an RS loom. There are a lot of things that won't need power anymore .... rear speakers, rear wiper assembly, rear spoiler, rear bootlid light, sunroof, central locking, electric windows, rear window heater element etc.
___
16th May 2014
A good 3 hours today. Tackled the hateful offside rear footwell, probably the worst section of the lot; a thick river of glue down in the corners and crevices. Still it was a lovely sunny day and I just took my time in a pair of shorts with the sunshine beating down .... glue ball, rag, xylene, rag, scraper, rag, fingernail, xylene, glue ball etc etc..
After that I pulled the small carpet pieces out from around the pedal box and took the remaining glue off there. That was uncomfrtable to say the least, lying flat on my tummy across the whole floorpan. Did the rear piece of transmission tunnel after that then did 80% of the nearside rear footwell too.
After that I gave her a real good wipe all over. Loosened up some of the stray dirt on the floors and inbetween all the modules and electrical boxes under the seats and then vacuumed everywhere.
A good afternoons work. Just have to finish the nearside rear footwell which will be a doddle, and then complete the forward sides of the transmission tunnel and then the only task left will be to go back over everything with a careful 'final finish' in preparation for handover.
Hurrah ! Almost done ...
_____
25th May 2014
A week or so has flown by. Been a bit busy and did my back in as well so haven't gotten aroudn to completely finishing. Still last weekend I did manage the last few main jobs. Completed the rear nearside footwell and then tackled the passenger footwell.
Pulled the remaining carpet from the transmission tunnel. This came away pretty easy and so did the sound padding underneath. The glue here is not too treacherous.
I started just rolling the fluffy areas that still had sound deadening stuck to them. Rolling back and forth with my fingers which gets rid of most of it just to leave the actual glue. Then out with the Xylene to completely clean.
The thing is I did this the wrong way round because along each side of the tunnel are these long rectangular strips of bitumen which are sound deadening. They are very hard and give lots of dirty brown coloured residue. So really its best to get them off first. The clubsport did not have these pieces.
When I tackled these I wanst sure if they should come off or not so what i did with them was to scrape them over and over again to get them clean and presentable. I imagined that they might be repainted.The amount of thick crud that comes off seems neverending.
Yuk ! See what I mean about doing these first !
Scrape the grime into a bag.
Here is the offside after completion. I found out after this though that I needn't have bothered since they have to be completely removed in any case. A hot air gun is the way to do this. They will peel away slowly in chunks. So that's pretty much it. All the glue is gone. The car just needs a good vacuum and then a good polish on all areas with Xylene just to make it sparkling and to remove any small rogue stray pieces of glue that were missed. Then it will be ready to deliver to the workshop for the roof to be chopped off !
Some other behind the scenes jobs. I took both my belts out and decided to give them a good clean. I left them to soak for about a week in a sink full of water with plenty of washing up powder. A little scrubbing and I turned them over occasionally and then scrubbed them one final time before rinsing and they came out pretty good.
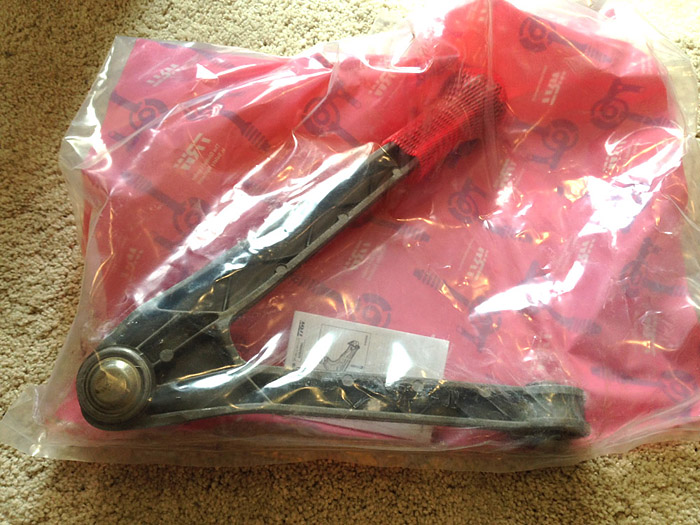
I also ordered a new offside rear A arm as the ball joint on my existing wishbone has a small bit of play in it. These are pretty cheap off ebay, the original parts straight from the manufacturer but way cheaper than what OPC charges. I have ordered an RS spec bush from elephant racing in the USA as well as my A arms are RS spec with the sport cartridge in the trailing bush.
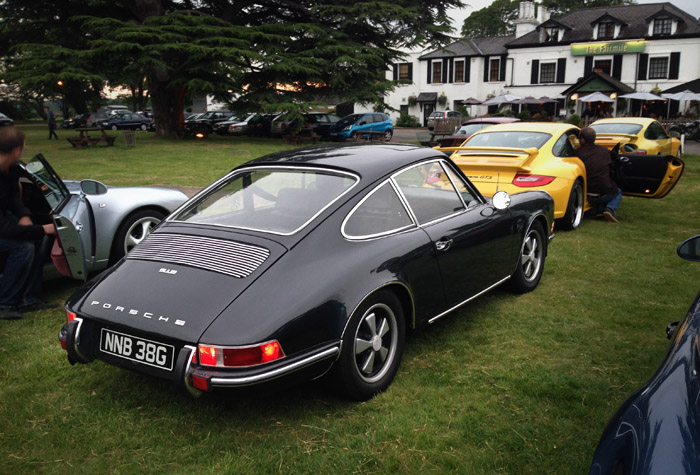
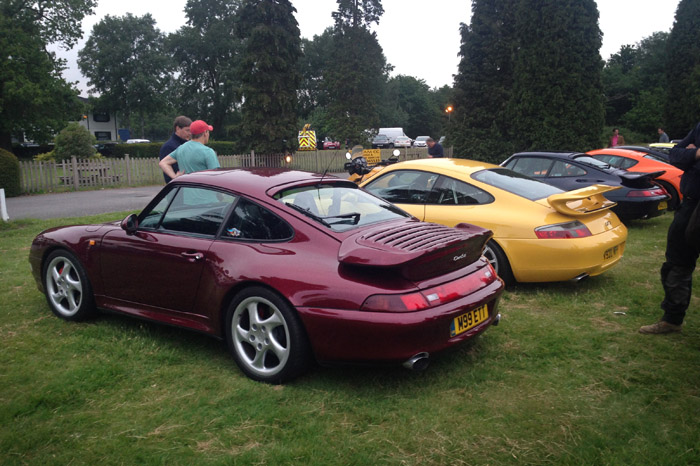
A little respite at a local Porsche meet. __
28th may 2014
Grabbed an hour or so to finally complete. Gave the whole car a vacuum and then whent over every surface with a microfibre and the xylene to remove any last bits that were missed.
___
31st may 2014
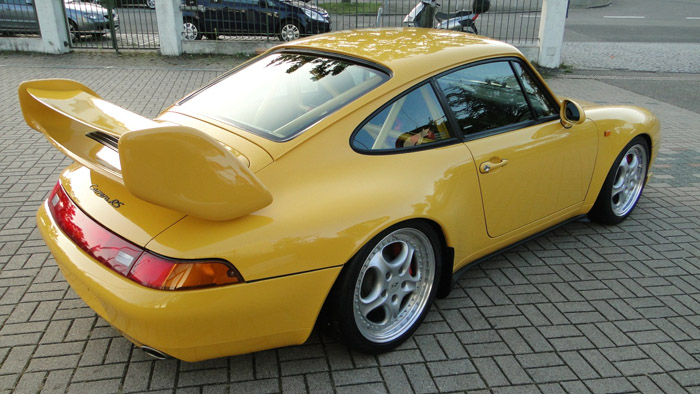
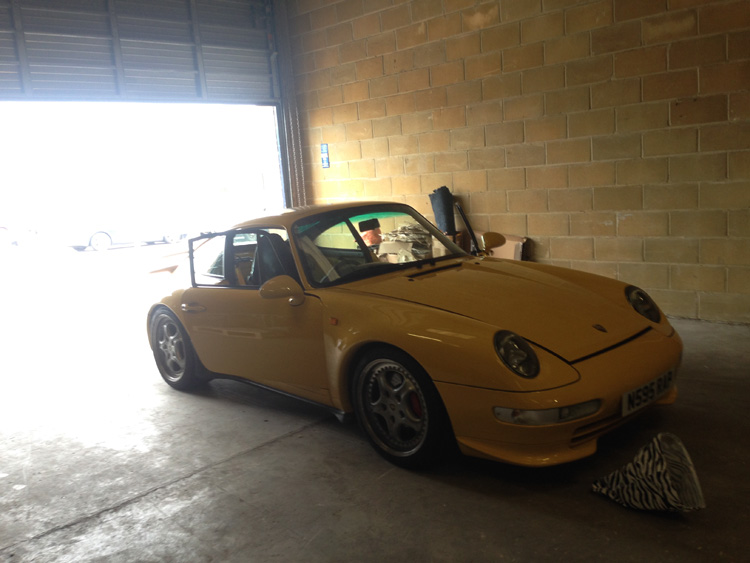
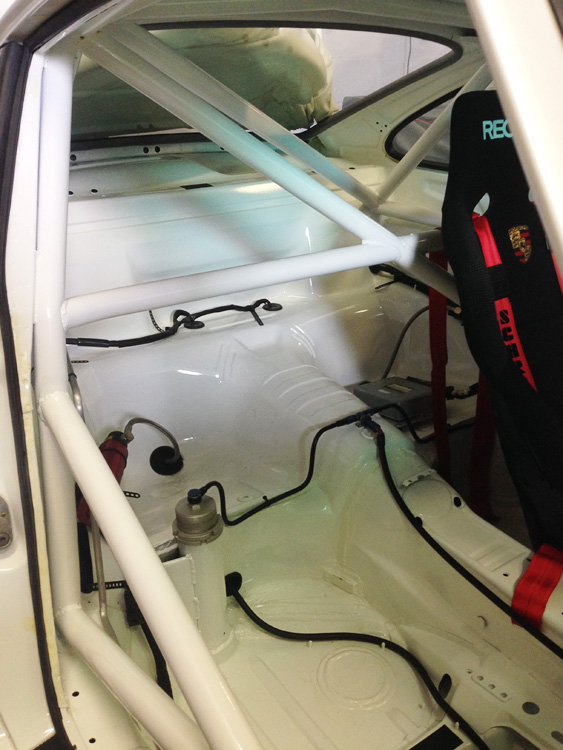
On Friday I took her to the workshop ... a secret location somewhere in the Europe ! Now I wasn't really sure what to expect on the drive down but I was pretty shocked by what I found. First of all the car is still really not that noisy and perfectly acceptable for me at 80+ on the motorway for touring. I gather that the Clubsports lack of underseal is the biggest thing that accounts for the greater noise but of course my car still has all that so its absolutely fine and that's without the engine sound pad still (which I intend to retrofit). Secondly though, once up to temps I soon found out that she feels so much faster. I didn't really expect this but the engine just feels like its pulling so much harder. This was a real unexepected treat and it gave me a little taster of things to come. I can honestly say that the car feels lighter now with less inertia and also a sense of it being a little lighter on its toes. It might not quite be as rapid as my GT3 but in all honesty it does not really feel any slower on account of its stubbier wheelbase and older less grown-up chassis. The cage will add weight of course but I still have one very heavy seat to remove, 20kg or so from the sunroof/headlining/motors, lightweight glass, motors in the doors, lots of wire being taken out of the loom and a much lighter aluminium bonnet. Couple that with the the 40% extra rigidity that the cage affords and the driving experience is going to be one hell of a transformation. I realy am quite excited about this now and I realise now that how will drive will eventually completely overshadow the satisfaction gained from its new looks an image. Driving, it really is all about driving and using these things as intended.
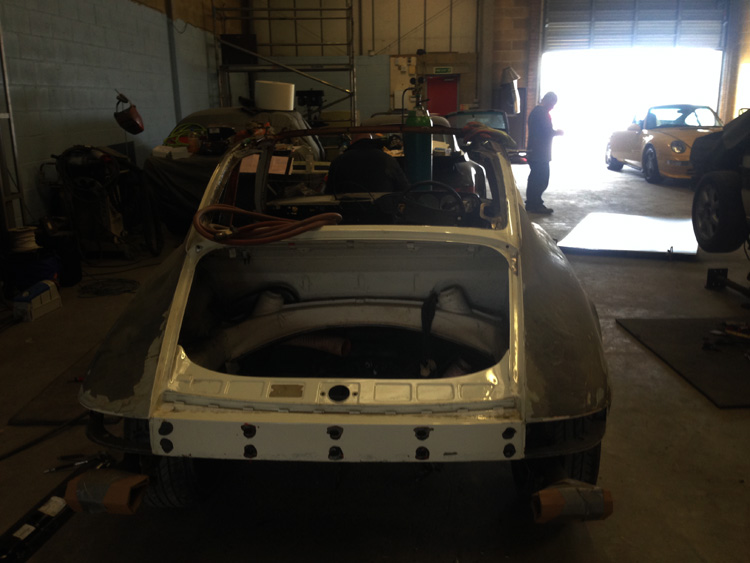
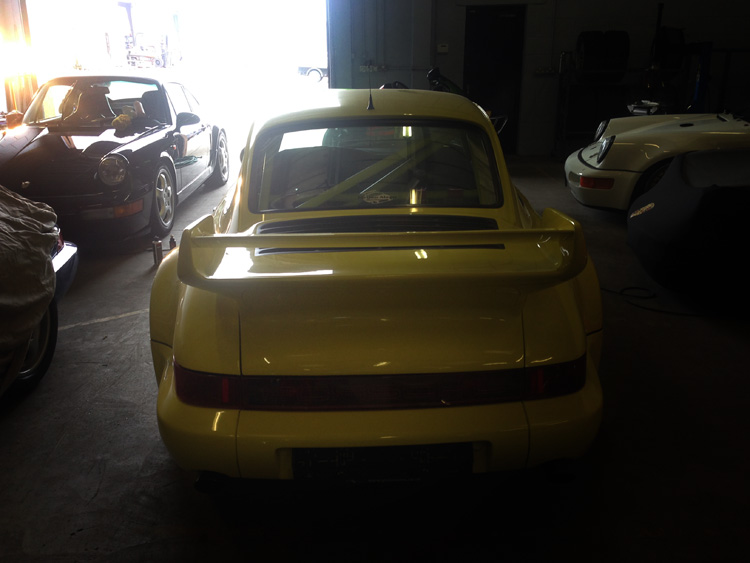
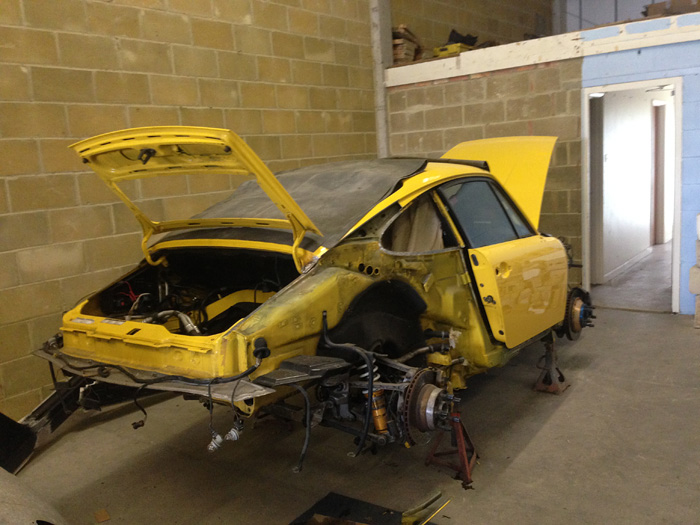
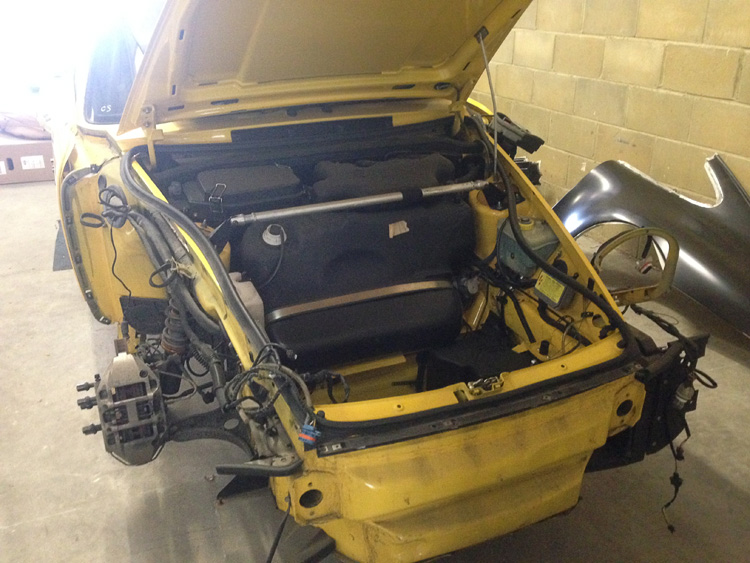
Goodbye oh yellow one ... you won't ever look like this again, that's for sure. Work will begin shortly. The first job is to cut the roof off, strip the interior, build and fit the cage. I spent a lot of time going through the various alterations and points of detail that will take place. There were many nuances to discuss. The genuine factory clubport cars are steeped in legend but my man was the bodywork expert at Porsche for over 15 years and for the last 5 years there was the person who trained everyone else with all things bodywork. When it comes to Clubsports there are very few people on the planet who have as much detailed knowledge. Suffice to say that there are all sorts of specific minutiae that need to be addressed if one is trying to properly recreate an M003 exactly as it came out of the factory. To give you an appetiser, some of this stuff involves even specific angles at which the spraygun was held when boot floors, cages and underside panels were painted ..... the number and total length of weld spots when the cage was attached to the pillars. An anoraks wet dream ! I shall get into all this and more though as and when I update. For now, a few pictures.
This place is a bit of a treasure trove. Here we have a 964 RSR with original factory cage so plenty of good original reference points !
Factory RHD 993 GT2 EVO .... makes a 993 GT2 seem as commonplace as a Ford Mondeo ! Red 993 RSR next to it, with with factory cages.
LHD low miles 964RS in the background ... sold already. Not certain what the yellow car was but it looked stunning.
A few basket cases too. This and a 356 shell which looked like a huge piece of rust but which will eventually look like a brand spanking new speedster.
A 993RS M002 from Asia having all sorts of stuff done to it.
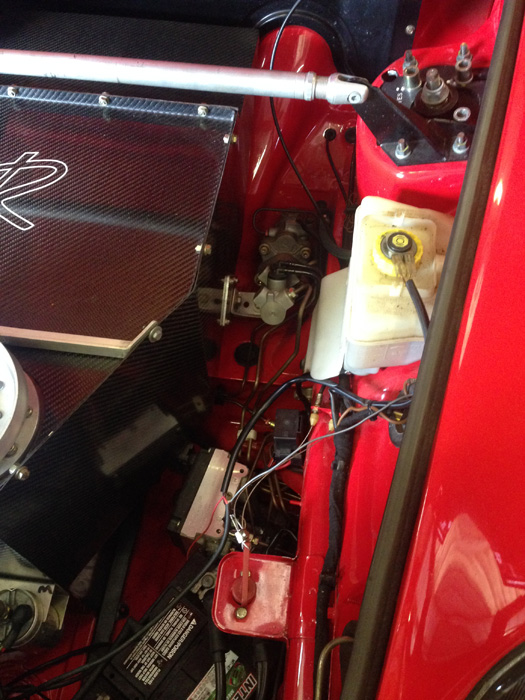
LHD 993 RSR showing 25.4mm master cylinder, battery cut off and cable guide panels.
______ M003 - m64/20 3.8 RS engine
25th July 2014
Well this years project was supposed to be clubsport interior and maybe the front boot, hyrdaulic brakes and ali bonnet but typically, just when I don't need it, I get offered an original RS 3.8 M60/20 engine ! Not exactly the right time but hey ho, these things are rare and with the price of genuine rhd RS touching £250,000 you really do have to grab these parts as and when you can. So this year my car will get a freshly rebuilt 3.8 RS engine and luckily for me, I sold my existing 3.6 pretty quickly.
Out with the old. I got a very good price for my 3.6 lump. Although the cost to change is still on the large size the chunk of money from the sale of the old will help enormously. William wanted my engine for a singer style back date project he is doing ovee the next few years. Like everyone else seemingly, he understands that the best policy with these cars now is to grab the parts you need as and when you see them rather than when you need them. Things are getting scarcer by the day. Incidentally that Rubystone 964 RS you see in the foreground is an absolute beauty and currently for sale. Right hand drive, ultra clean inside and out, an immaculate car with a commensurate price tag.
The gearbox sits on the side of the workshop. I'll be fitting the RS gearbox mount before it goes back in. Next year this will come out again for the conversion to an M003 box. My clutch and flywheel and pressure plate are good. These will be mostly changed though for the RS clutch and flywheel. When the mapping takes place it makes sense to have done the flywheel already so the idle/stall issue can be dealt with in one go.
Here is my new engine. It's an original 3.8 RS M64/20. the crankcase is very different from a regular 3.6 crankcase and as such, different to engines that have had the 3.8 powerkit fitted. The 3.8 case is bored to 109mm from 107mm and the crankcase walls have a radial groove machined into them for teh additional seals. You can see these seals in my 4th picture there. I gather the studs are slightly different and larger piston sprayers from the '93 Turbo are present too. This engine will come completely rebuilt. New bearings, new piston rings, new RS cams, RMS, new barrels, heads refurbished by Russell at RSR engineering. Paul has shot blasted a fair bit of it with more to come so it should look pretty clean when its done. Most of the screws are being plated as well and we are having the fan shroud and fan cleaned up too. ______________________
|
.JPG)
.JPG)
.JPG)
.JPG)
.JPG)


.JPG)
.JPG)
.jpg)
.JPG)
.JPG)
.JPG)
.JPG)
.JPG)


.JPG)
.JPG)
.JPG)
.JPG)
.JPG)
.JPG)
.JPG)
.JPG)
.JPG)
.JPG)
.JPG)
.JPG)
.JPG)