Spark plug Leads This job is a bit of a pain. Simple enough.. disconnect 12 leads at both ends and then replace. The problems though start with the RHS or offside bank of leads which are routed behind the varioram intake manifold on top of the back of the fan shroud. They are secured with clips which are screwed down at four different positions and 3 of those positions are quite hard to get to. Long thin arms help as does a good selection of high quality phillips screwdrivers, long, extra long, flexible, very short and then ideally the use of a thin bit ratchet as well. Added to that the dreaded hidden spark plug (innermost right hand side top) which is obscured underneath the power steering pump and you will need the offside silencer and the engine shroud removed if you are to swap leads (just as in spark plug replacement).
TOOLS You will need:
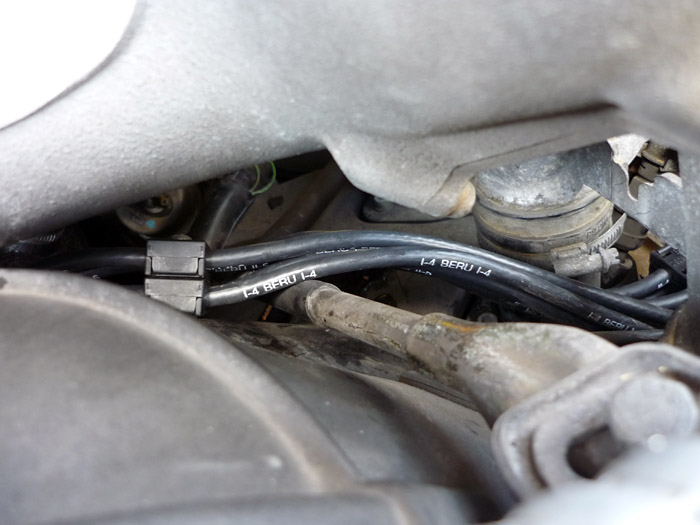
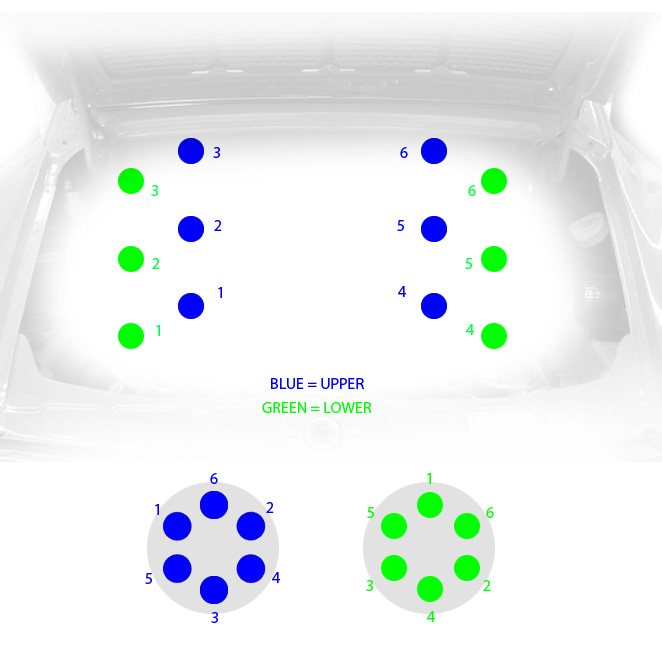
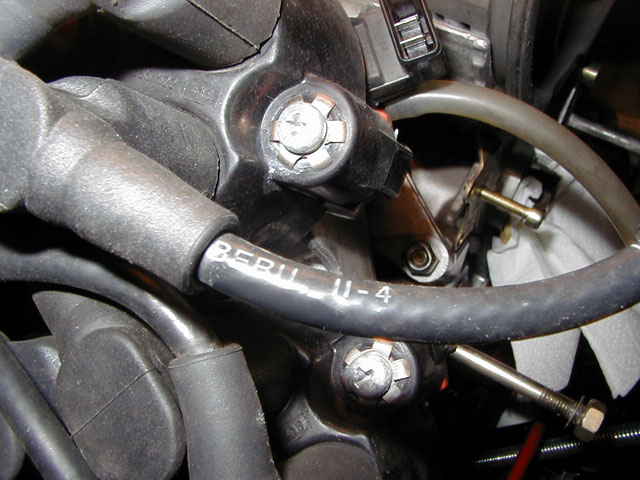
Before we get started be aware that the distributor points should all be numbered on the distributor cap. The leftmost and lowermost (when looking from the back of the car) distributor feeds the top bank of cylinders both sides with 1 going to the left side bank and the rearmost spark plug (nearest the back of the car), then 2 the middle, 3 the left side forward most plug. Then 4 feeds the rearmost right side (or offside) upper cylinder, 5 the right side middle and then finally 6 the right side forward most plug. Moving onto the right and higher primary distributor, this connects to all the lower cylinders and in a matching pattern so 1 connects to the left side rearmost lower plug, 2, then 3 as before then 4 to the rearmost right hand side lower plug, 5 on the middle right lower cylinder then 6 into that tricky lower frontmost position. There should be a diagram on a sticker on the left side of your engine bay. And also if you bought the OEM Beru leads, they will be numbered 1 - 6 in the format we've just discussed. Before the main number they will be marked 'I' for upper cylinders and 'II' for lower cylinders.
Jack the car up at the rear. Remove the engine undertray & both rear wheels. Remove the flexible heater pipe that obscure the rearmost offside plug. back in the engine bay remove the blower assembly and the airbox. First up up you can easily change the 2 short coil to distributor leads. The slightly shorter one is for the lower secondary distributor. Having said that, it's actually easier to leave them disconnected at the distributors till the end.
Tackle the left side upper bank first. This will be made from a single short plug lead which goes to cylinder 1 and then another short bundle of 2 leads for cylinders 2 & 3. In the picture above you can see that they require you to undo the left side connector. Unplug the old leads one by one from the distributor and then replace with the new lead, checking the numbers as you go on.
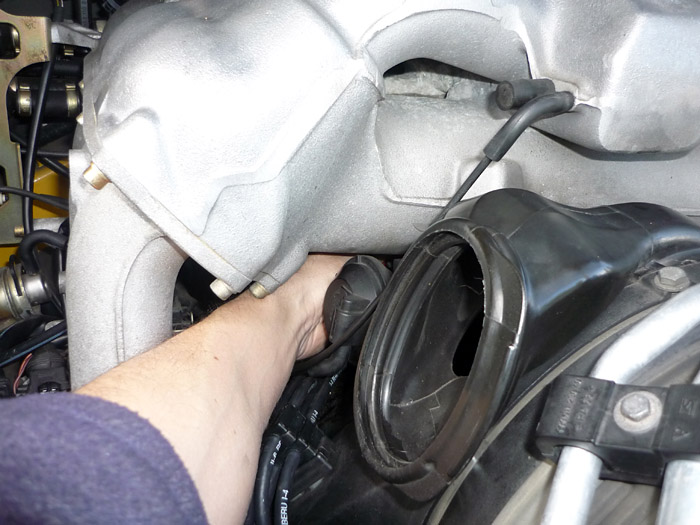
From your freshly ordered set find the next shortest bundle of 3 plugs and arrange its clip on top of the short width clip of the 2 lead bundle and loosely screw this back down. Pull off the old 1,2,3 leads from the primary distributor and connect the new ends on. Go down to the side of the wheelarch, remove the 3 lower bank leads, push the oval rubber seal that sits in the hole in the engine shroud with a screwdriver or a blunt end so that you deform it and are able to one by one push all the old plugs up beyond the shroud and into the engine bay. Remove the old nearside lower bank leads completely and then thread the new ones back down through that hole in the engine shroud and fit them onto the plugs. The right side or offside leads are all routed under the intake manifold, across the back of the fan shroud and then they appear again at the right side of the manifold. They are held mounted at four places, each time by 2 long phillips screws.
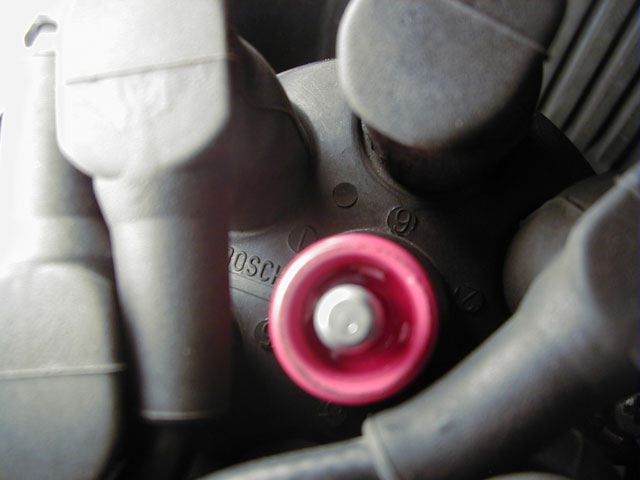
The first mount point is fairly easy depending on what tools you have. There is very little space immediately on top of the screws so you will need to find a workable solution to undo them.
A hexagonal bit inside a small 1/4" ratchet might do the trick for the outer screw.
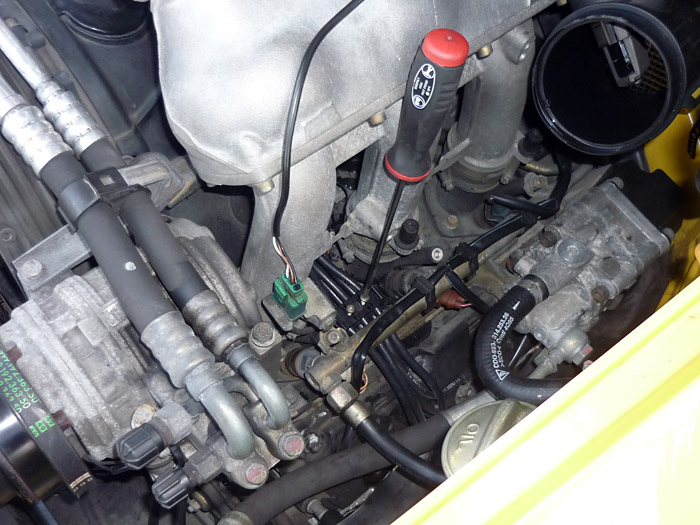
A flexible long screwdriver attacking from the side of the manifold might work as well. Try applying a little pressure on the clips with your other hand, bending the group of 3 clips backwards towards the back of the engine bay. This will help you get a more perpendicular purchase onto the head of the screw.
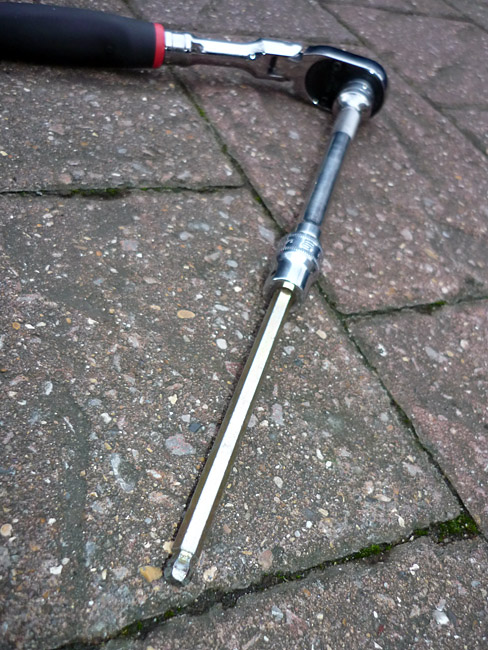
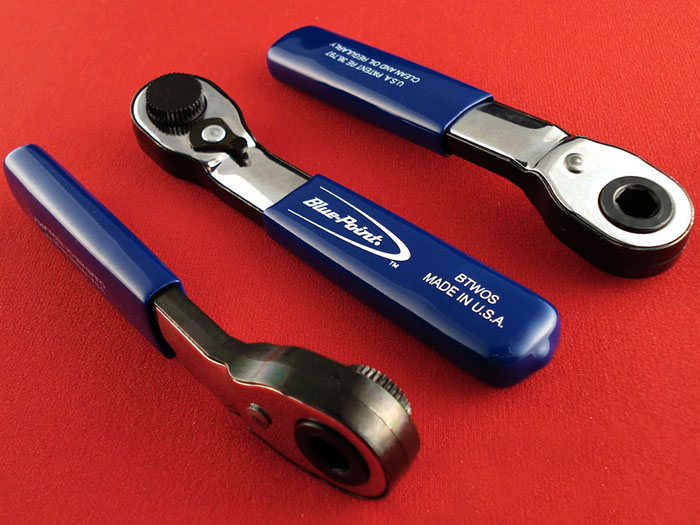
I'd say the best tool for these 2 screws would be a thin bit ratchet like these. I didn't have one but guess what, I will in a few days time. A man can never have enough tools.
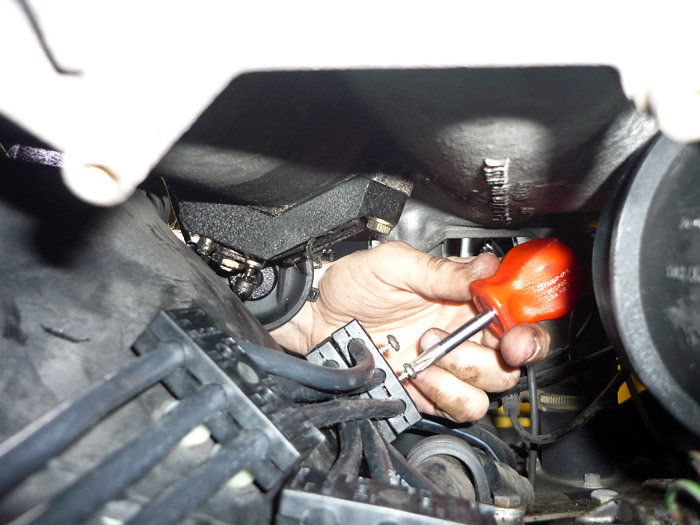
The next stack of 2 clips in (working left to right) is difficult to see but as long as your hands/arms are not too big you can work your way in between the manifold and fan shroud armed with a short subby screwdriver. Just make sure it's something decent with a good handle that will allow you to apply some good torque. A stubby ratcheting screwdriver would also be ideal. If you are quite thin like me you can actually insert your other hand in from the right hand side of the manifold and have both hands onto the 2 clips here, one hand maybe pincering and stabilising the shank of the screwdriver whilst the left hand turns. Undo the screws and be careful to successully rescue them once they are undone. I find a magnetic pick up tool absolutely invaluable for this type of work when screws and bits and other such things inevitably work loose or fall from your hands and lodge themselves deep in the recesses of the engine bay.
Here's a picture taken from the right hand side trumpets. Prepare to get scratched wrists and arms and an aching back from leaning over 20 degrees for so long.
The next stack of clips is a little further on to the right hand side of the engine bay. They are slightly visible from the front but you will need to attack them from behind.
I found the very best way was to use a long screwdriver approaching from right behind the manifold where the MAF sensor usually lives. In my picture you can just about see the head of the screwdriver fixed onto one of the screws. This is far easier than trying to push your hand through the side of the manifold like last time. You can press down hard on the screwdriver and make pretty light work of it. Maybe consdier cable tieing your MAF out the way until you're all done. It has a habit of getting in the way here.
That same screwdriver on the last 2 clips. This one is completely self explanatory and a doddle to get to.
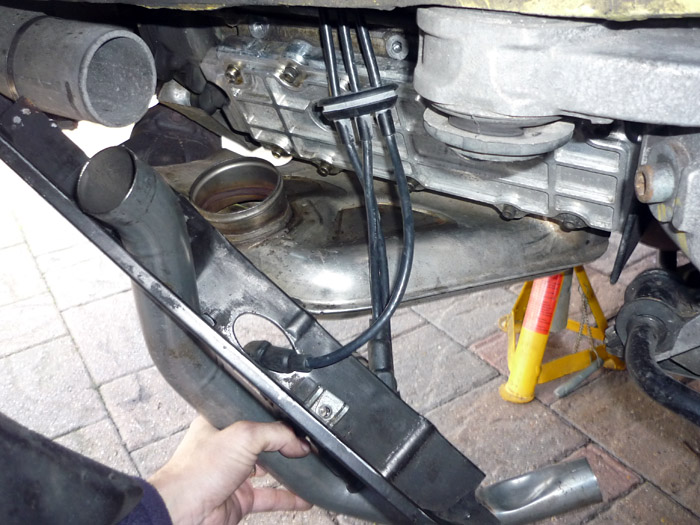
Go down to the offisde wheelarch and remove the exhaust silencer, heater hose and engine shroud as detailed in my spark plug change guide. The picture above is a new tool I have acquired since then. A long ball end hex socket which makes it a LOT easier to remove the 3 hex head screws that hold the shroud to the engine block.
With the shroud dropped push your old plugs up through that access hole. The rest of the job is a similar process of disconnecting the old leads and then getting the new leads in place so its all fairly straightforward. Just make sure you get all the connections right and do not tighten up any of the clips until you are completely finalised. When all your distributor connections are made and have been checked and double checked then you will need to slide the wires around through the clips to take up any slack. Only once you have the wires all neat can you go in and tighten the clips again.
On that 3rd set of clips, just before the leads exit the underneath of the manifold, you will see a long metal rod which bolts up onto the Air conditioning compressor mounting. Now my old lower set of leads went underneath this rod and although the rod has a nice piece of rubber sheath on it to prevent chafing, I decided to pass all 6 new leads over the top of this rod. I was also careful to make sure that no chafing could take place between the leads and that jubilee clip in the right of the above picture. When you're done. Tighten up all clips. Be sure that the 2 coil ot distributor leads are in place and then make one last final check that everything is connected as it should be. Replace the engine shroud, the offside silencer, heater blower assembly, maf sensor and airbox and then finally the engine undertray.
|
.JPG)
.JPG)
.JPG)
.JPG)
.JPG)
.JPG)
.JPG)
.JPG)