RS quick shift + Shift Rod mod
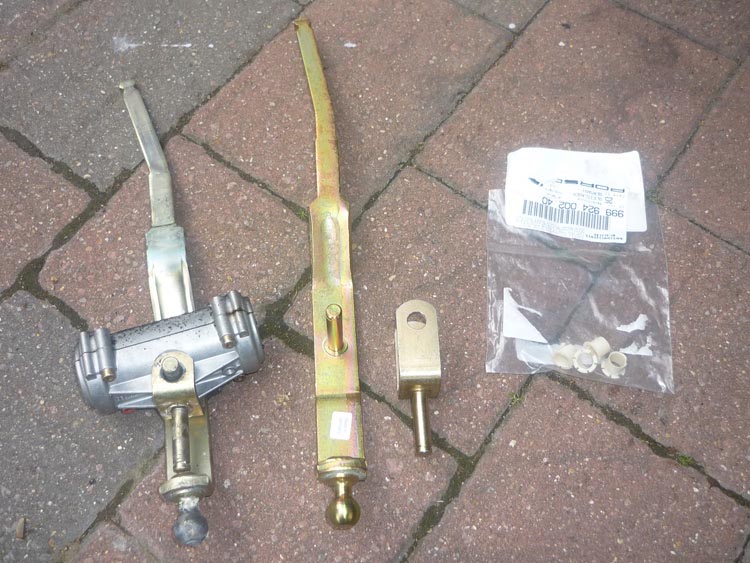
The gear shift on the 993 is ok. By the standard of modern cars its actually pretty good i'd say but its no S2000 box that's for sure. The good news it can very easily and cost effectively be improved upon. There are various short shift kits out there but we'll concentrate on the offical RS shift from Porsche as fitted to the original 993 Carrerra RS. As far as I know, at just over 60 pounds its actually cheaper than kits from the likes of Weltmeister. It will raise the gearlever slightly but shorten the throw by around 20% and make for a an overall tighter feel. First things first. The items you need are the actual RS gearshift lever, the RS fork and whilst you are there it is worth changing the little plastic bearings so you'll need 4 of them as well. The lock washers come in handy because they are easy to lose to grab 2 of them as well.
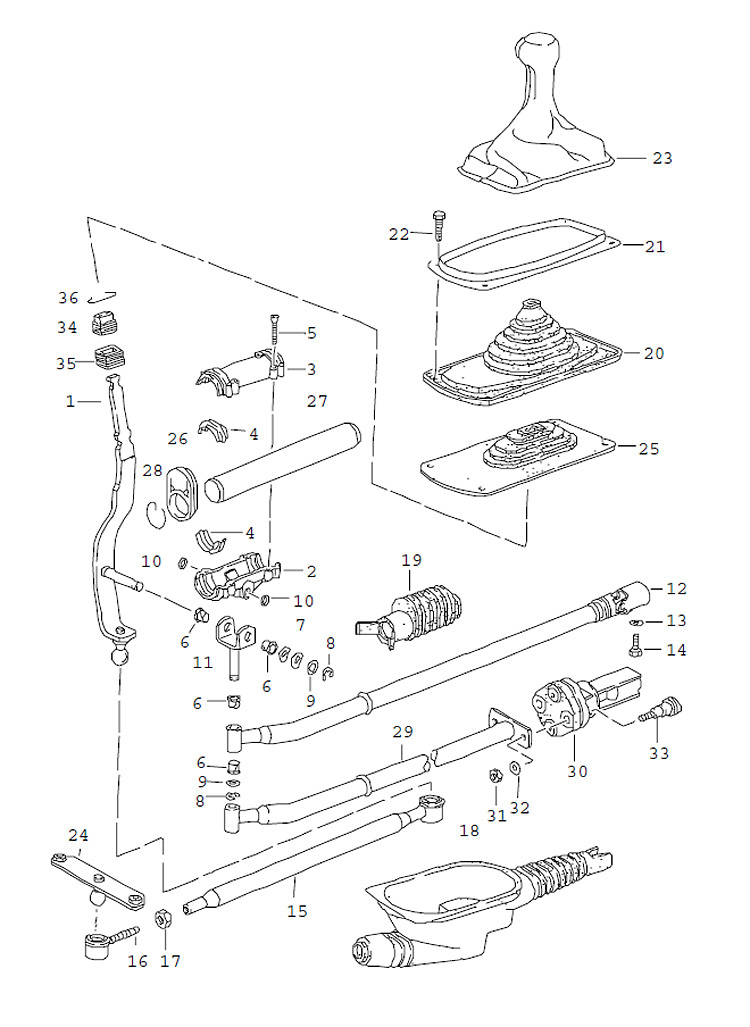
KEY:
Now the factory RS 993 also uses another uprated part and that is the lower shift rod. From a purists point of view the problem with the stock rod (number 29 in the diagram) is that it bolts onto a huge piece of rubber (30) which then mates to a coupler which then fits into the gearbox shift shaft. You will see clearly later but essentially there is a gap between the rubber and the coupler and then another gap between the coupler and the bolts which hold everything onto the shift rod. This crude 'bearing' ultimately means that there is quite a lot of slop introduced into the system and that means a looser, less precise gearchange. You can see in the diagram that the RS shift rod (number 12 in diag.) dispenses with the isolating and comfort effects of such a design and is instead a solid rod with a single direct U jount. You can buy the RS shift rod as well for 250 pounds or so, of you can source a copy that's made inthe USA called the 'Golden Rod' for slightly cheaper, or you can get 80 or 90% of the same effect for the cost of a few washers. See below on how to mod the rod.
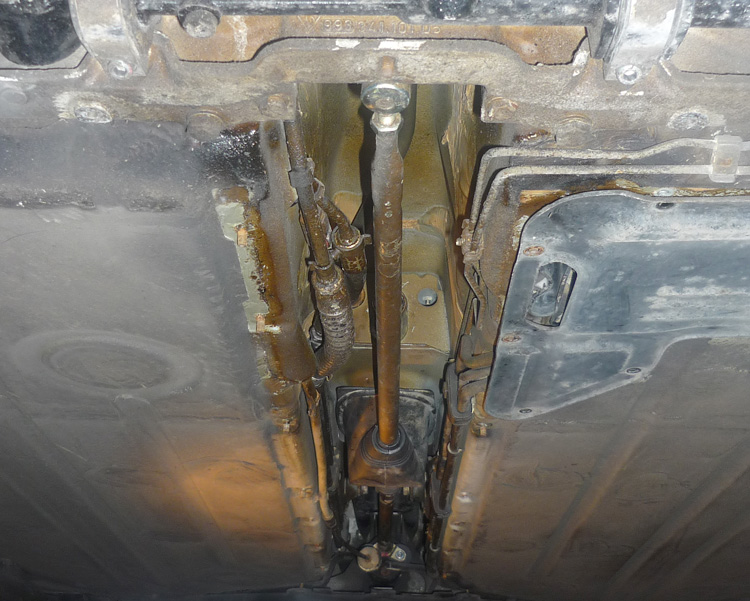
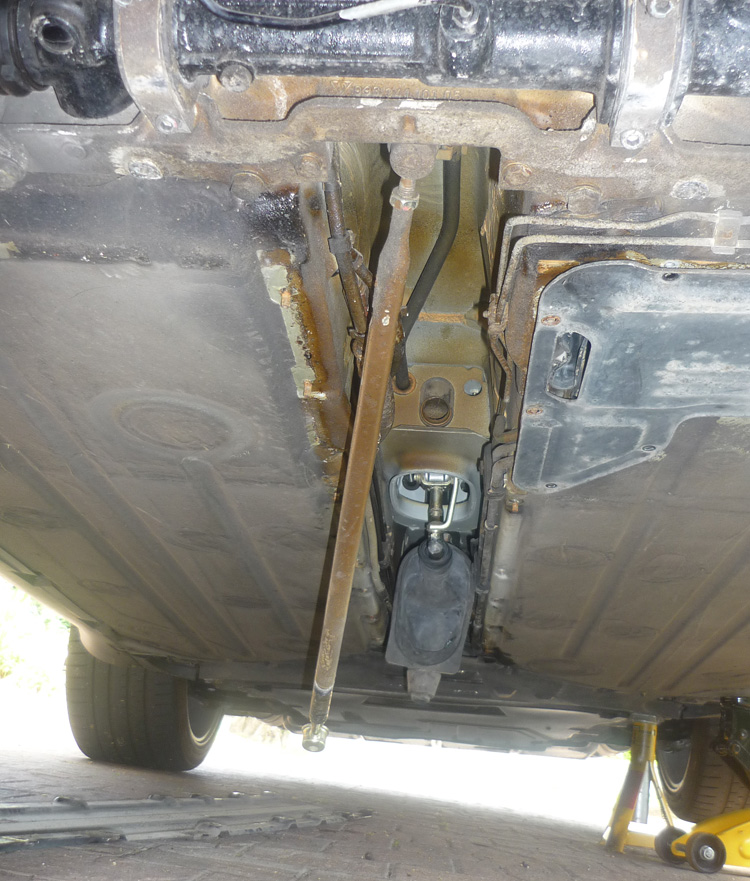
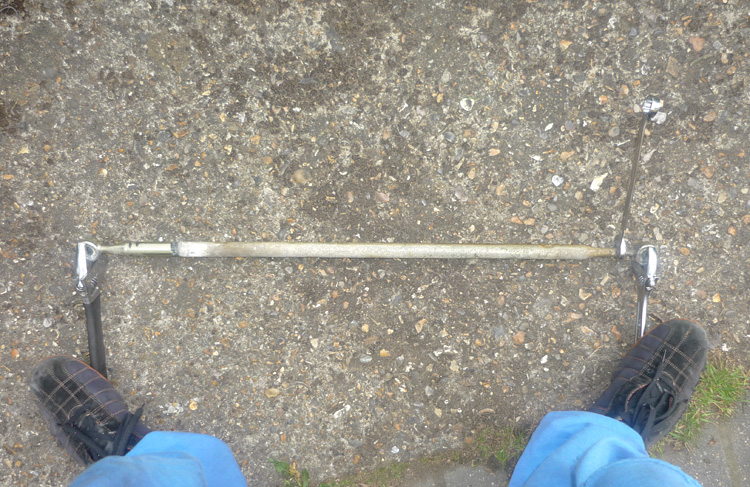
Fitting First thing is to push down on the leather around your gearstick all the way round the perimeter then angle out the whole of the leather boot and pull it upwards. Grip the gear knob by the left and right sides (do not grip north and south) and then pull very hard and wiggle the thing around. Eventually it will come off. Place it on the seat and you're done in the interior. Note that despite what some guides say you do not have to remove the transmission tunnel, just take the gear knob off that's all. Now get the car up axle stands and remove the steering undertray (handful of trim fasteners and a couple of bolts), loosen the little kidney shaped side tray (i left the 2 outboard bolts still intact) and the undo all the nuts on the long centre transmission cover. Watch out because if the nuts are bound onto the threads you can easily shear the bolt end off. This happened to me on at least 6 of them but when it happened the first time I should have stopped and treated them all with a little heat first of all. At some point I am going to have to strip out the interior and replace these screws. With the kidney shaped cover loose on one side you can then slide the centre cover forward and out. You now get something looking like the following. Make a mental note of that frontmost rod, you will have to lengthen that slightly later on.
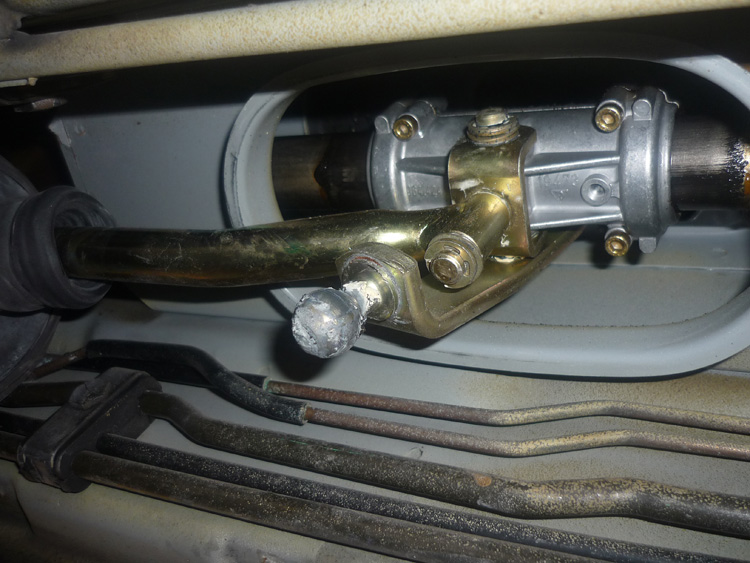
Position yourself underneath where the two long rods that you see go into a rubber boot. Pull on the rubber boot so it comes away from then rotate th ewhole boot around and over so you expose the frontmost rod which is held by socket + ball joint onto the bottom of the shift rod.
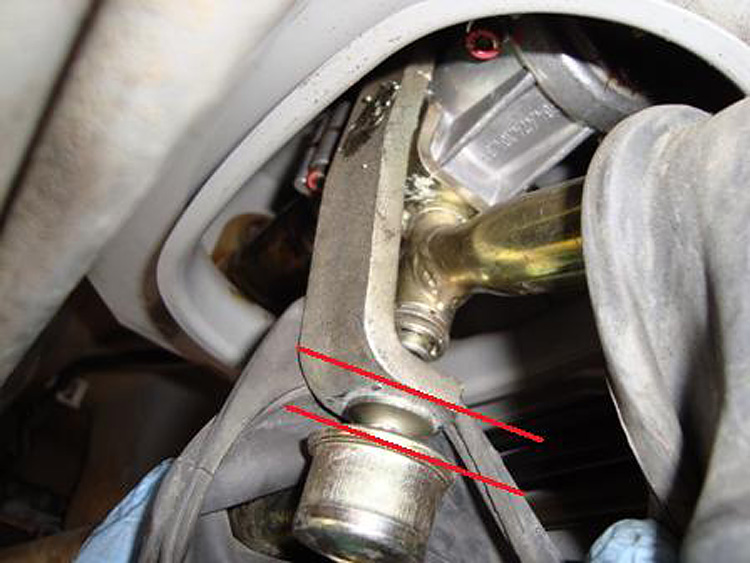
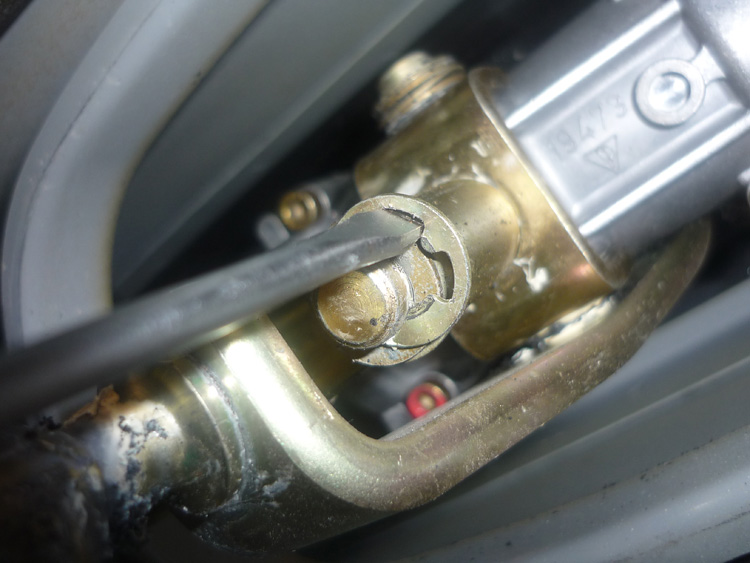
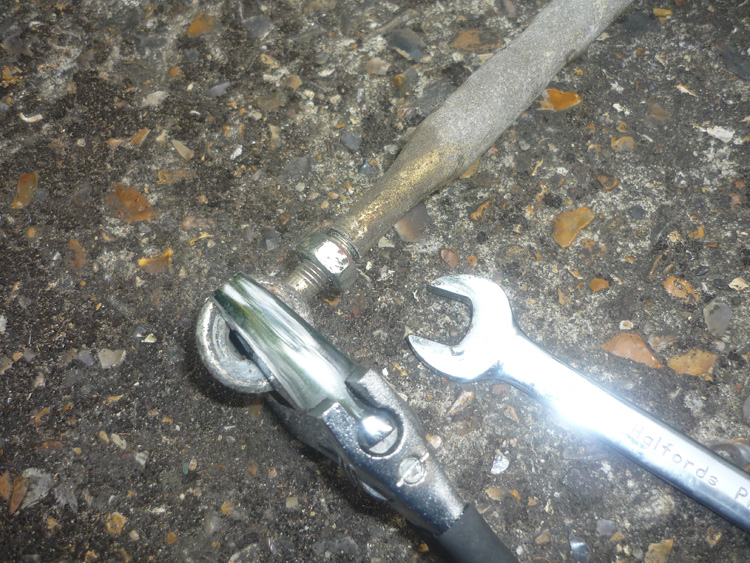
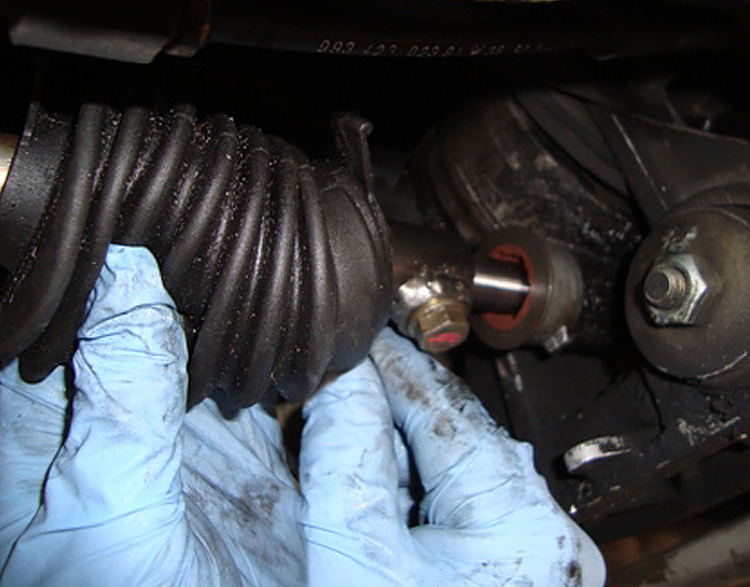
You can see this joint here. You need to separate between the red lines and although a ball joint tool will do it or a pickle fork, I found it really quick just to use a 19mm spanner. Slide the spanner into the crevice and then lever it down. Once separated you can slide the boot off the rod.
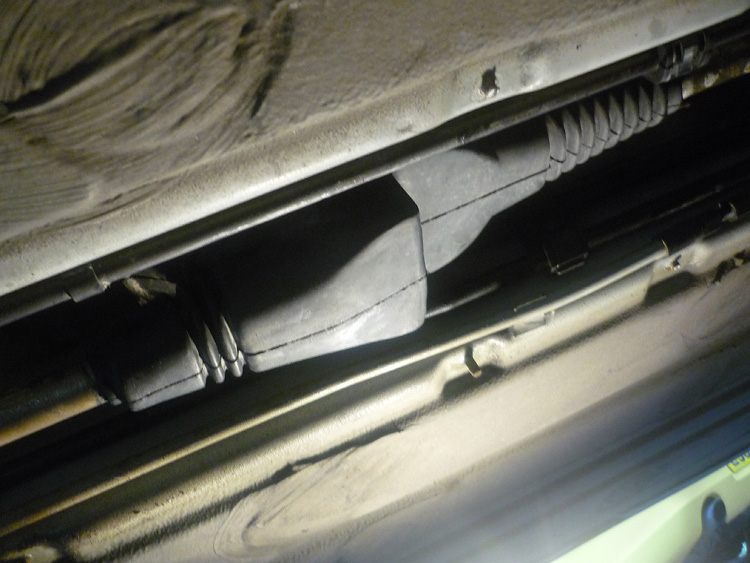
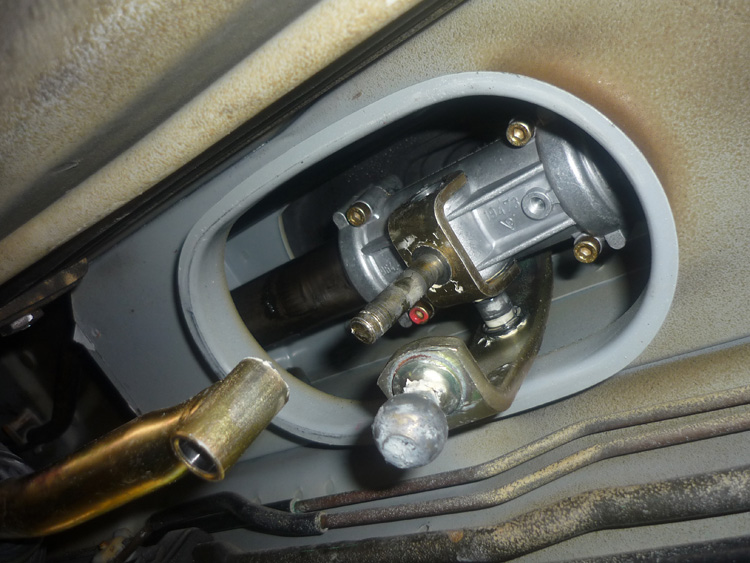
The forward rod or 'guide tube' will fall away and pivot at the ball joint on its other end as you see here in the picture.
This is what you will see now. You can slide the boot well out the way now towards the rear of the car.
To access the shift rod and tube you will first need to disconnect that shift rod we were talking about from the bototm of the fork. Poke a screwdriver into one of the gaps around the lock washer and rotate it. This will force the washer out in a controlled fashion and eventually you will be able to just pull it off with your finger. After that, take off the wahser + spring washer + washer and place aside.
Now by swinging the gearshift lever out of the way you will be able to pull down on the shift rod. Note that in either end of the collar you have a plastic bearing. These you will replace. The picture below is where you get to. The shift assembly is now free. You can see the it is attached to a silver barrel which in turn is sliding along a long tube. To release the shift assembly you have to first slide this tube out.
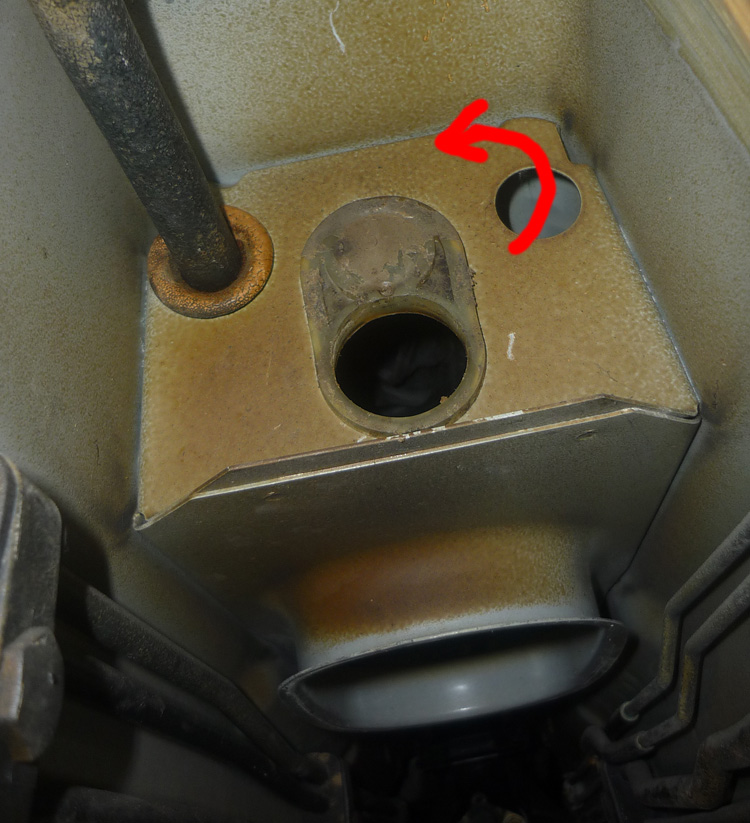
Look to the side and upwards and you will see that each end of the tube slides into a hard plastic lozenge shape bush and then on the outside of these a ring shaped metal fastner hooks into the tube and then fits around it but up against teh bush, thus preventing it from moving. Dig a screwdriver between the metal clip and the surface of the tube and lever the clip outwards and prise it away from the end of the tube. Once its free the turned in end will still be hooked into the hole in the tube and here its a simple matter of threading it out of that hole. You only need to remove one of these clips. I suggest the front most end nearest the nose of the car. Once the clip is off, slide the tube backwards at the same time as gripping all the shift parts and keeping them still. Once the tube is pulled from that silvery metal barrel you can pull the whole shift assembly out. Pull the tube all the way out too.
Before you do anything else, get those 2 plastic bushes that hold the tube in place and turn them upside down. This will raise the tube and mean that the shift assembly sits higher which is what you want for the RS lever.
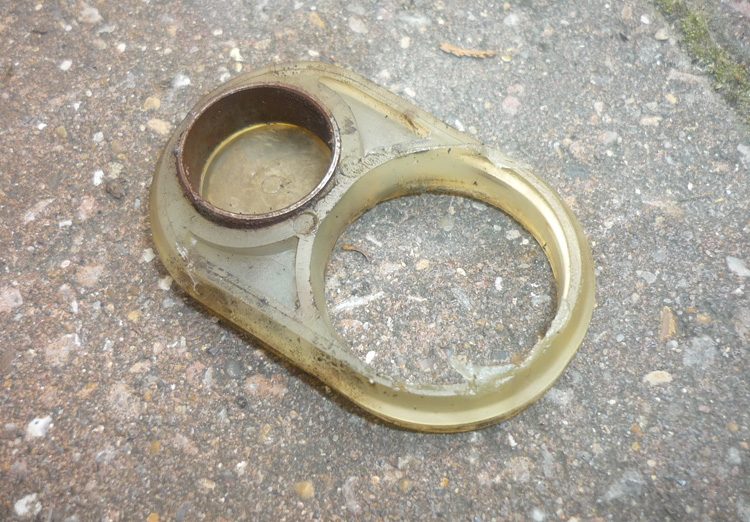
The bushes pop our fairly easily and have agrrove in their edge which mates to the lip of the sheet metal.
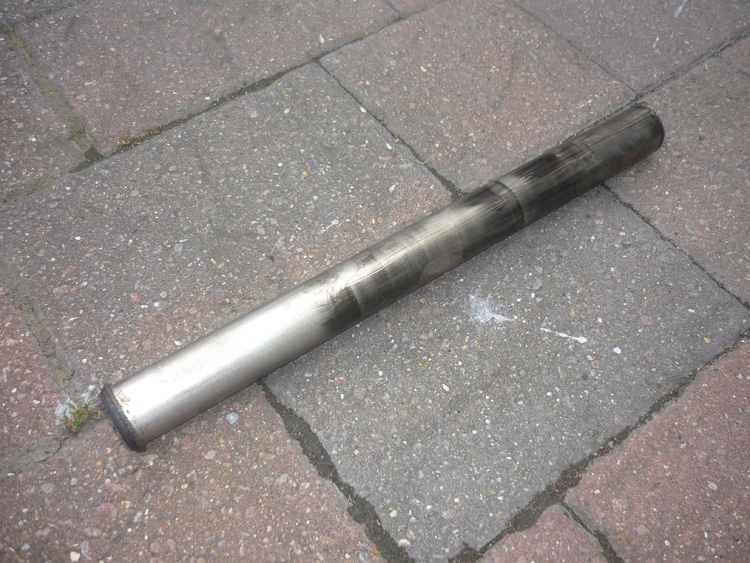
Here's the tube. Worth giving it a clean and makes usre its 100% free from dirt.
There's one of our tube end clips.
And finally the shift assembly consisting of the barrel shaped slide, the original gearshift lever and the original fork.
Remove the fork by removing the lock washer as you did before. As you remove the slide, note that it contains 2 rubber O rings that mate to the inside surfaces of the fork. You don't want to lose these.
Once you have dismantled the 3 pieces you can then start to grease everything up and reassemble with the new RS bits. Place a new plastic bearing first onto the fork spindle that comes out of the new gearshift lever. Then slide the new fork onto the spindle with the slide already position inside it. The place another plastic bearing onto the spindle and then replace the washer mix (wahser + spring washer + washer) onto the end of the spindle and then secure the lcoking washer against the side of the fork.
I cleaned and regreased the little plastic ring bearinsg inside the slide as well.
Once thats done you can then put the new assembly back into position. Be caerful when raising everything in place as you want the top of the new gearshift lever to go correctly through the hole in the rubber bellows (the rubber piece inside the interior just underneath your leather gearstick cover) Slide the tube back in from the rearmost hole. Slide it through the barrel shaped 'slide' and then into the forward bush and then replace the metal clip. The easiest way to do this is to first thread the hook of the clip into the hole on the tube. And then with a smallish screwdriver prise the top of the clip up and our over the tube, levering with the screwdriver against the lip of the tube.
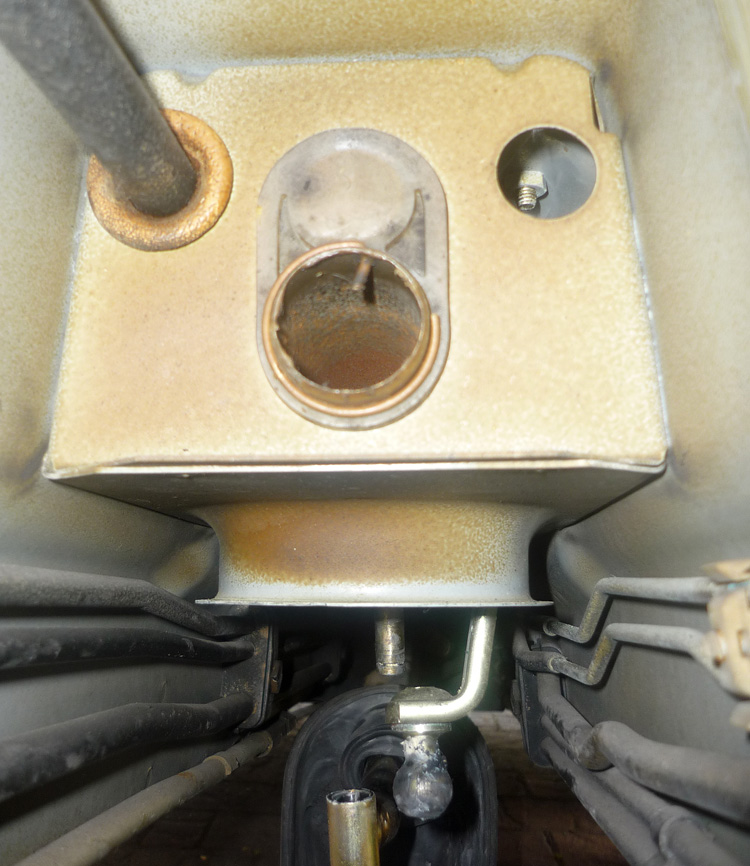
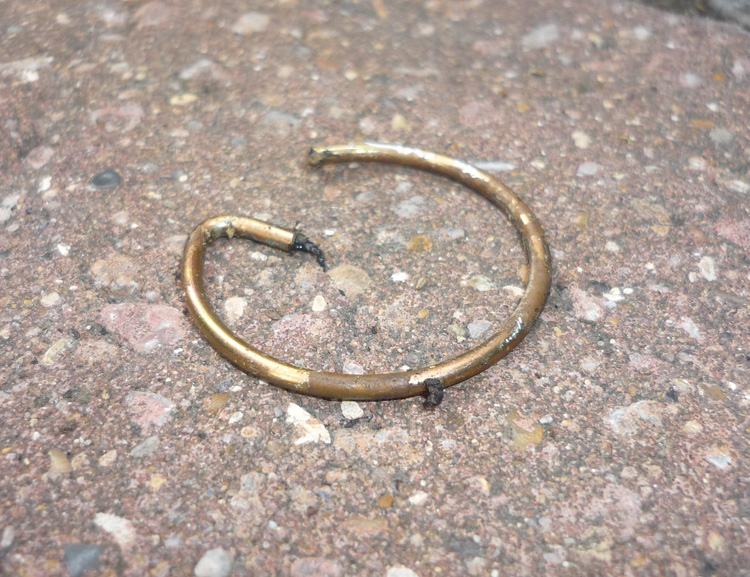
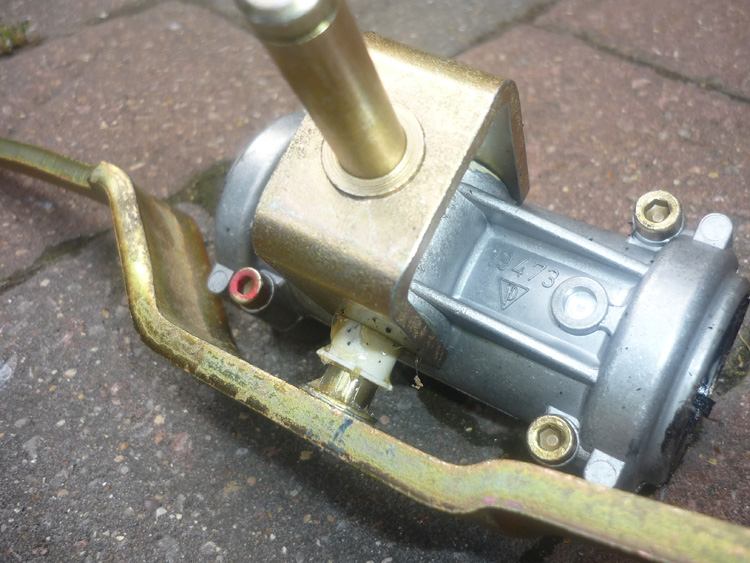
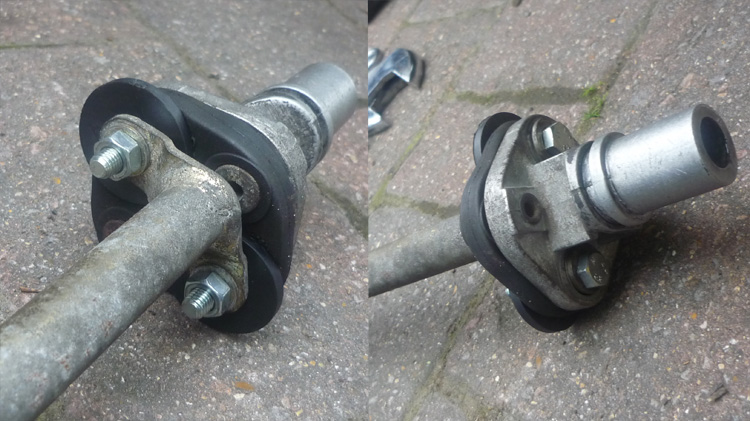
For the front rod there is also a small modofciation to ensure that your 1,3,5 gears are as far forward as your 2,4,6, positions are backwards. Simple prise off the forward rod or 'guide tube' with a spanner then at the front end, undo the clamping nut then unwind the thread by precisely 2 turns then tighten back up. This effectively lengthens the rod by 2 threads and allows proper centring of the gear stick with the RS shift. Just be sure that both your ball joint ends are aligned the same way when you tighten (see picture 1 below)
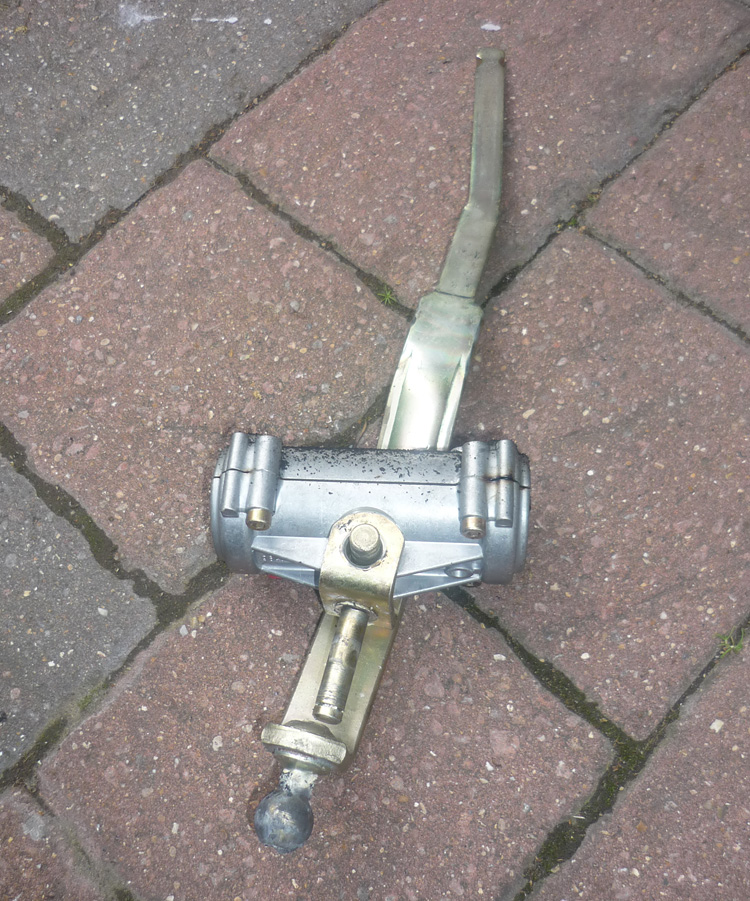
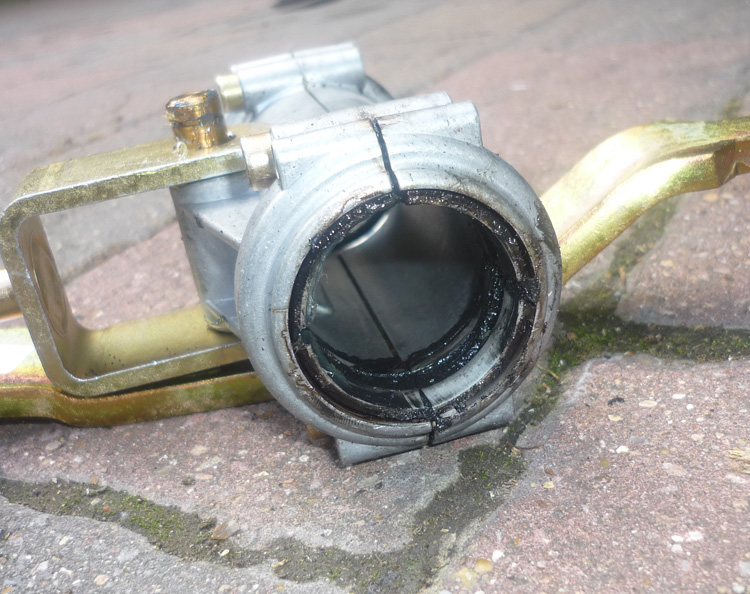
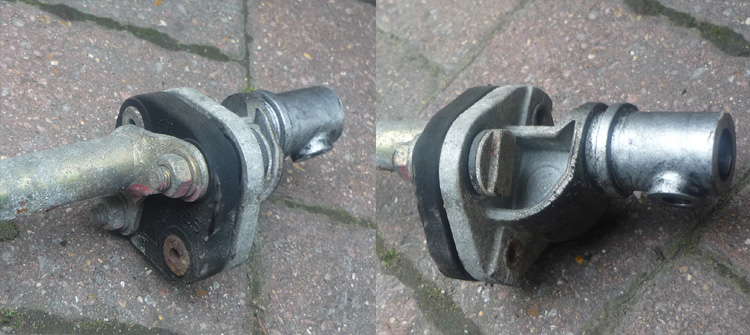
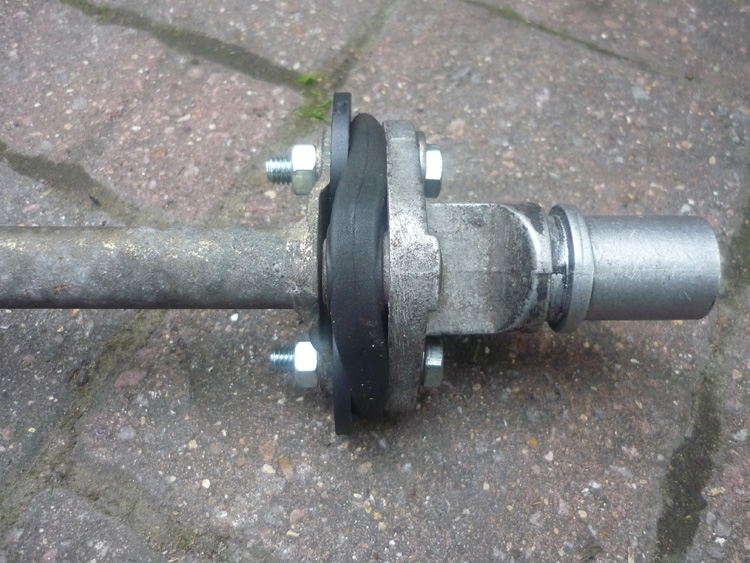
SHIFT ROD As we said at the start, there is a lot of slop in the shift rod as it has gaps and rubber parts to enable it to move sideways and up/downwards relative to any gearbox movement. Although a moveable but solid U joint would be preferable as in the proper RS rod and the 'Golden Rod') in real life you can actually remove this slack on the standard rod with no detrimental side effects. The result is a much more direct feeling shift. Its quite a dramatic difference. First of all turn your attention to the end of the rod nearest the gearbox shift shaft. Pull back the rubber boot and you will see abolt that needs undoing. This will release the rod off of the shaft and then you can remove it from under the car for modification.
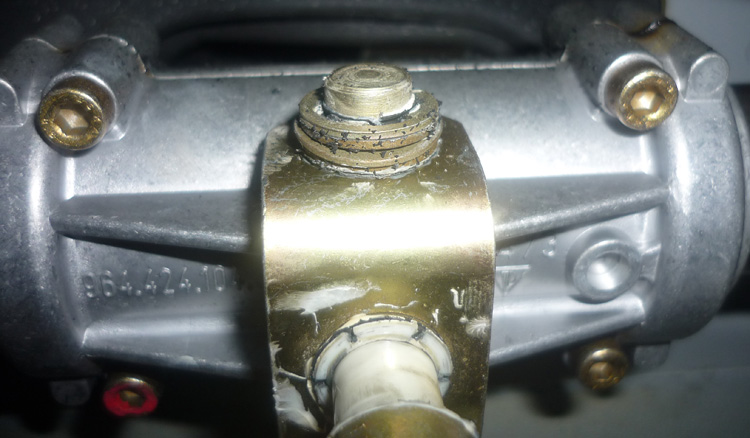
Below you can see that it has a peculiar arrangement that ensures that there is space between the rubber and the metal facing parts.
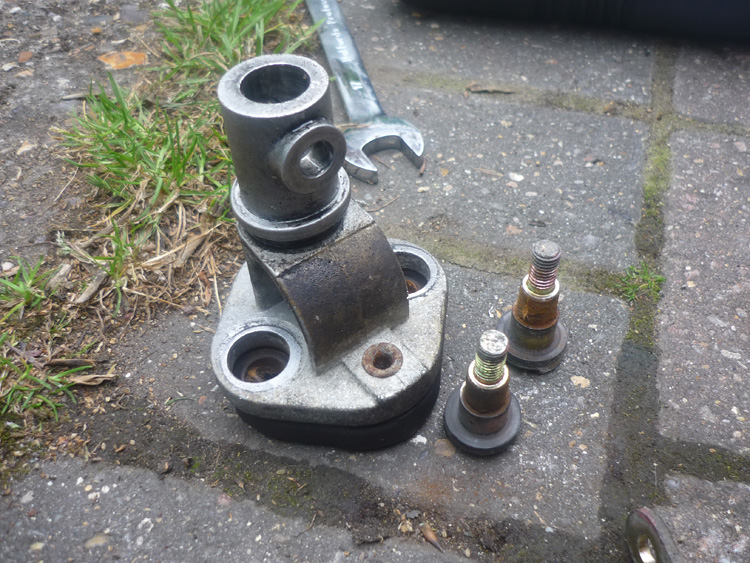
I dismantled the whole thing and then using some strong nylon washers and some new custom nuts and bolts, reassembled everything but tightened up and with the original rubber piece significantly clamped and squashed, nearly all of the play was removed.
Overall these 2 changes make quite abig difference to the precision, feel, throw and overall visceral satisfaction you get from the 993 shift. Given the small financial outlay it all come massively recommended.
|
||||||||||||