RS Anti Roll Bars
The 993 RS has thicker anti roll or 'sway bars' front and rear. They are also adjustable which is obviously desireable for fine tuning. They are stupidly expensive once you've bought new drop links but you can save a few pennies (~£180) by reusing your standard front droplinks which as far as I am aware are the same (certainly the same fitment and dimensions). Another option is to buy some H&R bars which are thicker than standard but far less money. The H&R + Bilsten PSS10 combination is particularly popular over in the USA with the rennlist crowd. There is also an M030 option but I am not sure on spec and I am pretty sure that they are not adjustable. RS bars keep the car flatter in a corner and allow for adjustability both front and rear. The more solid and flat cornering they allow is obviously more in keeing with a lower ride height, uprated suspension and a more focused track and road car. The job to fit them is pretty straight forward but the front bar can be a real puzzle to get out. Sadly there isn't any pre-existing guides on the internet so I had to guess it all myself. I'll share what I found though so hopefully you'll take just a fraction of the time that it took me. Also, i'll warn you here and now that if you are fitting RS bars to a car with KW suspension then the RS rear drop links will NOT fit. If you have rear struts with an adjustable collar for the drop link (e.g. Bilstein PSS9, 10) then that's fine but on the KW the droplink bracket is fixed and it's way too high for the RS setup. As you'll see I solved this with some custom parts that I had fabricated although there are further solutions now being developed so read on.
TOOLS & PARTS REQUIRED 15,16,13" spanners and sockets
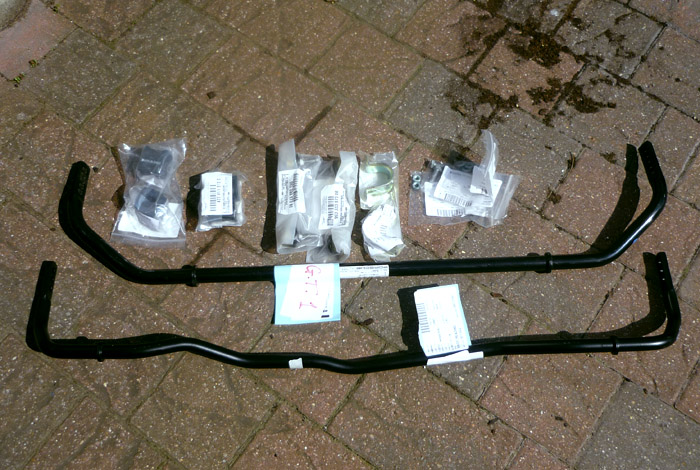
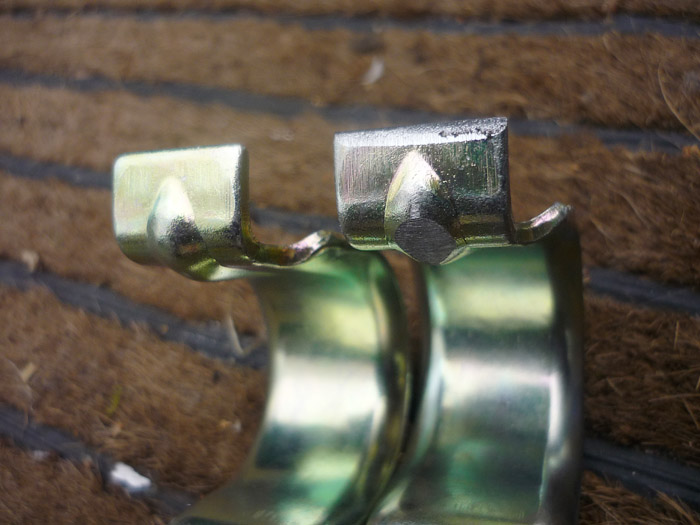
Preparing the Calipers Here's my kit of parts. The 2 bars (made by eibach), some new front retaining clips for the front as mine existing ones were pretty rusty, new RS bushes front and rear (yes they are harder than standard), new rear RS droplinks (you can reuse the standard fronts) and some new screws and nuts for the front clips. All in price was £815 including vat and 10% discount and not including a few quid discount that I will get from selling the old stuff on ebay.
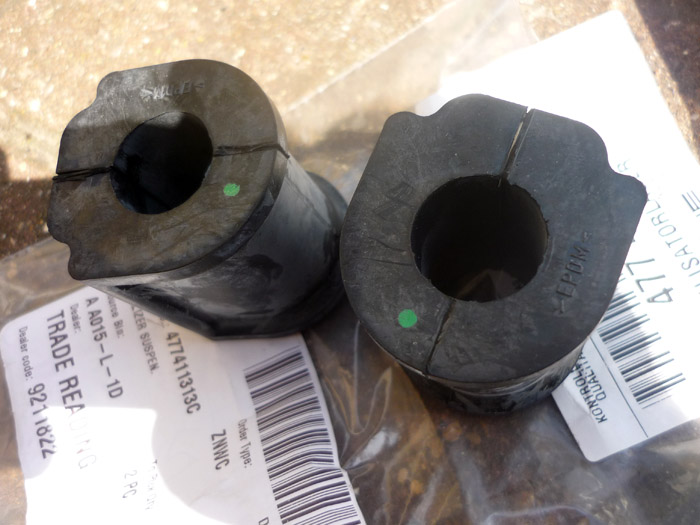
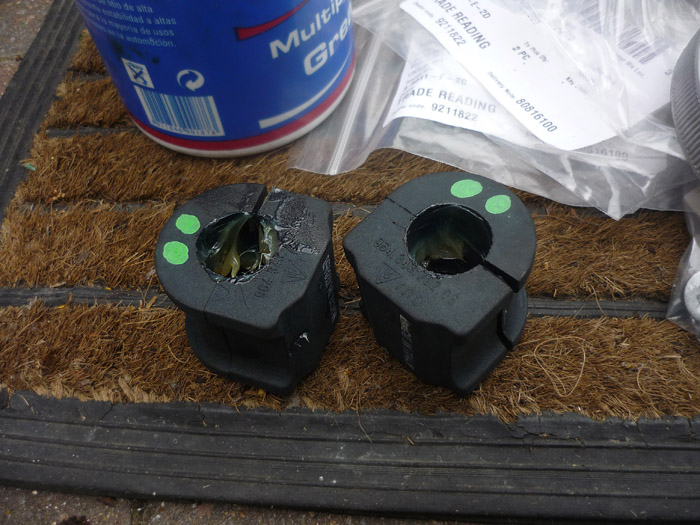
The RS bushes, identified by the green dot.
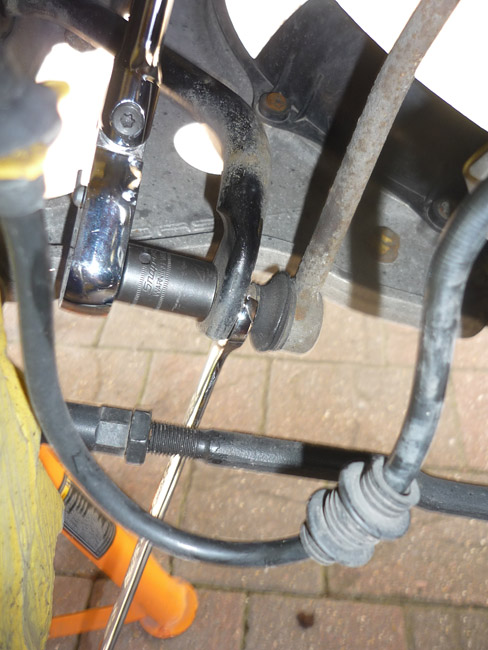
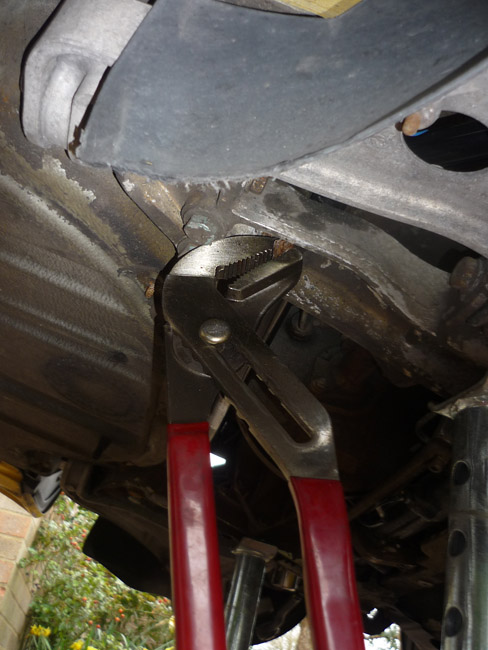
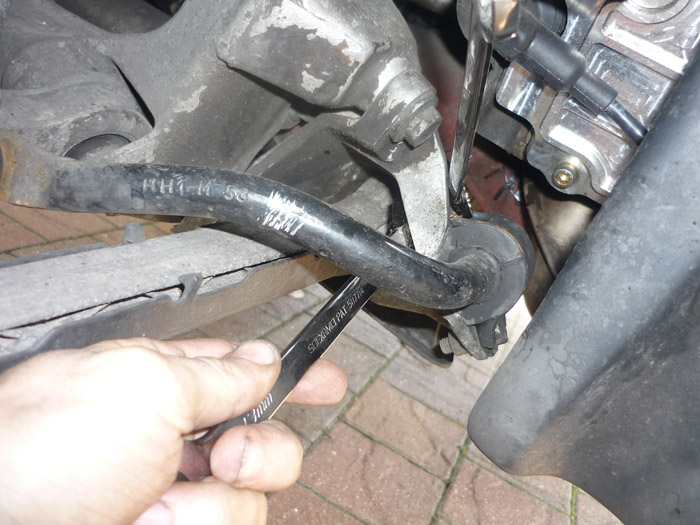
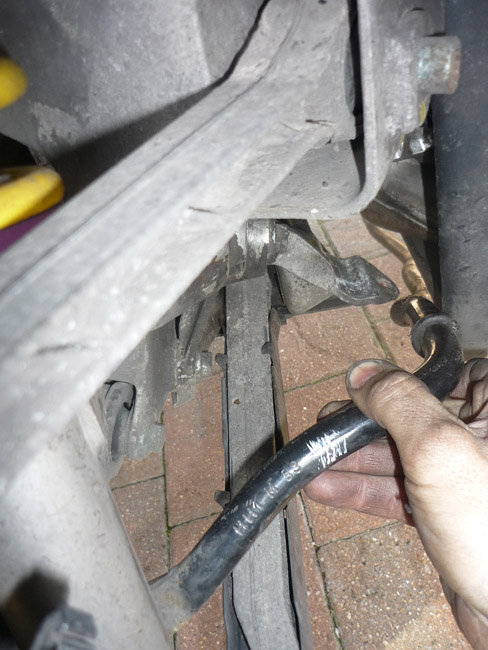
Disconnect the end of the arb from the droplink. Counter hold the flats on the droplink with a 16mm spanner and DO NOT let the droplink boot rotate (or you will split it). Hold the flats firm and then undo the nut with a 15mm tool.
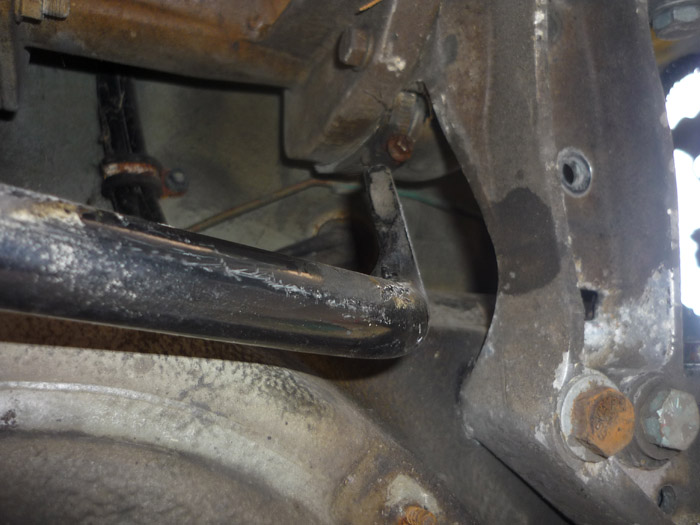
Undo the rearward acrews that hold the front ARB retaining clips in. The forward part of the clip has a hook that slots down into a hole in the subframe member. Now ideally you'll want to pop the whole clip out but its easier said than done especially with teh bush and bar still in place. I didn't read any guides before so ended up removing the arb with them in place which is a painful way of doing it. But if you place a chisel on the tab that extends on the underside through the slot in the subframe and then give it a hard hit with a hammer I am told that the clips should pop out. I ended up bending the protruding tab with some pliers but only after I had removed the front arb.
Here is the forward end of the clip protruding through the subframe member. As you can see, it performs a right angle bend as it goes through the slot. You can hit the end with a chisel and I am told it will pop out this way.
Or if you are fitting new clips just bend the tab into oblivion with a monster set of pliers. The long handles make easy work of it.
Here's the idiotic way I did it though. I sprayed oil over the clips and bushes and then teased the bushes out.
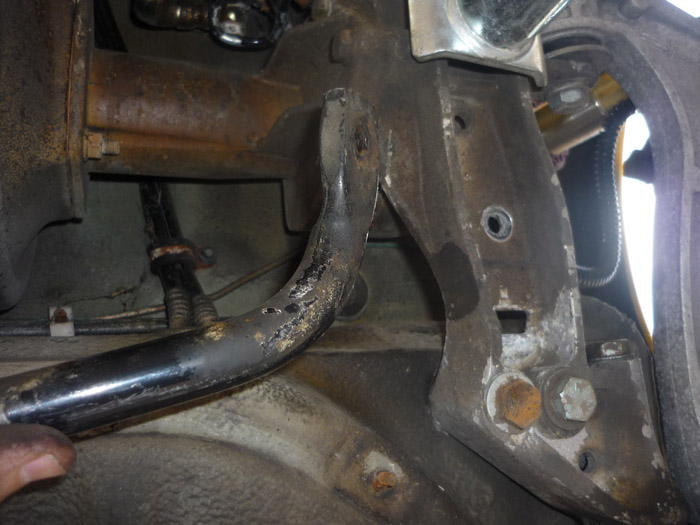
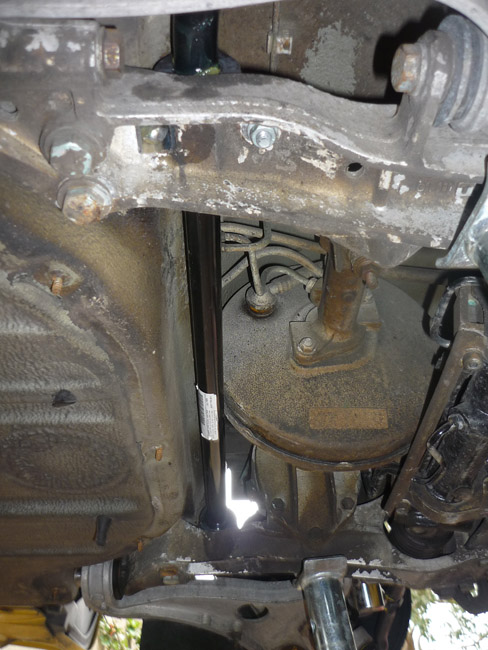
Now to removing the front arb. You want to do this methodically and not guess and bodge around like I did. Firstly the arb comes out of the NEARSIDE wheelarch. You will rotate it upwards (anticlock as you look at it from the wheelarch) so that the ends are vertical as in the picture and you will pull it upwards at a substantial upward angle as shown in the picture. It does not come out sideways. The offside has to be relased and then dropped to the floor and the it can be pulled UPWARDS.
So to reiterate, the key is that you will be able to release the bar once the other side (nearside) of the bar has dropped free of the car. As its rotated you will pull it through the arch FORWARD of the damper body as in my picture. Here is the OFFSIDE end of the bar still up above the subframe member. You can see that the end is already rotated upward in readiness.
With the end pointing up it can then fit through the space between th heater vent, subframe and the tub.
And here the end is clear and you can then drop it right down to the floor and start pulling it through the nearside arch.
As you pull the bar all the way through you carry on rotating it counter clockwise. Here you see the offside end coming through and being pulled toward the front of the car. If you follow this and my wording is clear then it should take less than 5 minutes (rather than 60 mins !). It's been a while since I actually did this job so my memory may have left out a bit of detail so if you perform this job and have anything to add then please mail me and I can add it in.
To fit my new front clips I found it was necessary to file away a little of the metal on the round button that is machined into the angled end. With this done you can position the end in the subframe slot and then tap then straight in with a hammer. Once they are in and bolted down there is NO way they are moving so don't worry about filing away a small bit of metal here.
Grease up the the inside of the front bushes.
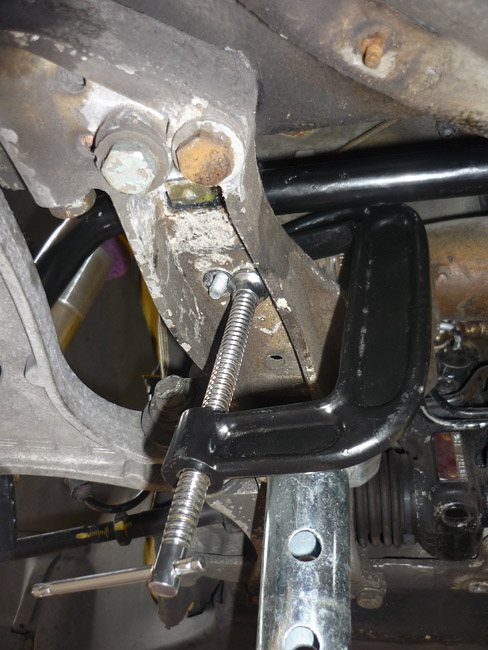
And now another slightly tricky bit. The clip and new bush and arb is a very tight fit. It needs an awful lot of pressure to compress the whole assembly and make it short enough to get your screw through there and the bolt onto the first few threads on the underside. If you have a helper then fine but my solution was to use a regular C clamp onto the head of the screw, the other end offset slightly to clear the other end of the screw. Tighten down and the bush and clip gets compressed and you can then reach up and get a nut on finger tight.
All done. Nice and clean.
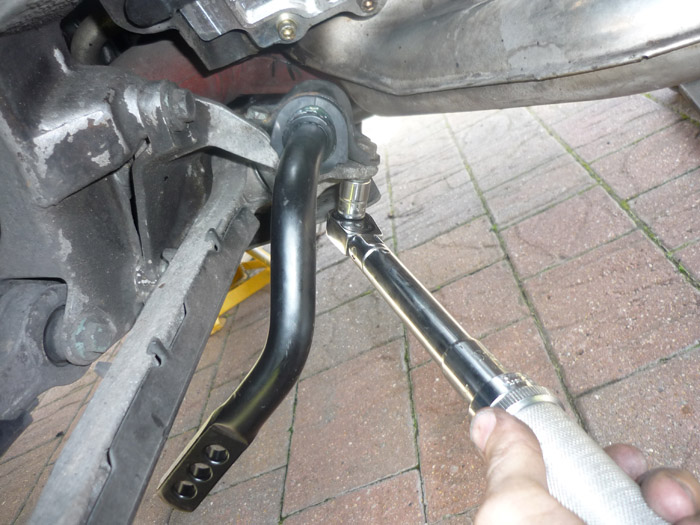
Re attach the ends of the new bar to the droplinks and once again, do not let the boot rotate. I know that a lot of the RS owners run fully stiff front and rear. I decided to go for the penultimate hole for my intended use and test at that point.
The new front bar in place.
The rear bar is a doddle, providing that is, that you don't run KW suspension. Undo the two screws on each clip.
Undo the droplinks.
Remove the old droplinks from the struts.
Prise off the old bar and bushes. Scrub away any white corrosion underneath the bush.
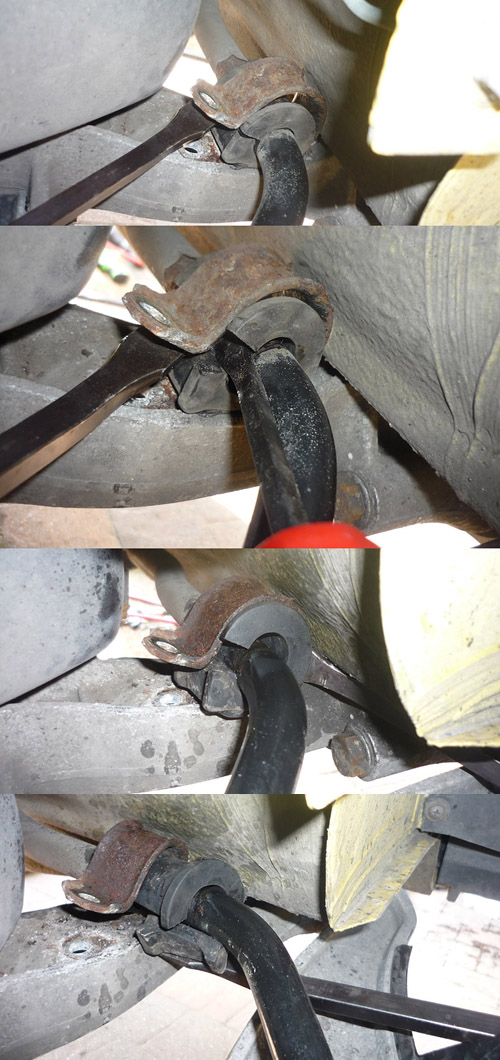
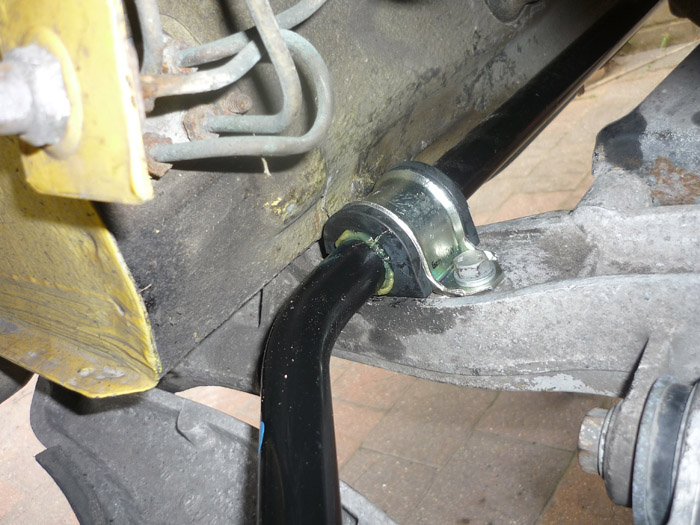
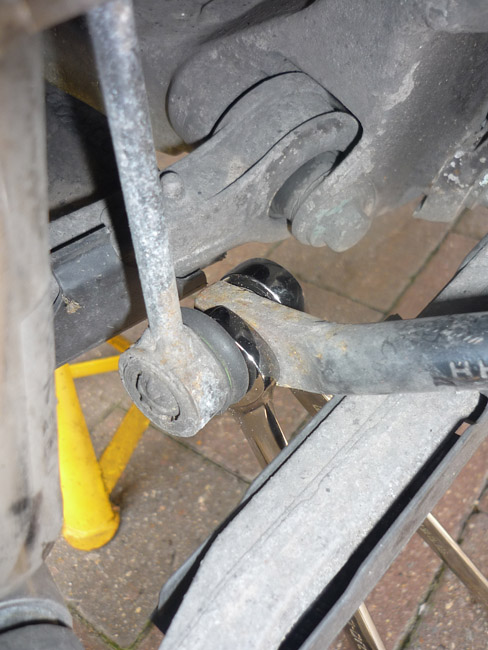
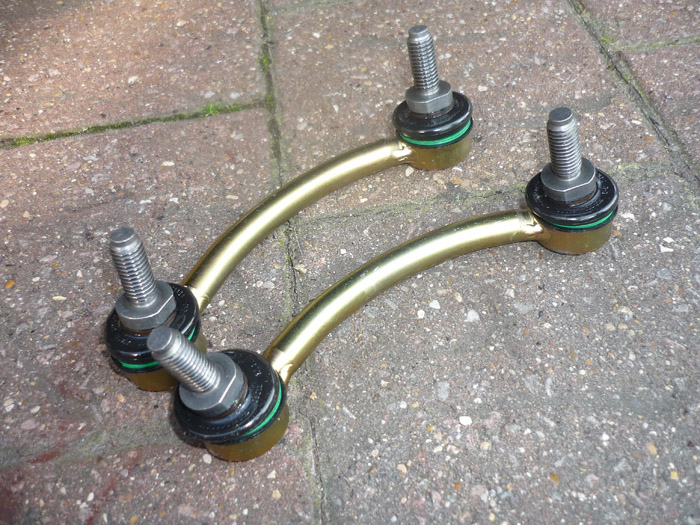
Here are the longer and curved RS rear droplinks. The RS rear bar fits very differently from the standard bar. The ends sit UNDERNEATH the rear lower toe arm. Do NOT try and install the bar any other way or you will risk smashing your suspension into tiny little pieces (yes, its been done, search on Rennlist if you like scary horror stories).
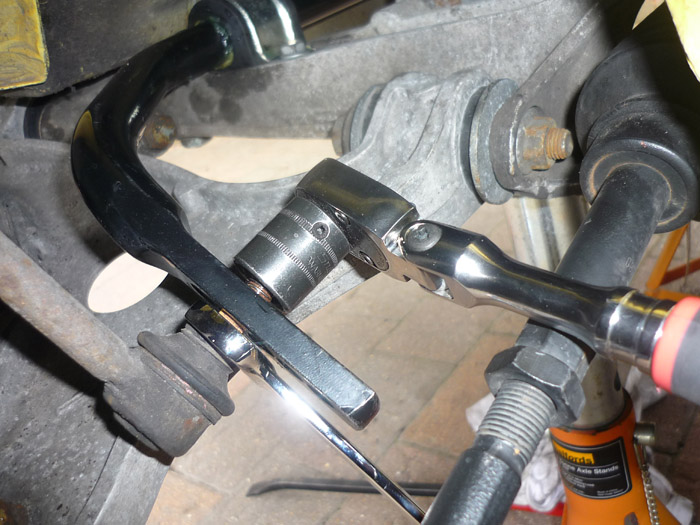
Getting the orientation right. A good shot of Chris Franklin's lovely little geo markings as well.
Fitting the new bushes and clips back on. Note that this picture is wrong. You want this all loose. Do NOT torque or tighen anything up until you have got the droplinks in place. You will want to finalise the bar's natural rotation and then tighten the bush up. In fact, if you are being finicky like me then you will want to fit your droplinks and then get the suspension at its rest pose and THEN tighten up the bushes. You can do this either by putting the wheels back on and getting the car onto a proper ramp or an inspection pit with the cars weight onto ythe wheels, or you can jack the uprights up so that they are as high as they'd be with the car sitting on its wheels. It's only a minor thing but it does mean that when the car is at its natural rest position where it spends most of its life, your bushes are not twisted. Personally I enjoy the satisfaction and reassurance of the little details such as this.
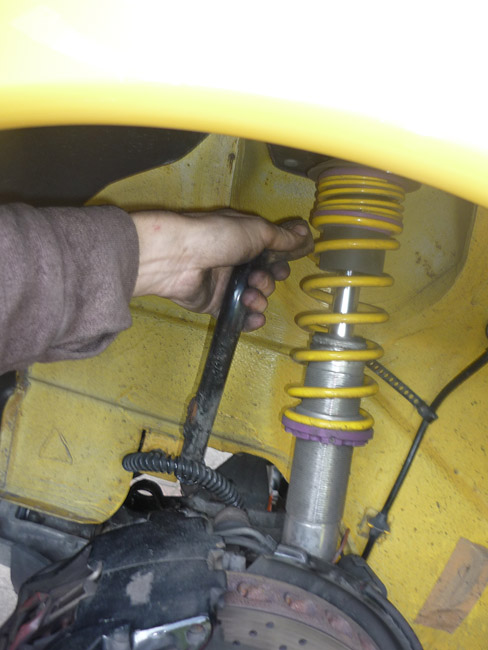
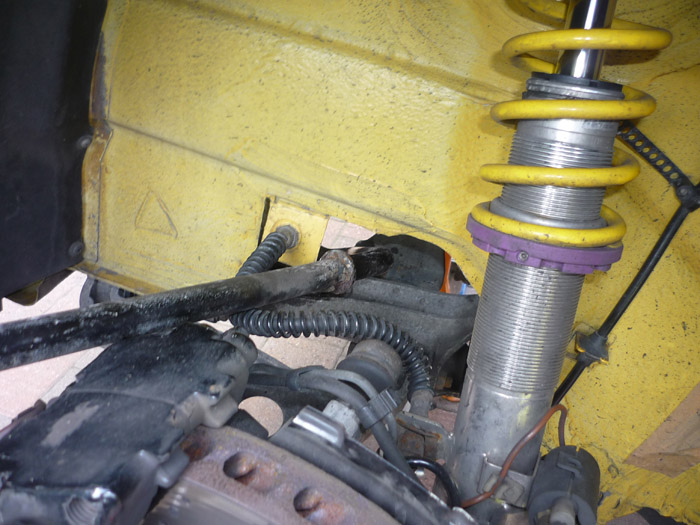
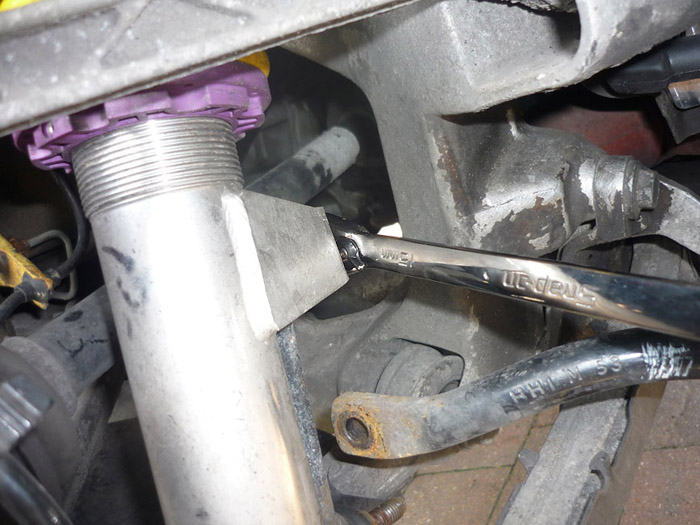
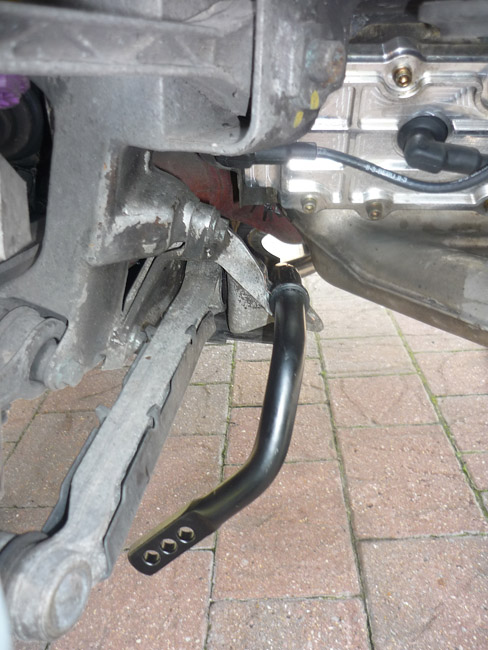
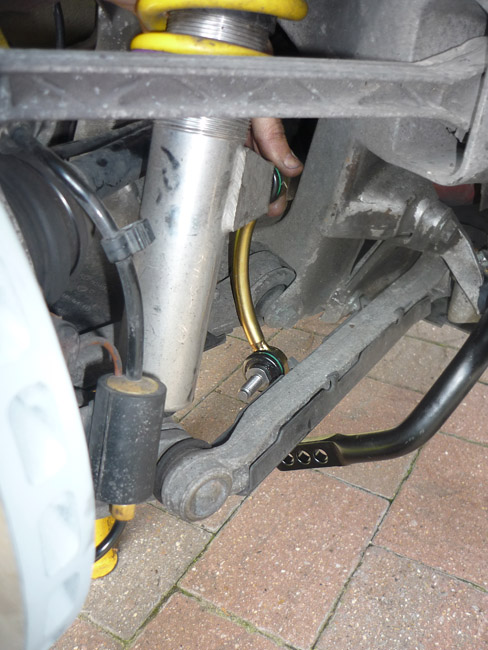
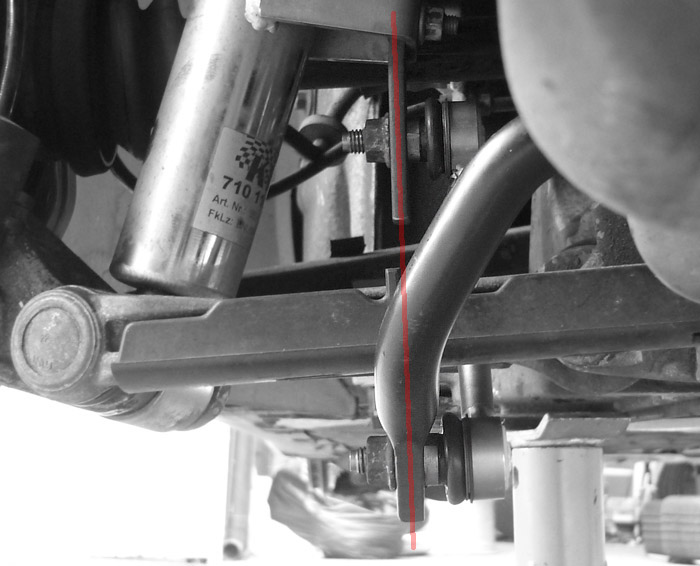
Here you can see that the static KW droplink bracket is way too high. Pull up the bar anymore to try and reach the droplink and it just hits that long toe arm.
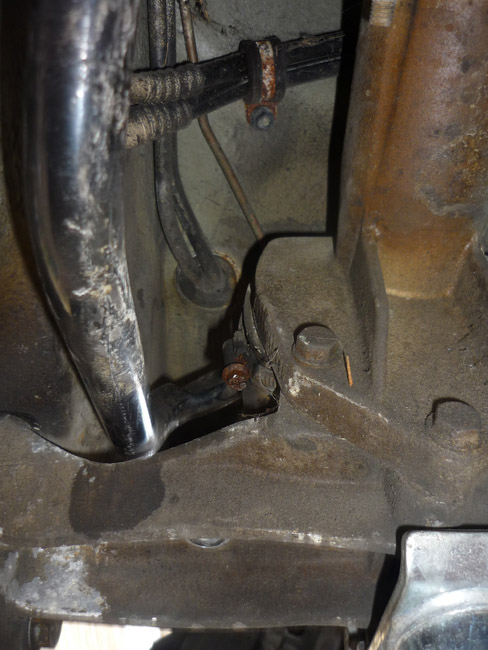
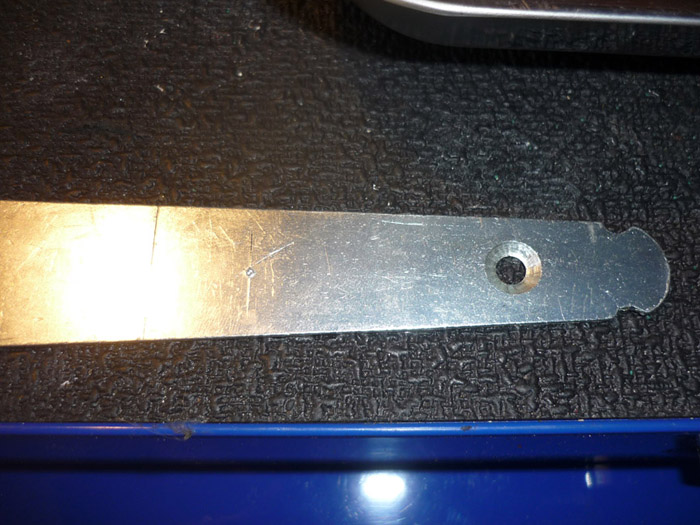
Here's where a bit of scrap metal or ali sheet comes in handy. One old hinge for a shed door. I measured the approximate distance between bar and droplink end and then created that same distance on the sheet metal. Drill a second hole and the cut to length with a hacksaw.
I made the holes oversized so that I could slide the bracket up and down a little to suit, and I also bent the whole bracket outward at the point where it leaves the metal cradle on the KW. The bend means that the bracket protrudes downards from the KW but then also bends inboard slightly toward the droplink more. The droplink should be as vertical as possible with its ends one above another.
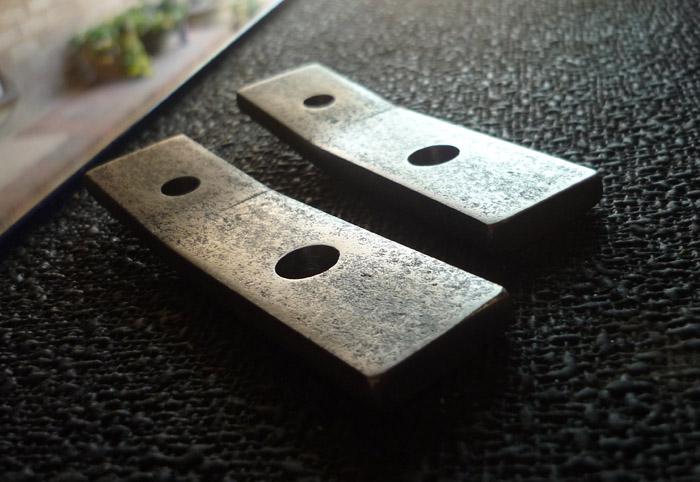
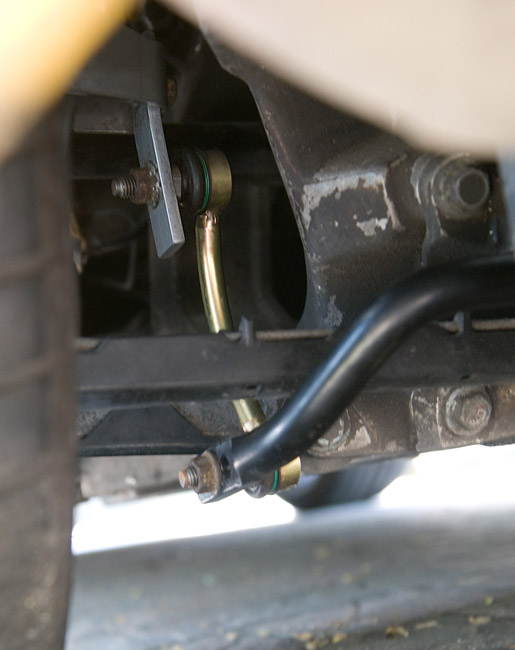
When my flimsy bracket sort of worked I took it to a metal fabricator and had these big beasts made. They are very thick and strong. They cost me just 10 quid; some things, just some things, are still great value in life. I sanded them down and then gave them a few coats of hammerite.
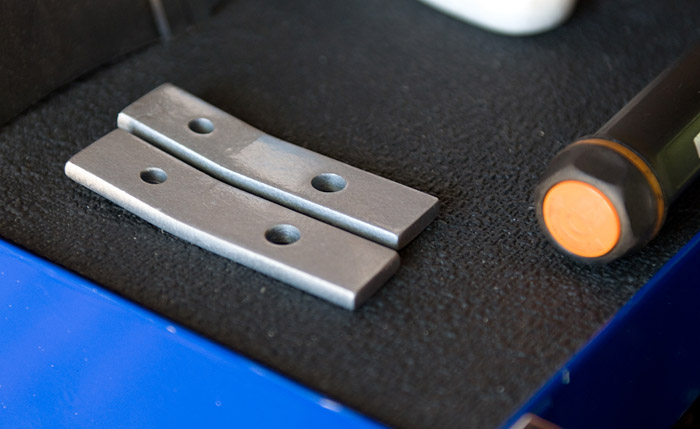
Here you can see the brackets on the car. The length is good as the bar is where it should be and won't be touching the Toe arm. The bracket is in line with the flat end of the ARB (give or take) and the dloplink is parallell to this line as well. The suspension is in full droop and if you imagine the wheel going on and the suspension moving up to rest position then the droplink will probably be almost perfectly vertical then with one ball joint nicely above the other.
There is a neater solution than this. Our old friends FD Motorsports (they of the Goldenrod) are currently designing a longer all stainless droplink which will work straight out of the box with KW and RS rear bars. With the dollar the price will be cheaper than the standard RS droplinks so it will be cost effective as well. I am told they will be ready in a matter of weeks. I will report on the difference the RS bars make very soon. A uick drive tells me the difference is marked. The steering alone has changed quite dramatically with the turn in feeling a lot sharper and more direct/responsive. UPDATE:
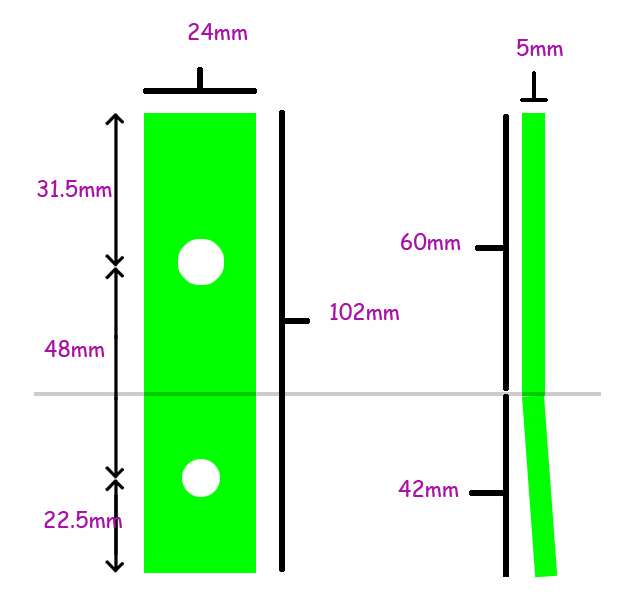
I have had a few mails asking more about my brackets so here is a tech drawing. Note that its rough but probably within a millimetre or so. I also found that they were slipping around the C bracker that comes off the KW so make sure you use some decent washers and do them up tight.
|