Rear Chassis Corrosion - support plates
Below the 993's rear quarter panels lurks a lateral plate which supports the body panel and also aids the mounting of the PU ( more specifically the rearward PU bracket). If you've ever peered into the rear arch with the liners removed you probably would have seen this. It's a simple sheet of steel which is colour painted and bolted down against the main chassis legs that run down the rear of the car. Below it a formed ali heatsheld is wrapped against it, protecting the area from the hot silencers below. The problem is, at the factory after priming, these supports were bolted onto the main chassis legs before painting. Much like the dreaded windscreen, this whole area is prone to corrosion and recently on the 911 UK forum, lots of owners have been in for some nasty shocks when they have investigated this area. Some poor folk's cars were so bad that the rust had eaten right through. If you haven't checked then tomorrow mighht be a good idea ! I don't wish to alarm any owners out there but with these things it's better to catch the dreaded rust before it gets too bad. So here is my journey and i'll be explaining how to review this area on your 993 and what to do about it. First of all this guide assumes that you have removed the rear PU, bumper and both rear silencers. You can read about how to achieve that in my Cay Bypass article.
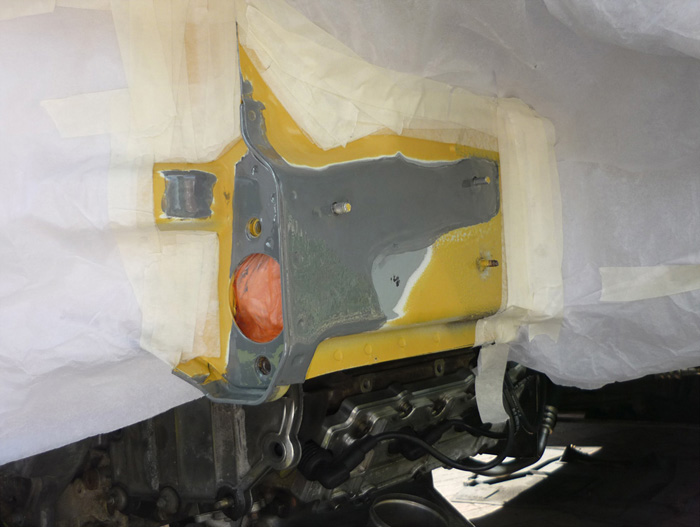
Revealing the truth
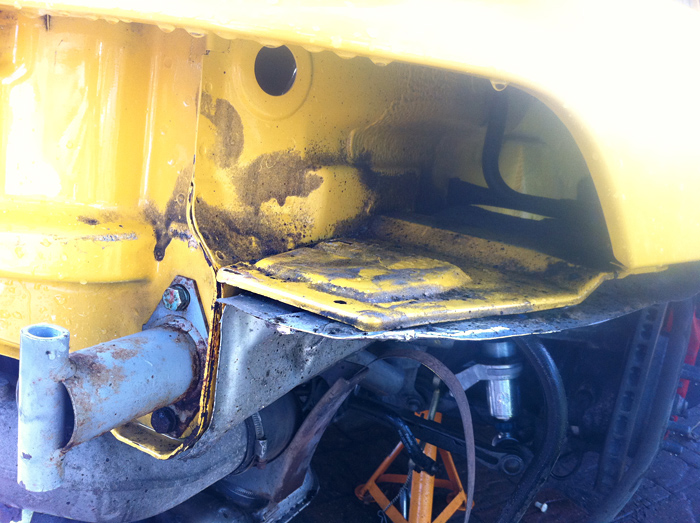
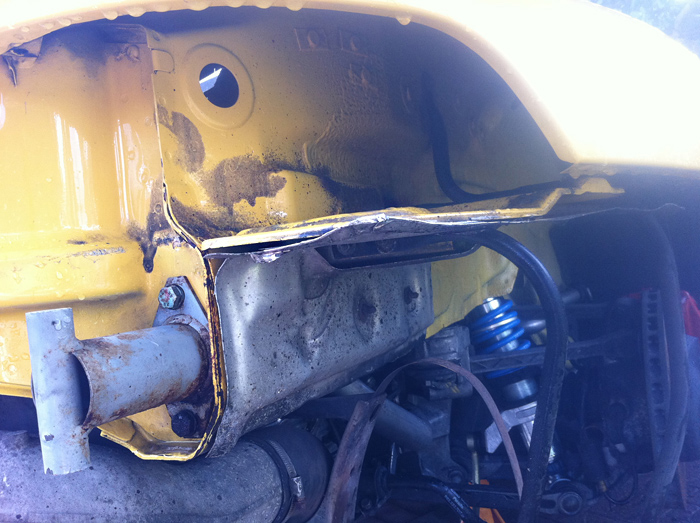
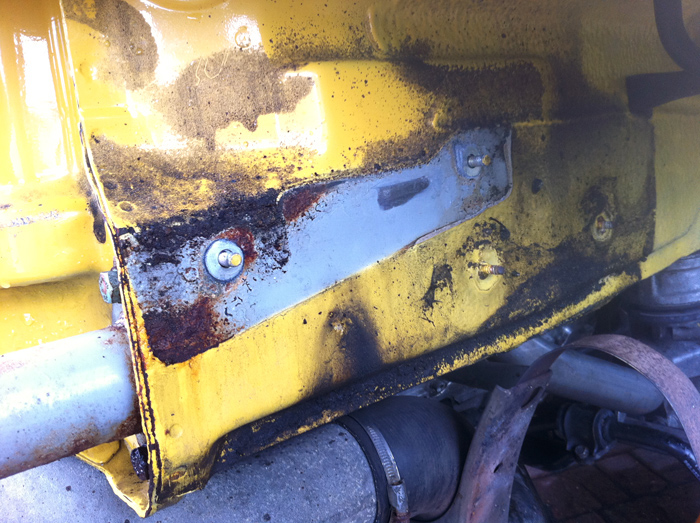
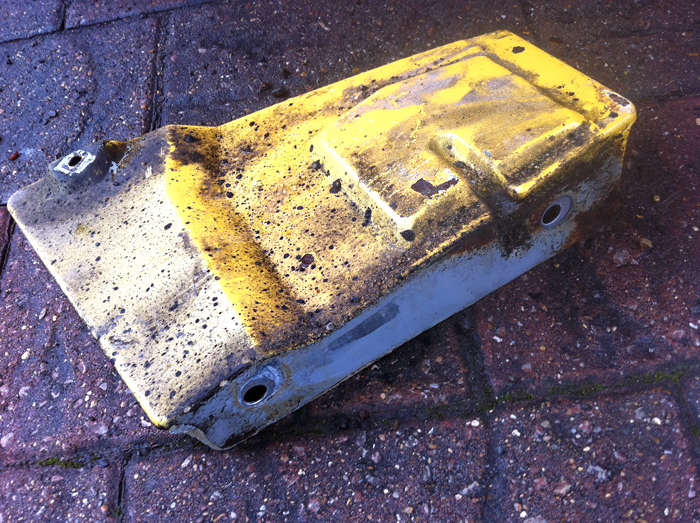
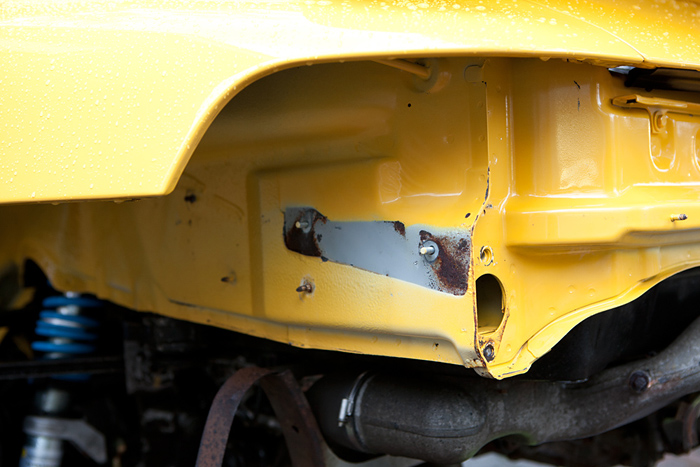
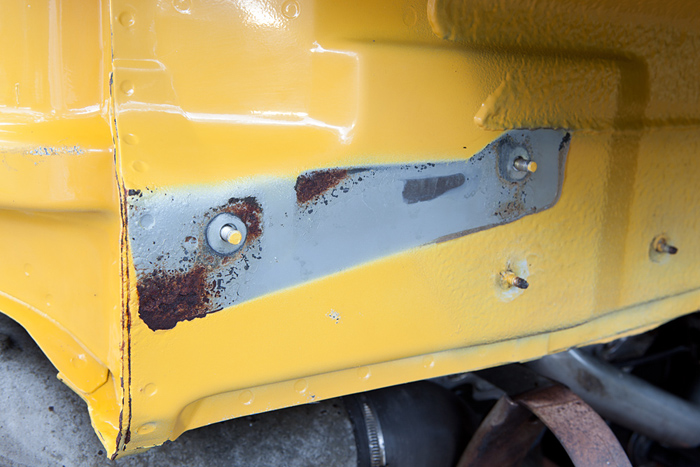
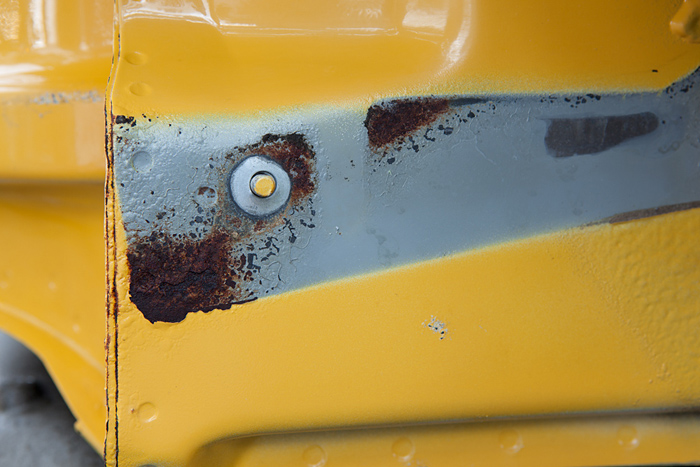
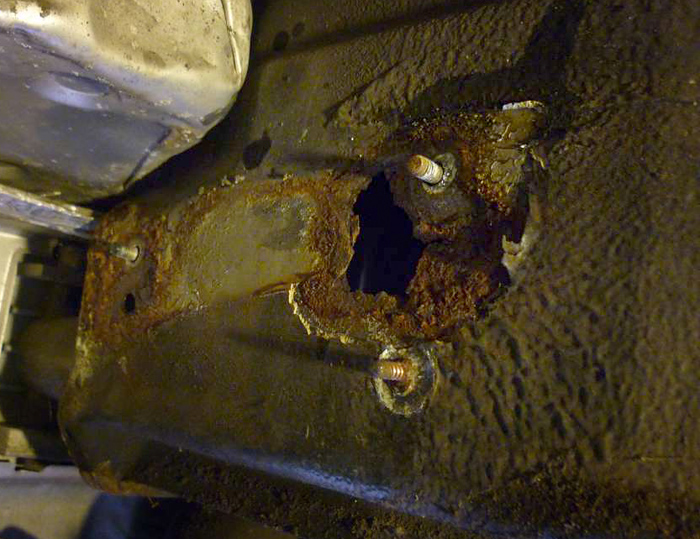
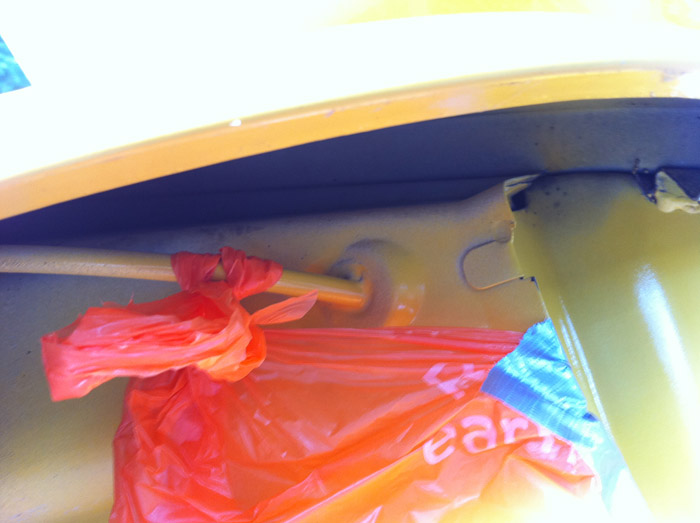
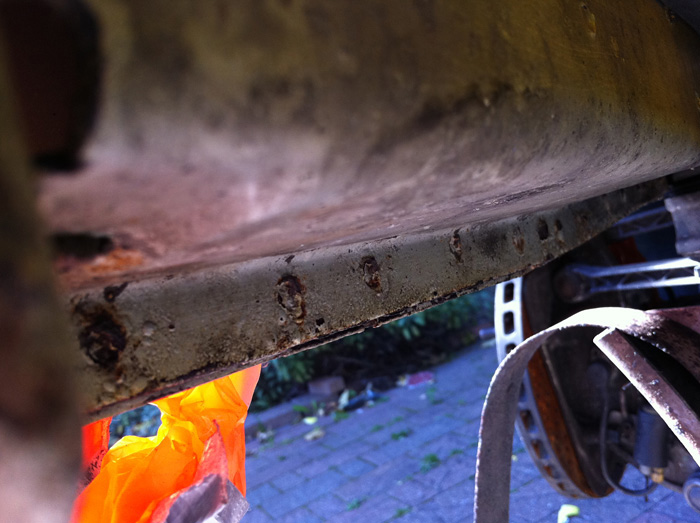
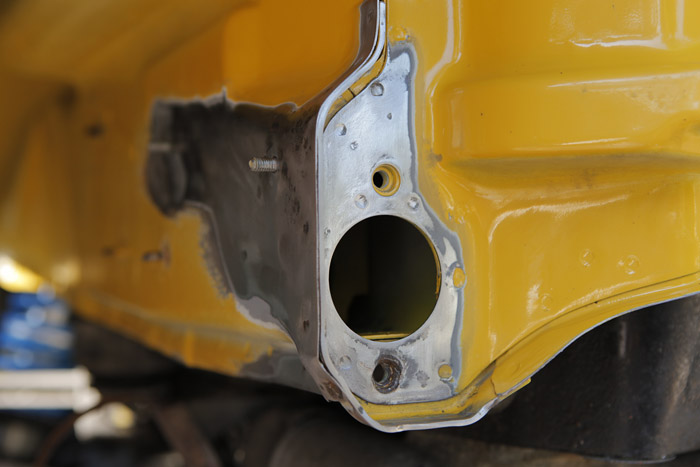
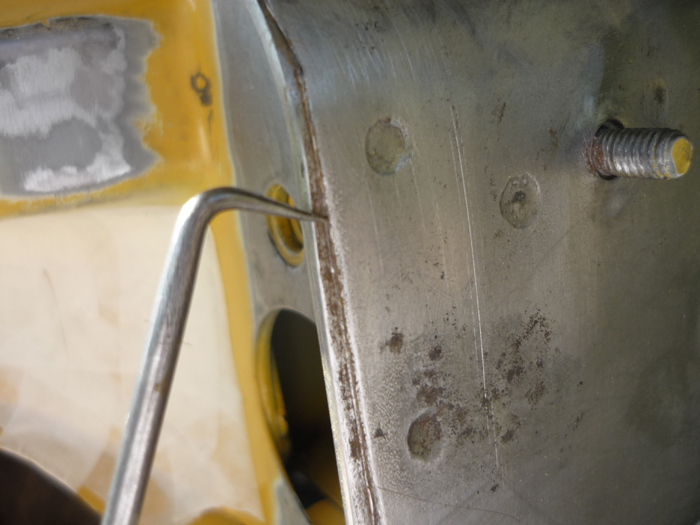
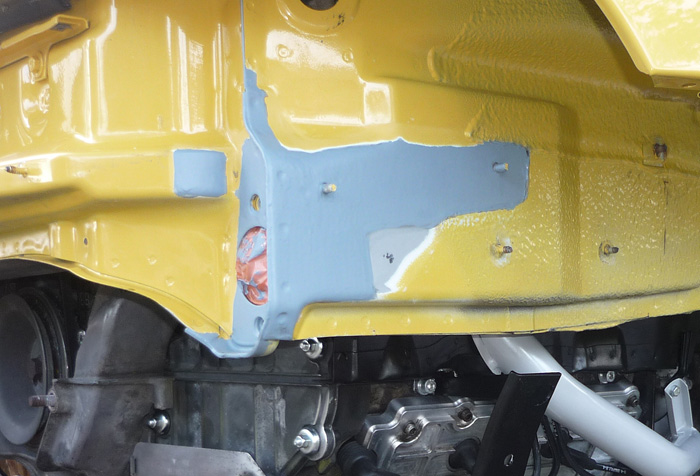
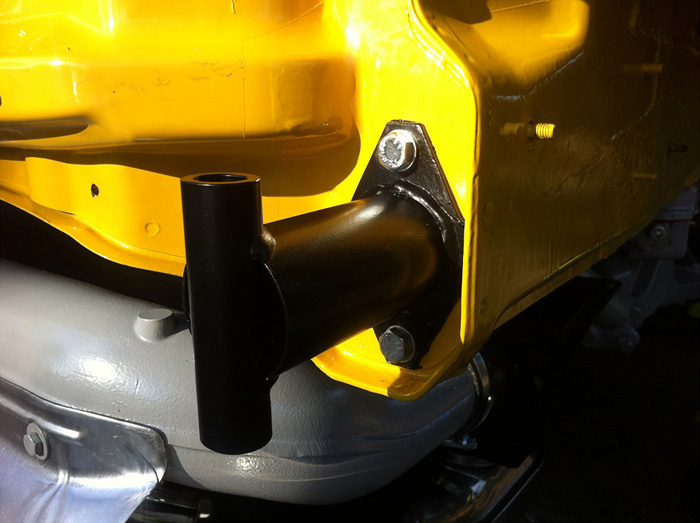
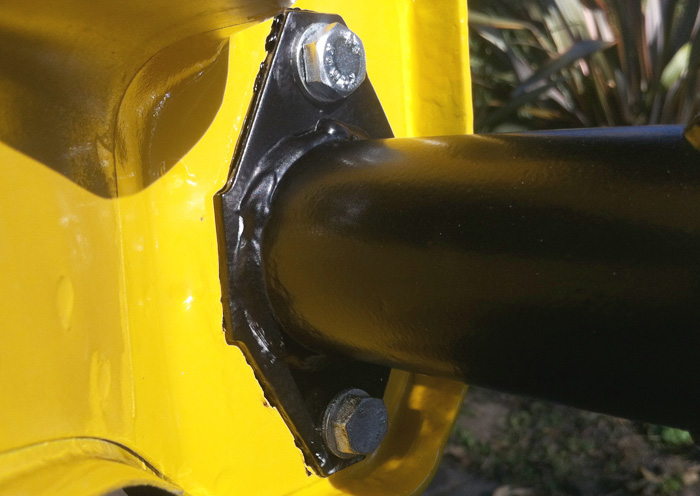
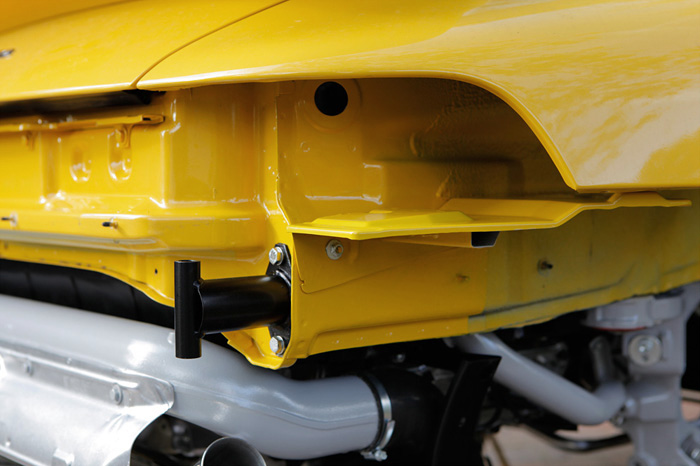
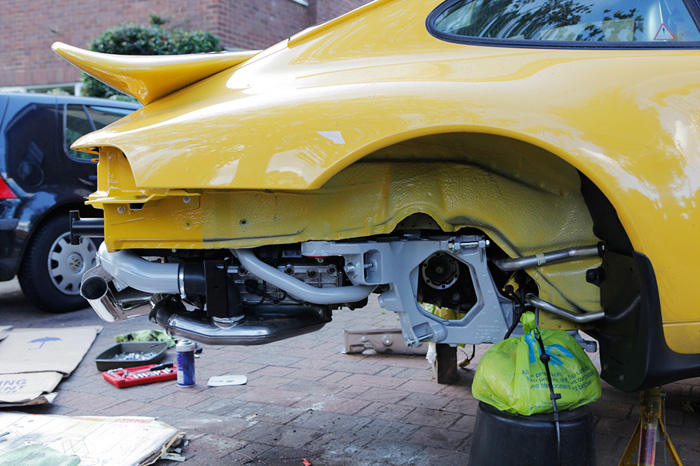
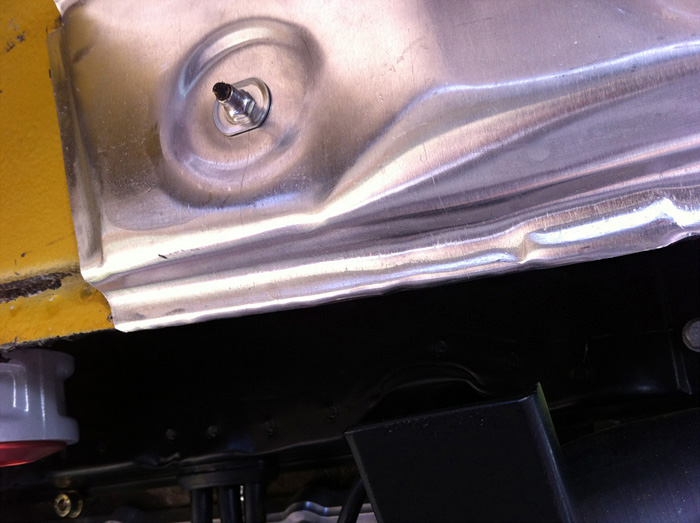
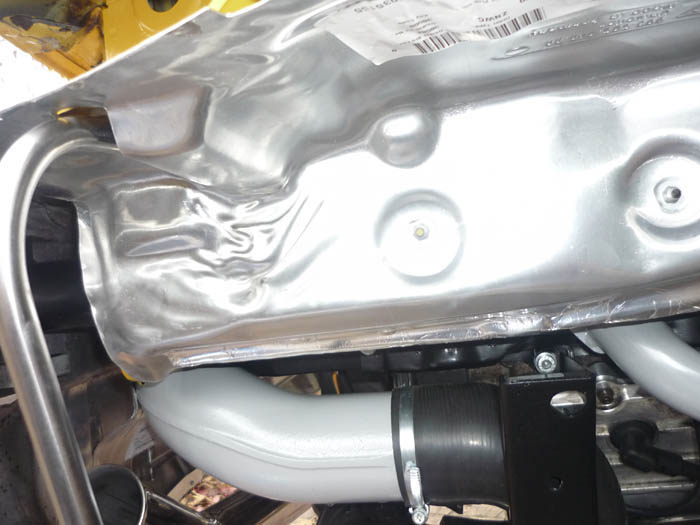
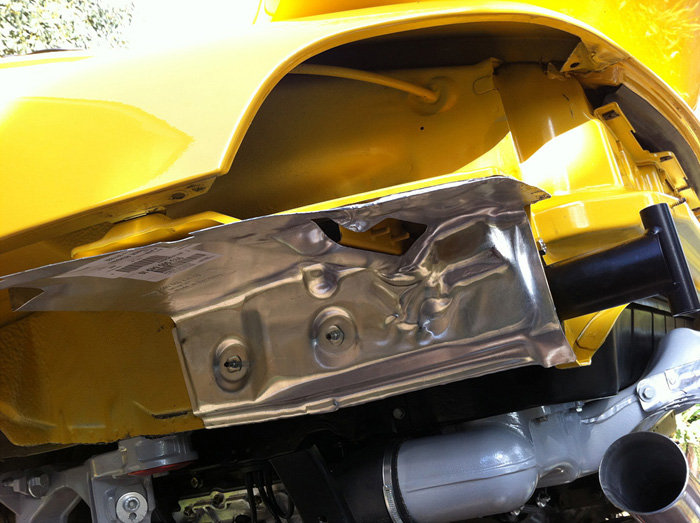
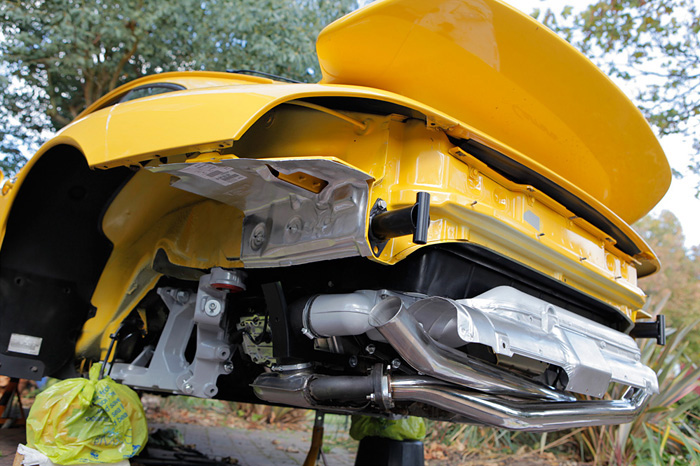
In these pictures you can see the RHS or offside support plate that extends out from the main chassis leg. Below it is a heatshield and the rearmost bumper bracket (also prone to corrosion but more on that later). You can see that this whole area is a haven for mud, crud and general grime and dirt.
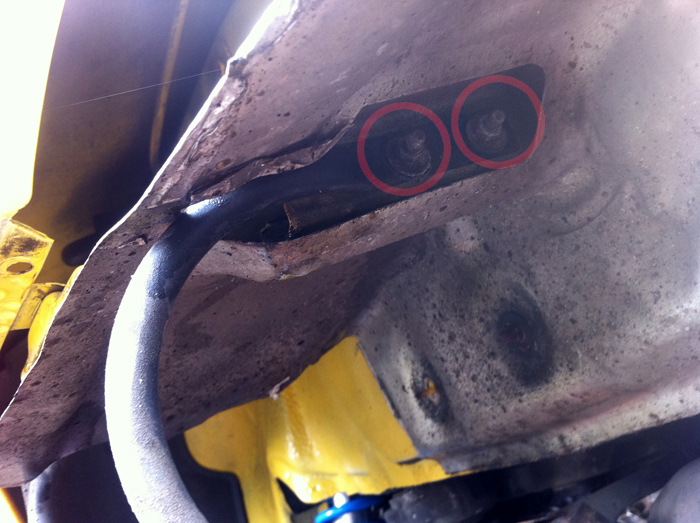
First remove the rearmost bumper bracket. Undo these two nuts + washers here and pull it away.
Now you can take the ali heat shield off. I think this 8mm and just two nuts which are on captive screws which protrude from the chassis. Now these have a tendency to stick and they may be completely deformed or rounded. Try some heat, some penetrating fluid, shock and unlock, maybe nip up alittle before you undo etc.. I was unlucky with one of mine and just had to bend one of my heatshield aroudn and over it.
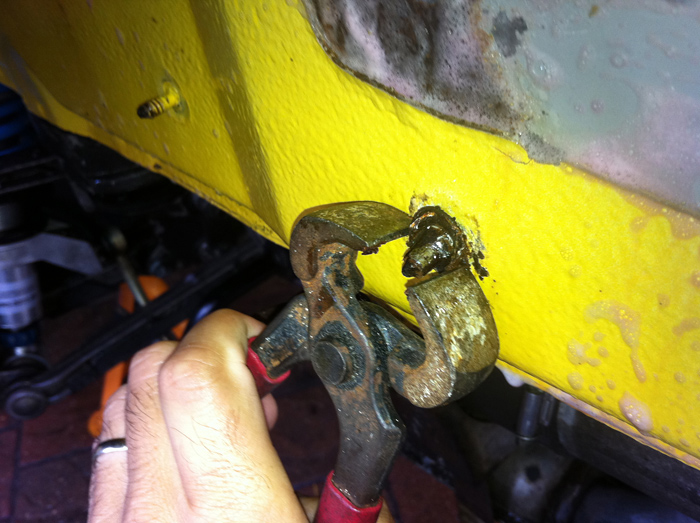
You can see in this photo I removed the nut later on with some pliers.
Don't forget that the front of the heatshield also kind of clips into a speed nut which is used for the rear wheel arch liner, so pull the shield away and down here.
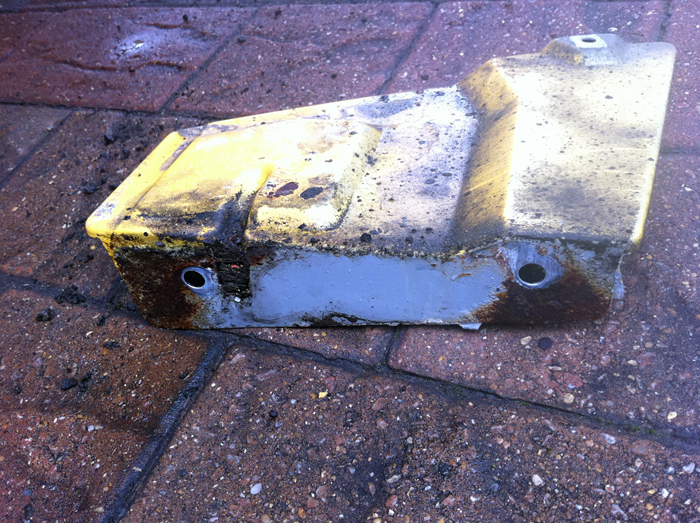
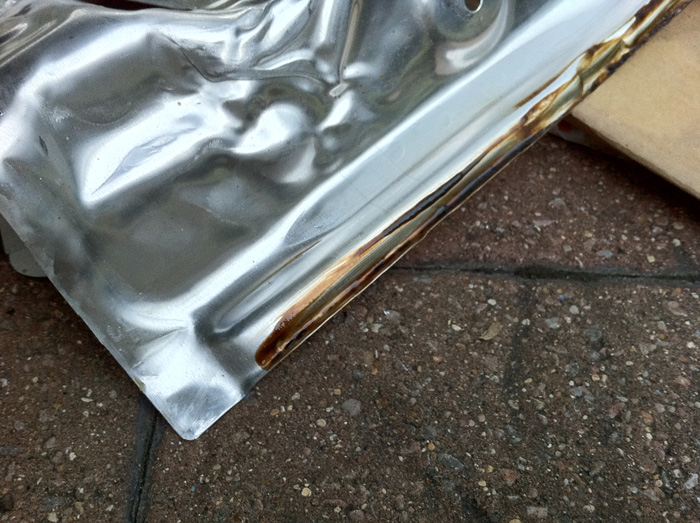
The simply remove completely. You can see on my nearside cover there was a ton of gunk that had been jammed up the lower edge.
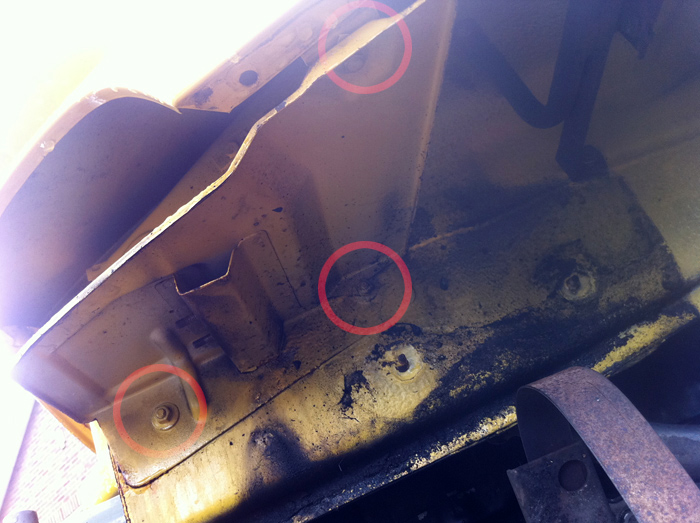
With the heat shields off you can now take off the supports. Just 2 nuts into th chassis leg and then a vertical nut that goes into a bracket that come off the rear wing. Take a deep breath ....
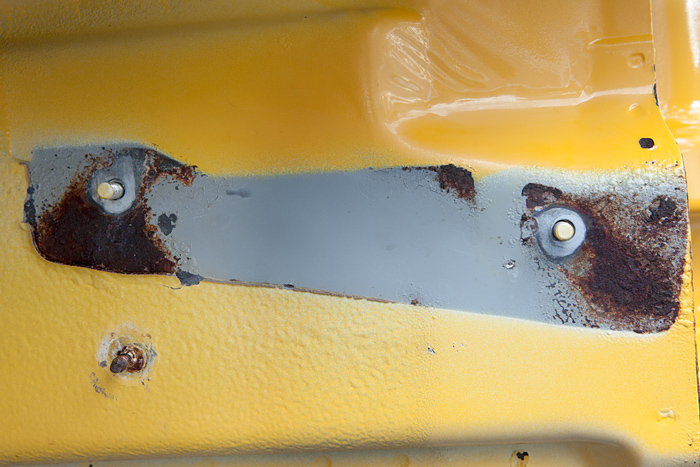
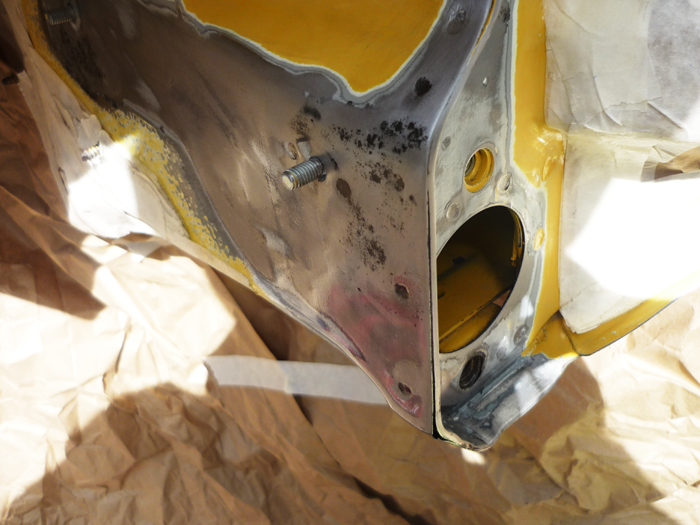
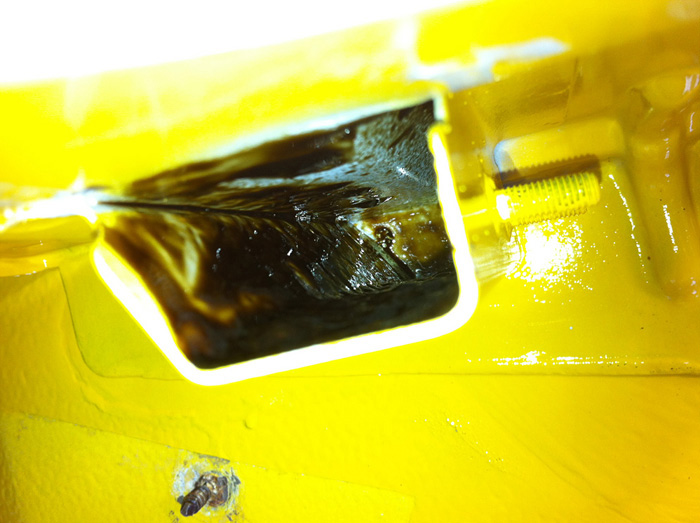
And ouch .... some rust for sure but despite the mess it doesn't look too bad, just some surface corrosion by the looks of things.
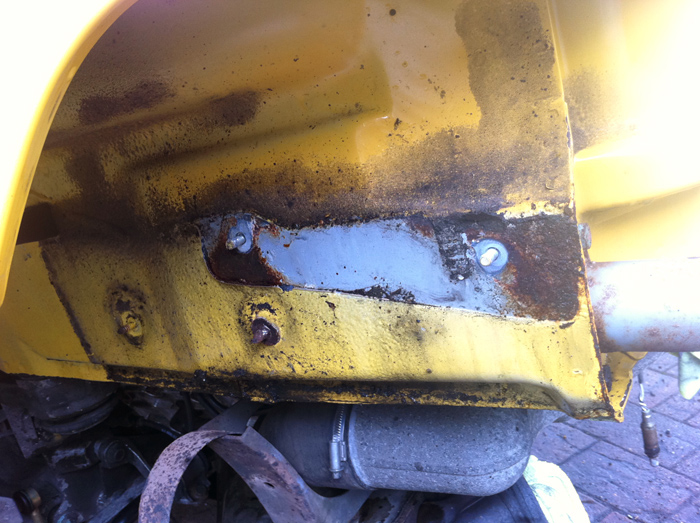
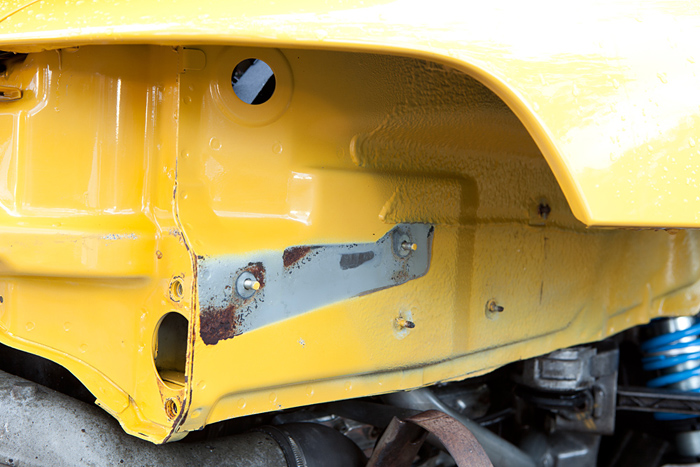
And the other side....
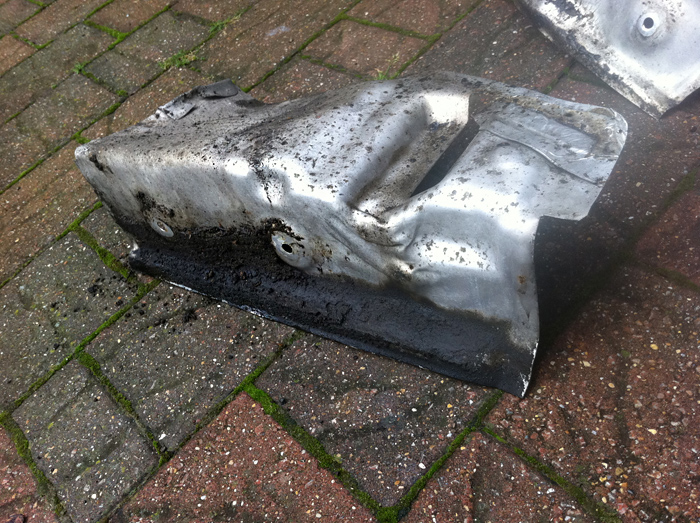
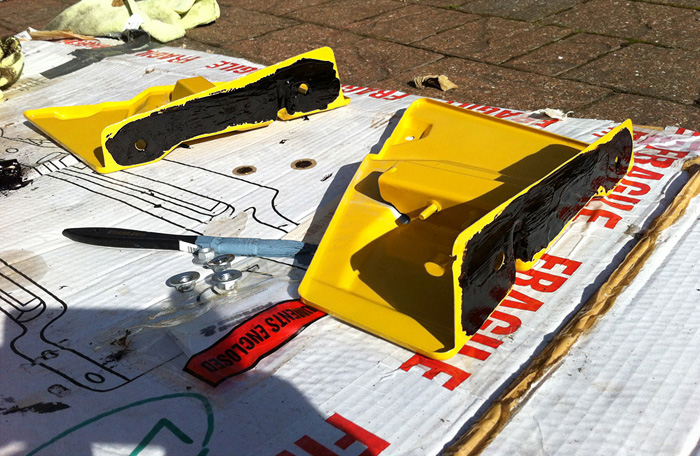
And the supports themselves. Perfectly salvagable and nothing that a grit blast won't sort out.
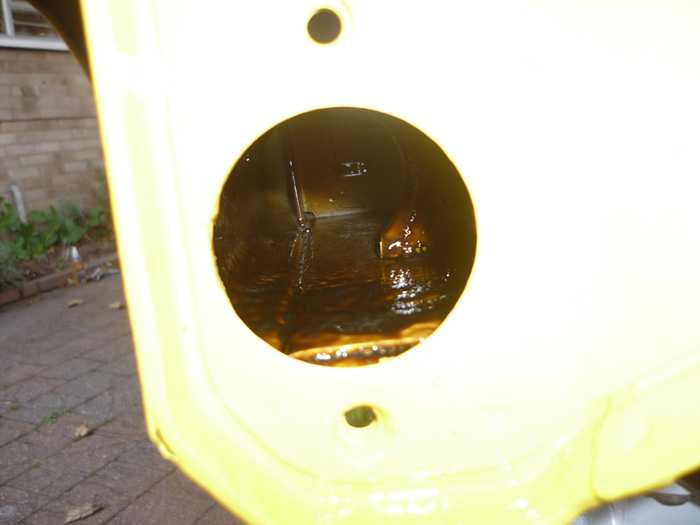
Take off your two impact absorbers as well. These could well be corroded as well and although you might wish to refurn them like me, you also want to look inside the chassis legs to check for corrosion on the inside. I recommend some heat for the lower nuts as they are prone to corrosion and stricking. I actually sheared one of mine so now I have a filthy great big stud to remove somehow.
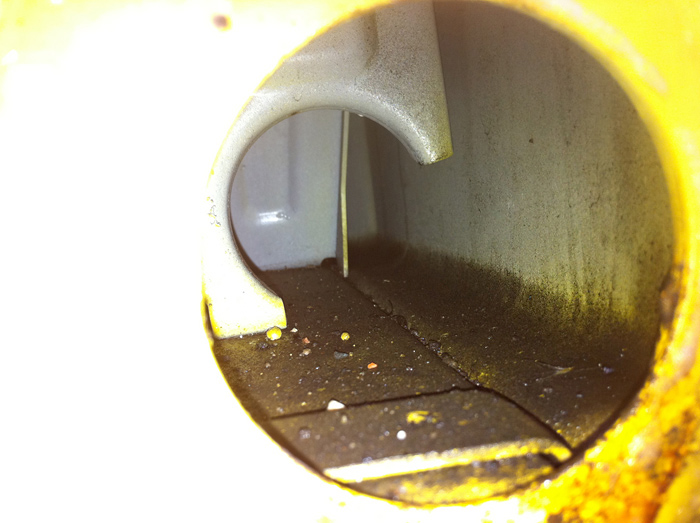
Here we are peering down into the legs where the impact absorbers were. Nice and clean here luckily and it will be filled with rust prevention before we are done.
The other side looks good too.
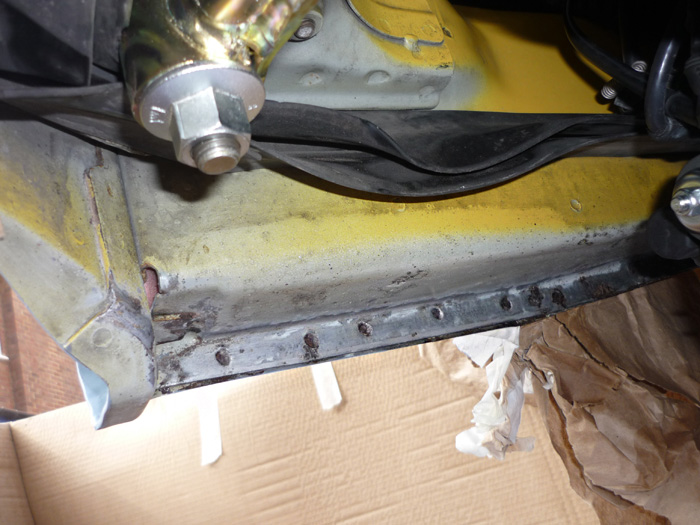
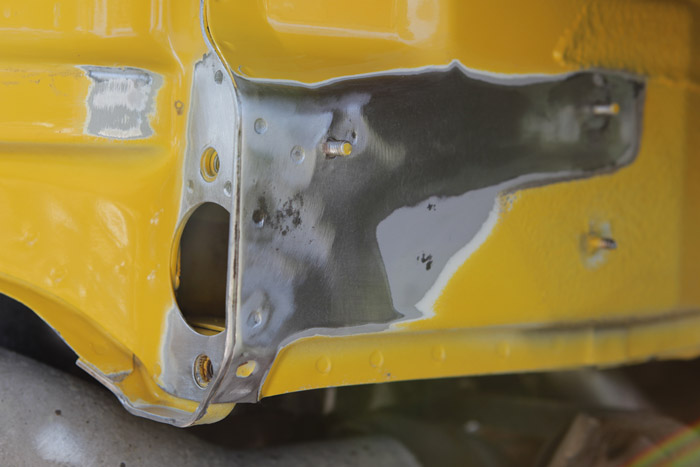
After a good proper soak with billberry wheel cleaner and a quick rub of tar remover the full extent of the problem is a lot clearer. I have been extremely lucky and this is one of the best 993's that's been seen on the internet recently. This will be easily treatable with the minimum of fuss.
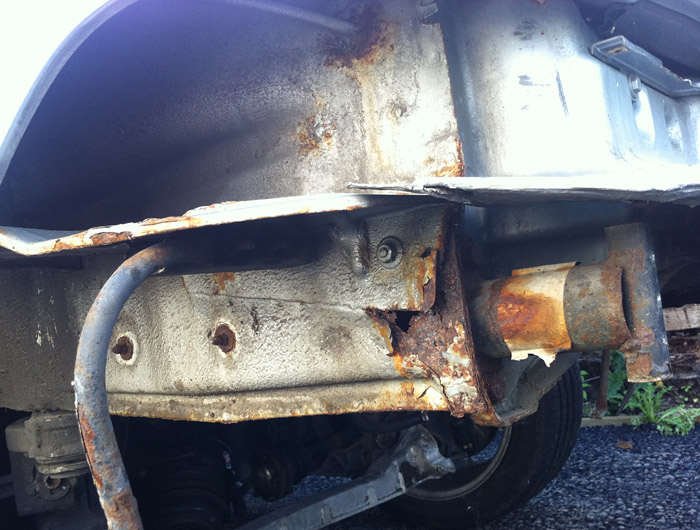
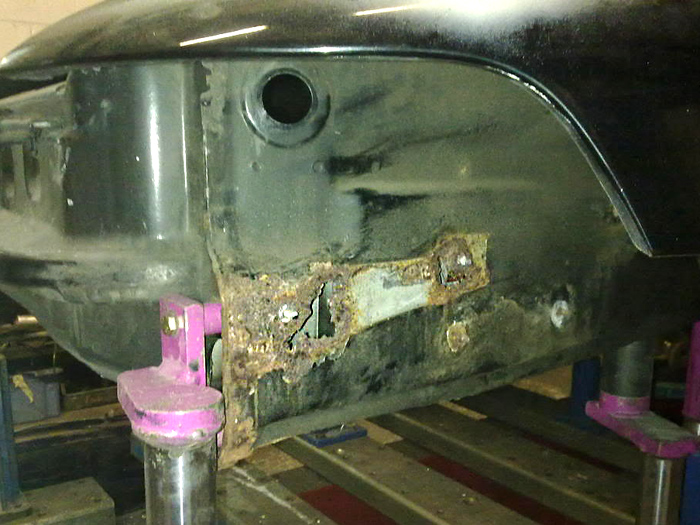
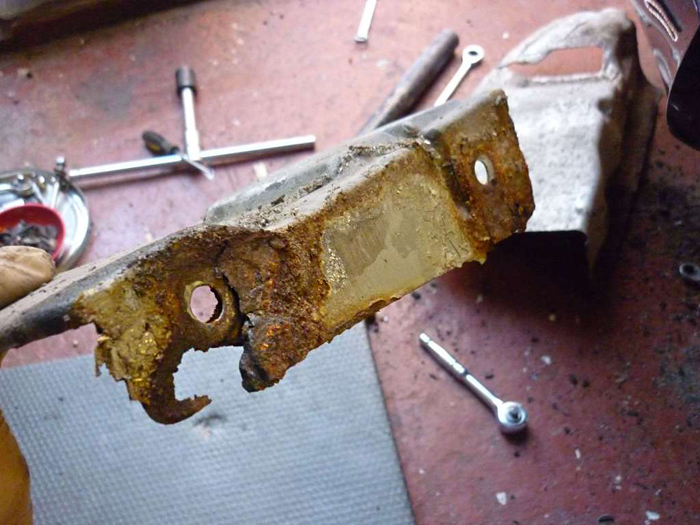
To give you an idea, here are a few other cars that came out slightly worse off:
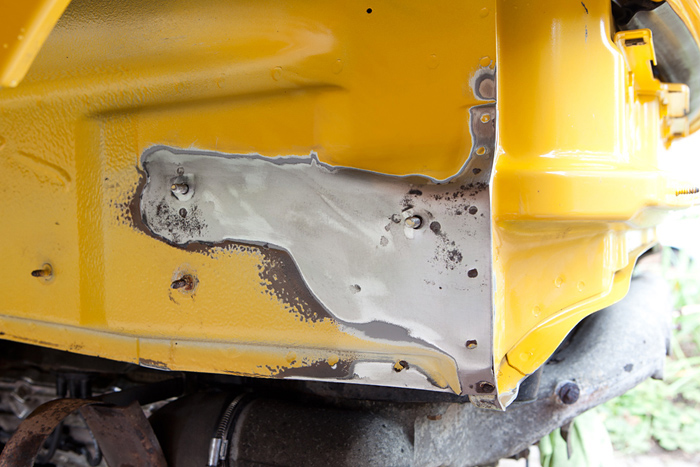
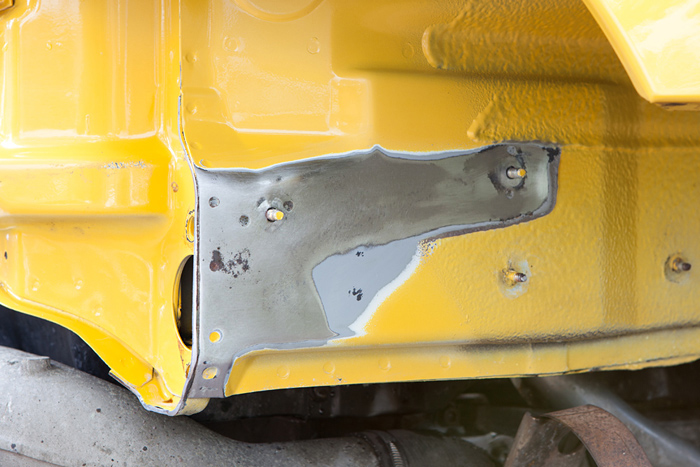
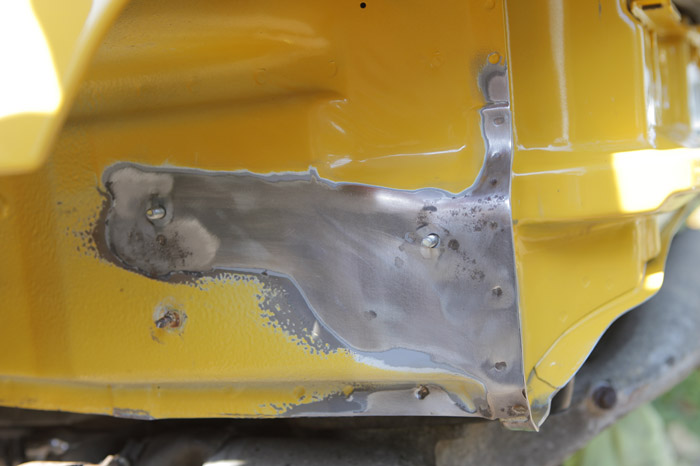
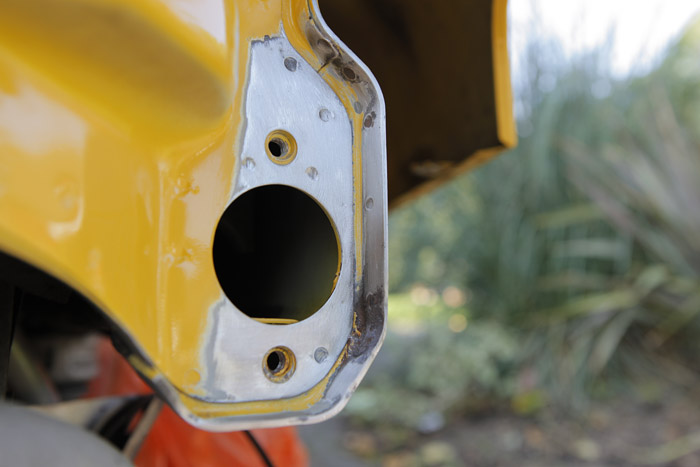
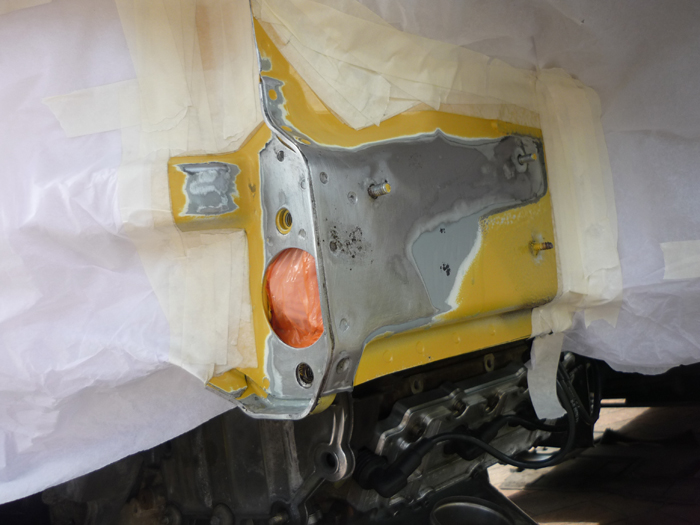
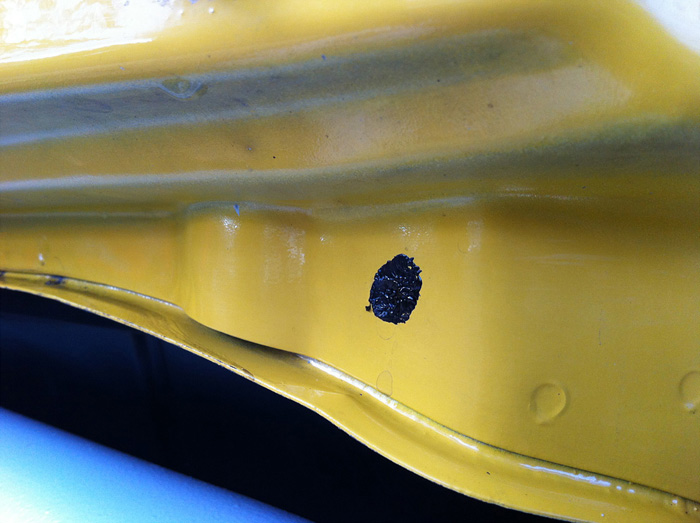
Rust Removal #1 Back to reality. After a few hours prep here is where we are at:
On each side I have gotten rid of nearly all the rust. I started out using 80 grit wet and dry and also the same coarsness pads on a DA sander when the area was big enough to get the sander in there. I moved to 600 grit later on to get a bit smoother. I plan to use the tried and tested and highly thought of 'POR15' system to restore and protect this area so although pretty much all the rust has gone, it's not actually necessary to remove it all completely. POR15 ('paint on rust') actually bonds best to rust but obviously to be on the safe side I will feel happier if I know its all gone. On the LHS around the rearward captive screw there is a little bit of pourousness but nothing that will trouble the POR15. More difficult is the front area around the impact absorbers not visible in these pictures. I have some spots of rust there and its very difficult to sand in there so my plan is to purchase a spot grit blaster and go over that area carefully with it. The seams will require a bit more attention too. I have run a stanley knife down them and scraped in the crevices but there is still a line of rust in the crevice on one side and it needs a bit more attention. It's times like that I dream of stripping the whole car down and dipping the entire chassis and starting from scratch. Maybe one day, eh ... ?
Rust Removal #2 Cracking on with phase 2 then.
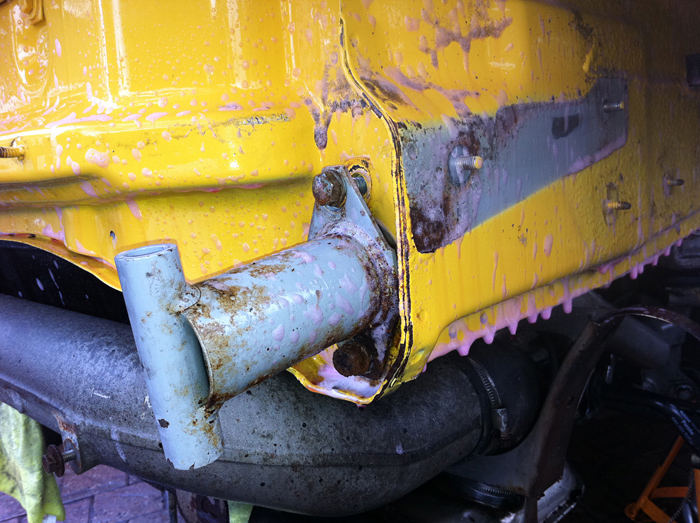
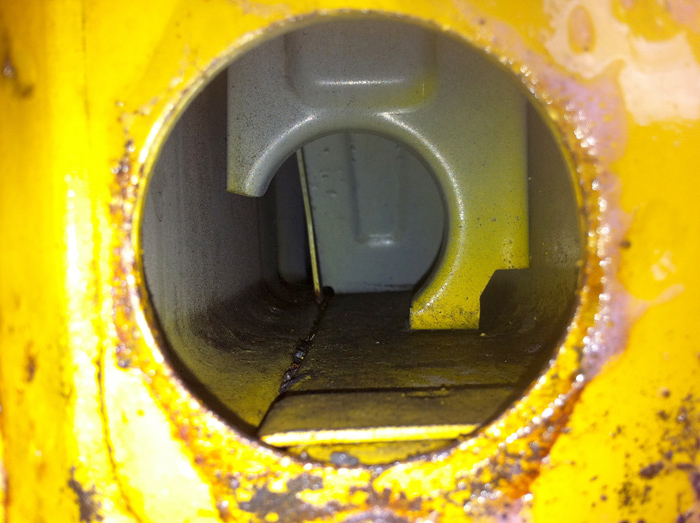
On the nearside you have the boot release cable housing which runs into the engine bay. It might be worth having a prod around the area where the cable goes through as this can be a real hive of rust. Mine was fine though.
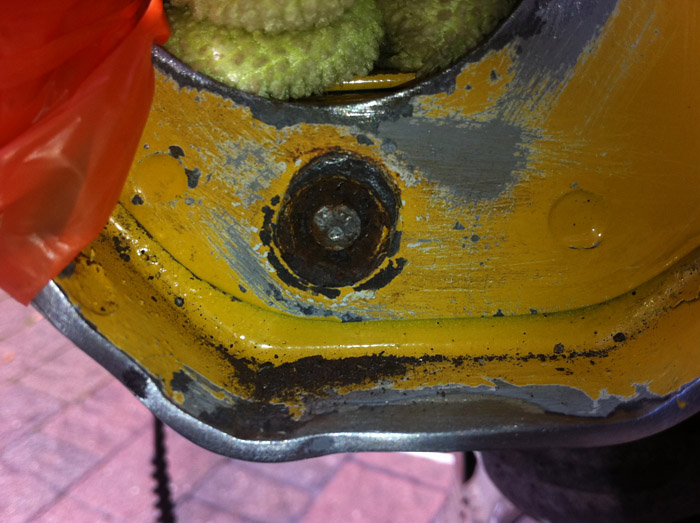
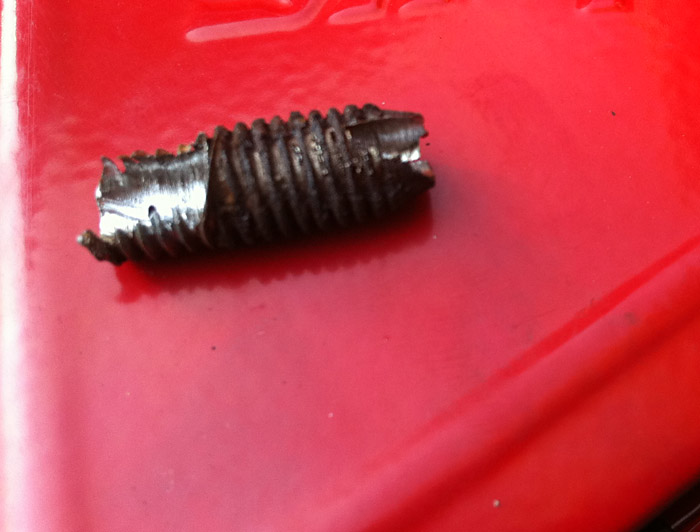
Onto those chassis leg ends .... difficult to get to. I did as best as I could with regular wet and dry. You can see that I had a sheared screw as well in my lower thread where the bumper impact bracket goes.
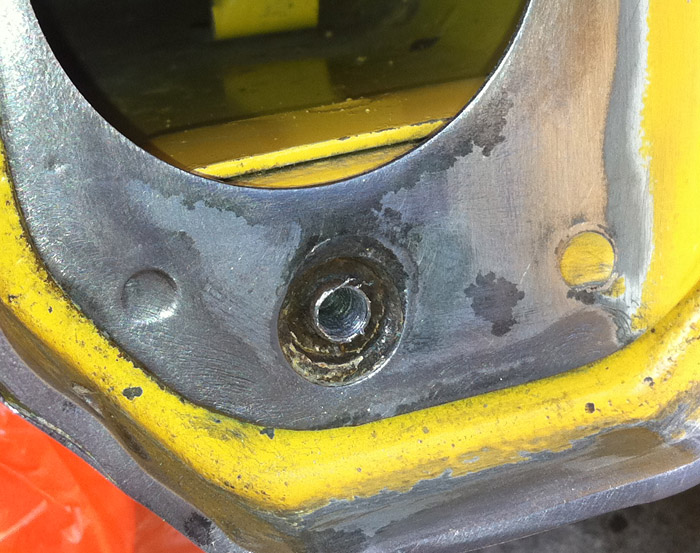
I had to drill through this ... a real pain in the neck.
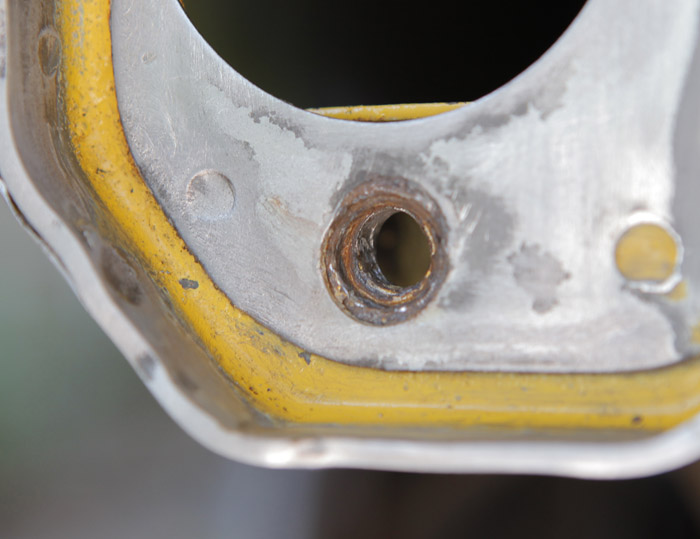
Here it is finally out with plenty of rust left over.
The offending screw.
On the underside of my chassis legs I also notice a little surface rust.
So sanded this down also in readiness for a coat of POr15 and painting.
Ditto the other side. A few spots of rust and a bit if paint missing here and there.
More sanding ...
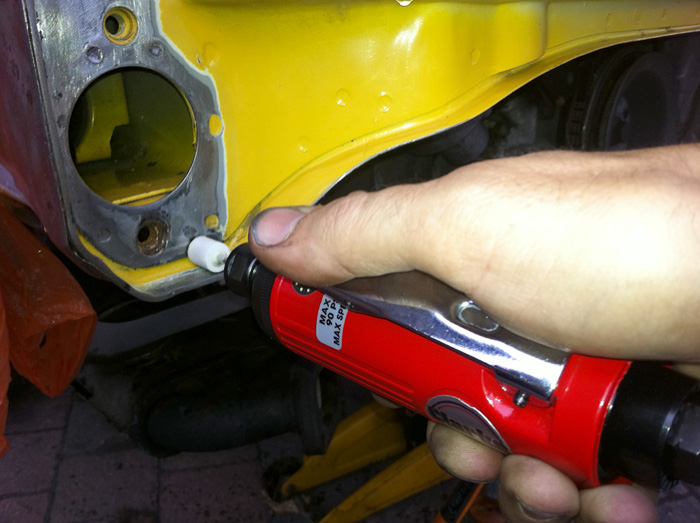
And now out with the rotary to get into those nooks and crannies.
A hook to get right into those seams.
Pretty much ready for the POR now.
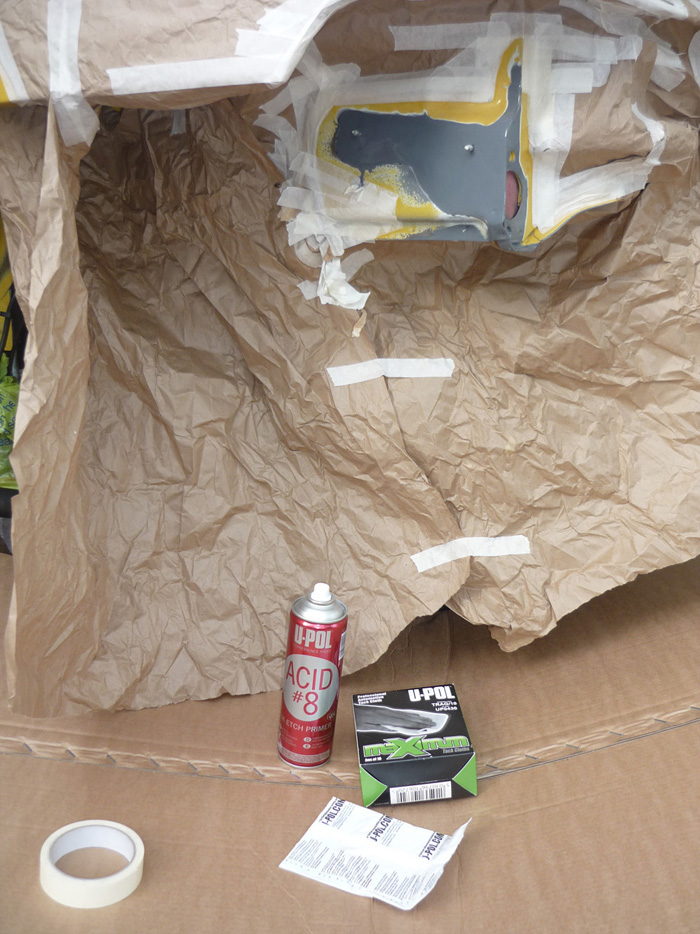
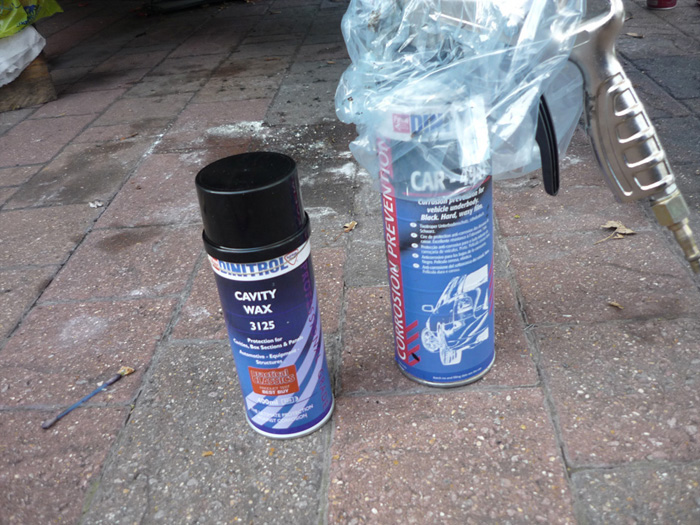
POR15
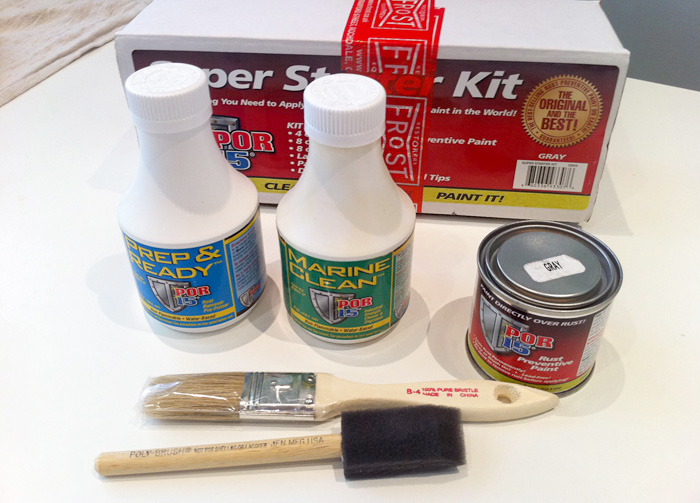
Here's the kit. I have to say that having gone through the experience I wouldn't want to go this route again. Firstly, POR15 is best if actually painting on rust and surfaces that are well past their best. Secondly, its a pain to prep, a pain to apply and the whole primer process is also a bit of a nightmare. It's expensive too. In hindsight I should have just used a regular high build primer and then topcoat and lacquer. Still, I suppose is it nice to to know that I have that extra layer of protection.
Clean the surface with Marin Clean, Wash with water. The soak with Prep and Ready rust rmover for 30 mins or so and the wash again with water. Then dry. Then paint on the POR15. It doesn't go on that easily at first but after youve got some on and it starts to dry a bit you can get a thicker layer on. I did 2 laters on total. It does even out quite well do you should get a smooth surface.
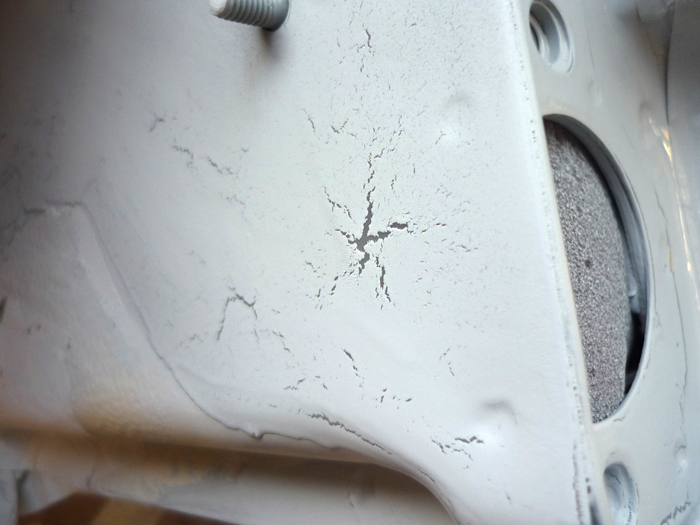
I initially decided to use a UPOL acid etch primer. The manual says you have to apply any 3rd party primers whilst the POR15 is still tacky and not fully dry to allow for a good chemical bond.
Well I tried that and this is what happened. Maybe I it was a little too tacky but bottom line is its very hard to judge and a right fiddle.
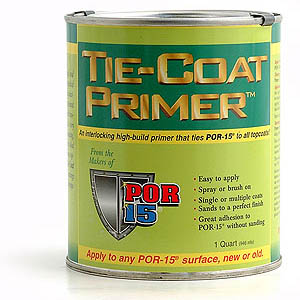
So onto plan b which is the only option left now that the POR15 is dry. That is sanding down the POR15 with some 500 grit and using their very own Tie Coar primer which is another expensive product.
The tie coat primer is VERY thick and a real pain to use. Once I had a couple of coats fully dry after a few days, it was so lumpy and bumpy and had such variance in surface height that I found that trying to sand it flat and smooth was near impossible because sooner or later certain areas would go be inadvertantly sanded back to POR15 or even bare metal again ! So I just left mine as a pretty rough uneven finish.
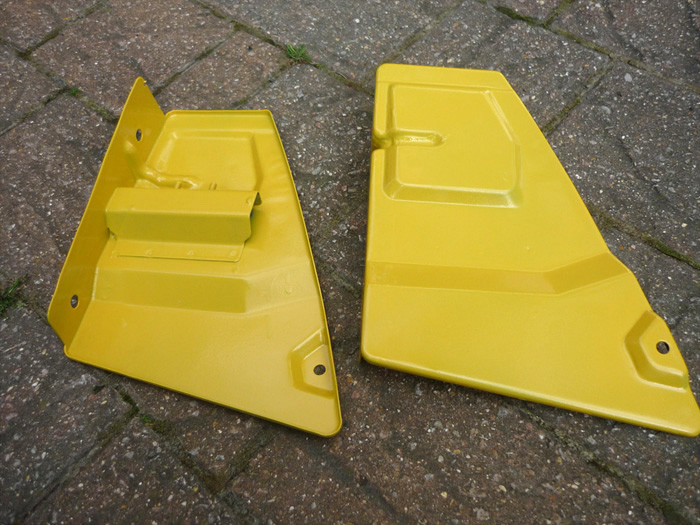
Side Supports
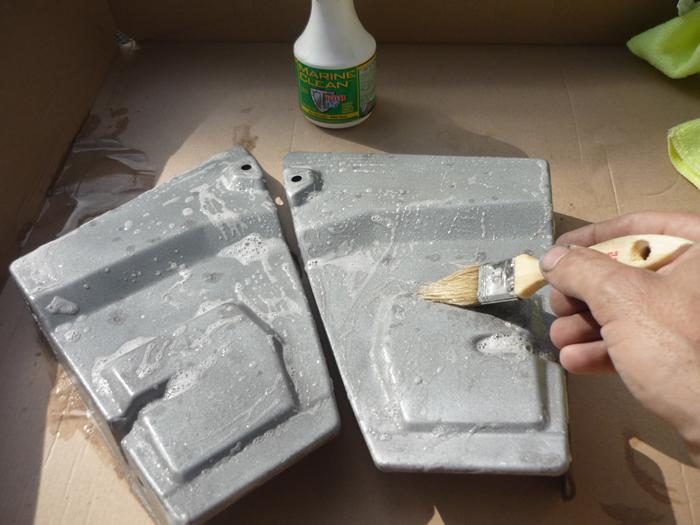
Now onto those side supports. I had mine grit blasted. here I am prepping them wuth the marin clean degreaser.
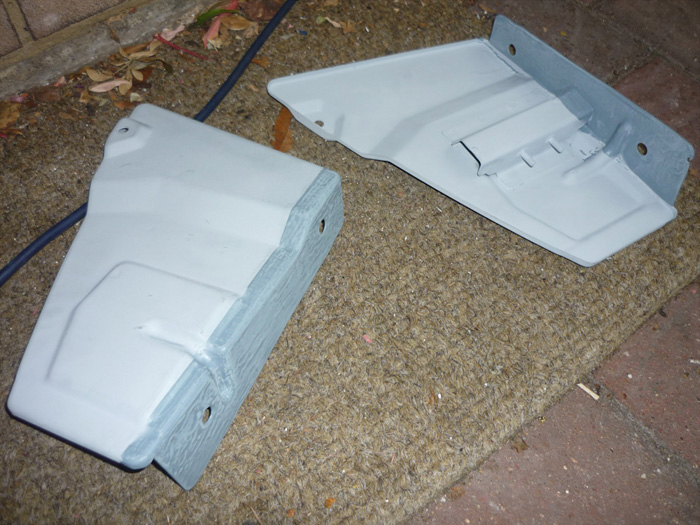
Now with 2 layers of POR15 at the edge faces and then regular etch primer elsewhere. These will NOT be going rusty any time soon !
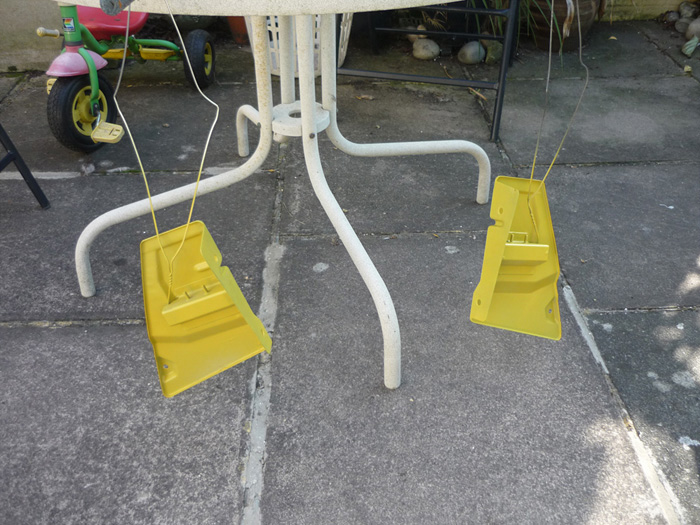
Speed Yellow top coat.
Couple of layers of lacquer as well. I was obviously not going for a perfect finish here and good job because I'm pretty useless at this paiting lark ! My number one priority here is no more rust !
Reassembly
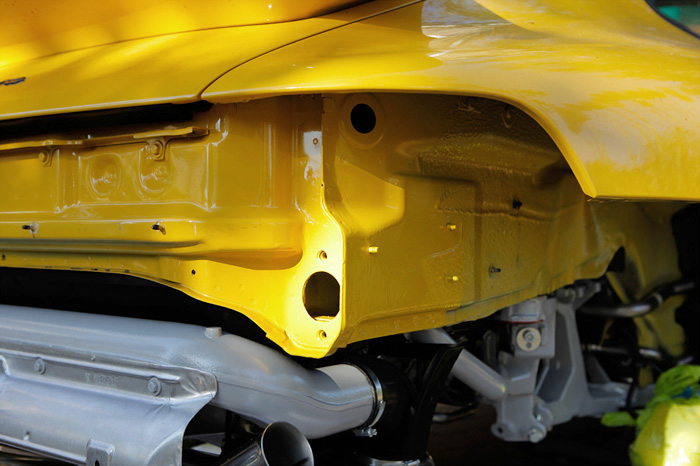
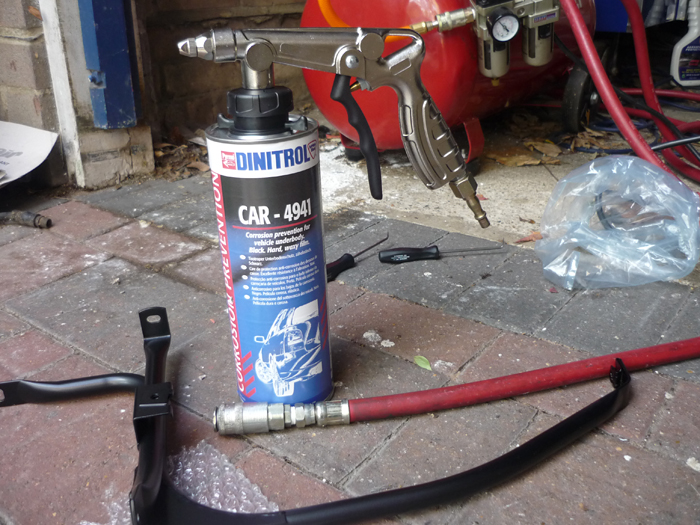
Here the chassis sides have been sprayed with 3 coats of speed yellow (which doesnt match because speed yellow never does) and then topped off with a couple of coats of lacquer.
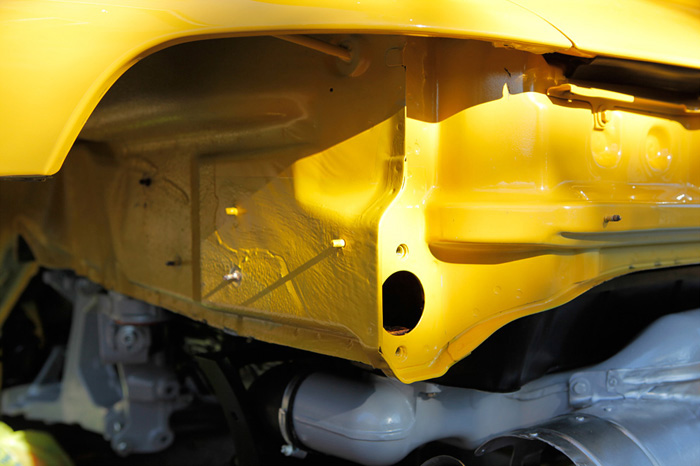
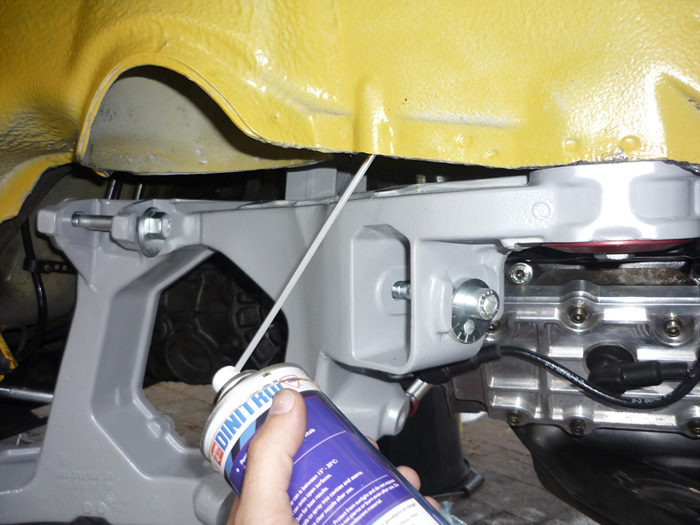
I applied both of these inside the chassis legs. Fist the 3125, allow to dry and then the 4941.
I also applied 3125 and 4941 all along the seams and up into any cavities and openings.
4941 applied as a bead along the pinch seam of the suspension turret.
etc...
Impact absorbers ..
As they also seem to collect a large amount of rust I also applied some 4941 on the back faces before fitting them.
Same with the chassis supports. A layer of 4941 as a last final measure.
And more Dinitrol inside those box sections that the bumper supports sit against.
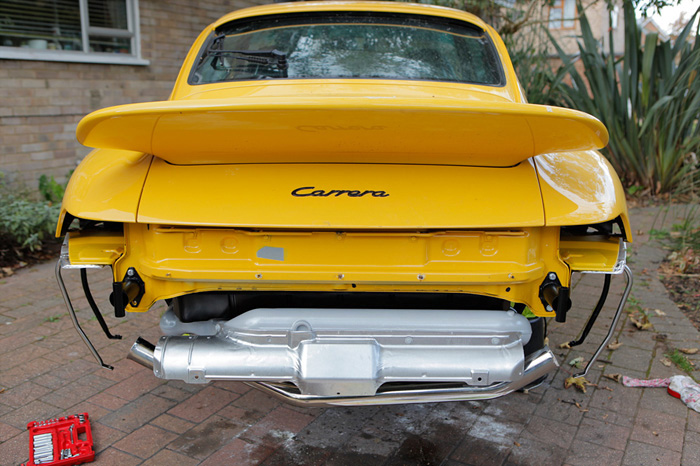
fitted
278 different shades of speed yellow !
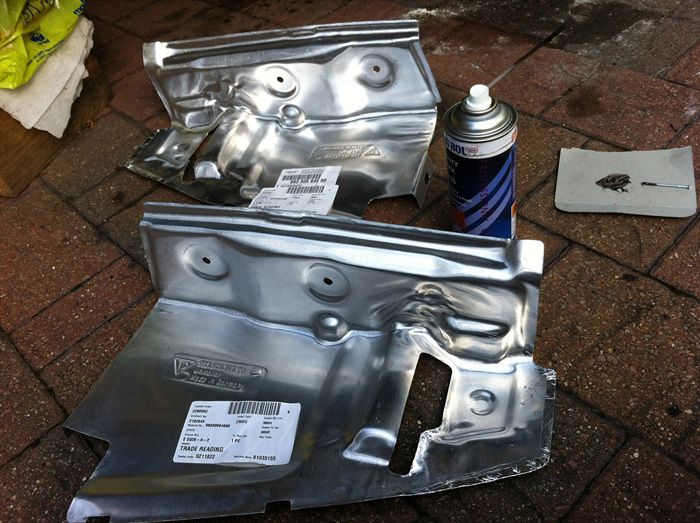
I have refurbed and fixed most heatshields at the rear but these I coulndt help replace as they were so messed up. I could have grit blasted the originals and it would have worked but given the new paint and the newly restored side supports my feeling was that new would be best. These were still soemthing like £50 each.
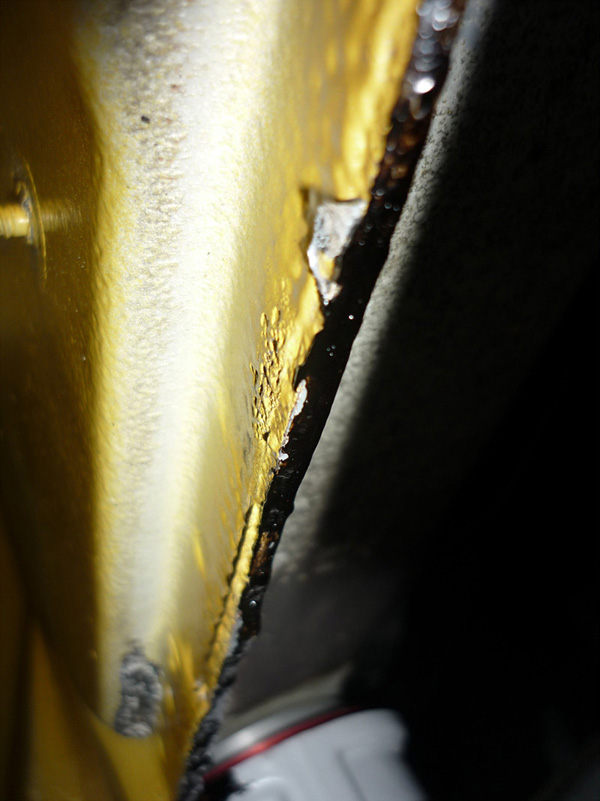
A final bead of Dinitrol to but up against the chassis edge.
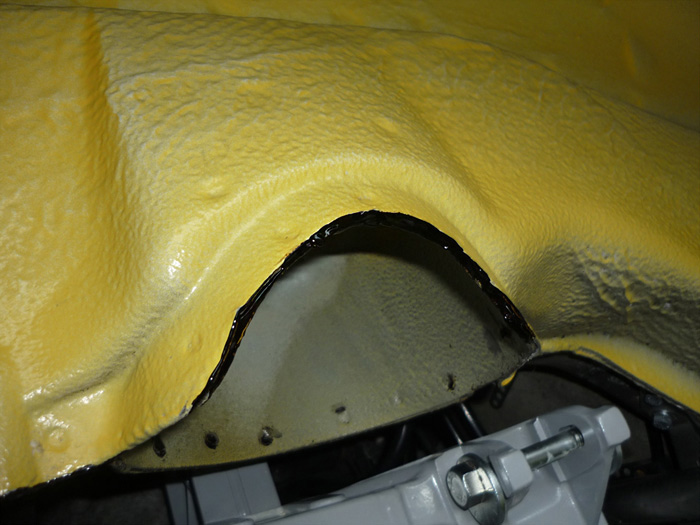
I gently bent the side faces into a curved shape so that the lower edges pushed up against the bodywork when fitted. I then also formed the very edges under around and under the chassis seam by pressing a round socket up against the edge. This will hopefully stop the mud getting between the heatshield.
Strip of metal tape applied to the lower edged and formed under across and up the inside of the chassis leg to seal the gap.
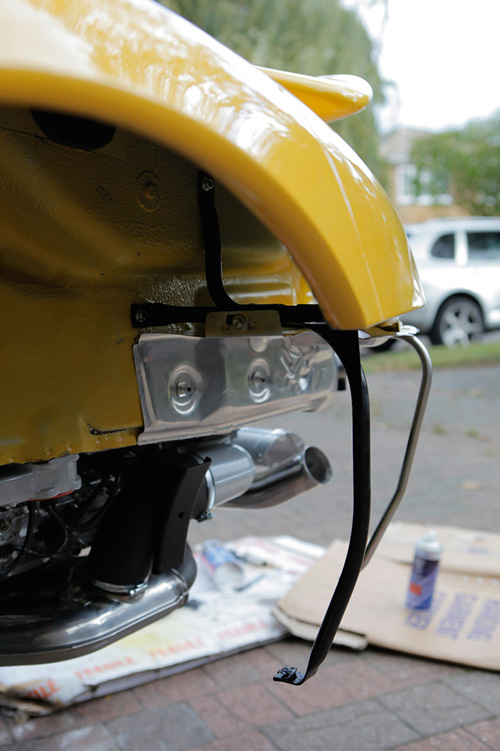
One heatshield in place.
Looking good.
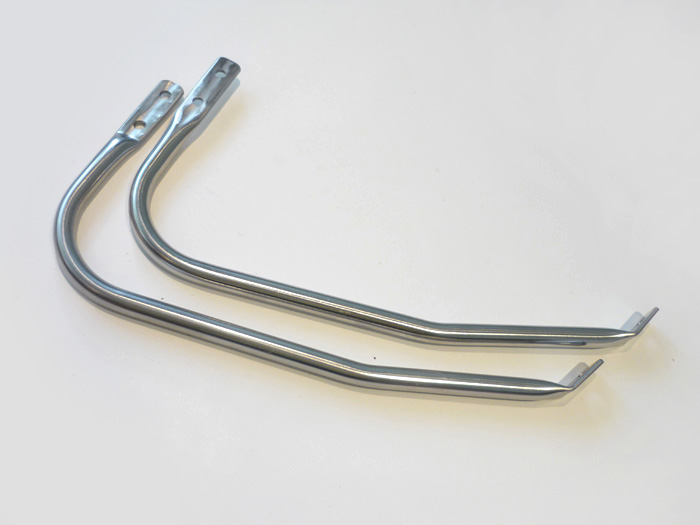
A pair of rear bumper supports custom made in stainless steel by a very kind chap from the 911uk forums.
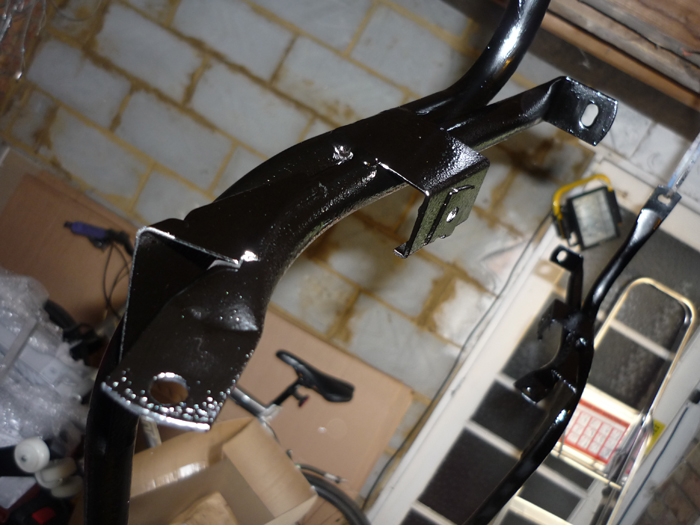
The larger forward bumper brackets were grit blasted, powder coated then treated with a liberal coating of 4941
And left to dry.
I also went round the whole rear of the car with everything still off, and applied Dinitol on various spots that I thuoghht were vunerable to rust attack or wherever I spotted any paint loss.
like these spots here....
Sorted. If the car lasted 15 years before rotting away fully here at the rear, then with the POR15 and the much better rust protection it shouldn't be until 2035 or so until another look is needed.
Bumper supports in place.
That's pretty much it for this guide. Of course there's plenty of stuff still to go back on and lots of other cosmetic stuff to do at the rear of the car but the best thing is to read about this in my rear cosmetic restoration article.
|