\
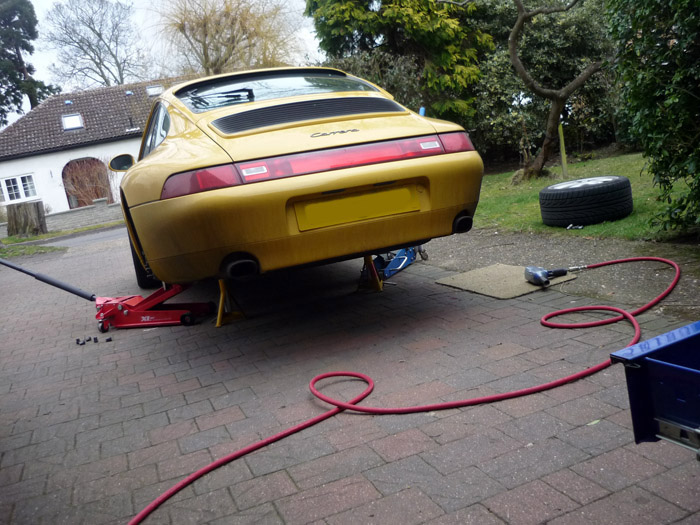
24k-30k-60k Service - spark plugs It's march 2010. Last time the 993 was serviced was only a few thousand miles ago during Febuary of last year 2009 at the well known UK independent Paragon. Instead of paying a whopping 280+vat for a yearly oil change back at the sussex dealership I have decided to give the car not only a full 24k service with oil filters and spark plugs, but also perform some additional 30k and 60k scheduled maintenance (gearbox oil, fuel filter, V belt and PAS belt check). As if that wasn't enough I will also be checking and renewing (wherever applicable) both distributer caps, rotors and the dizzy belt, something that isn't even included in the porsche maintenance schedule. For the absolute icing on the cake, I'll also be removing and cleaning the ISV valve. These last two, the twin distributer belt and the Idle stabiliser Valve, if you don't know when they were last looked at then it might be advisable to find out. Failure of the dizzy belt is relatively uncommon (since it was fixed from the 964 'sans vent' days) but failures have been documented, but the fact that it has failed is not always immediately obvious. Here are links to the other parts of the servicing: 1. 60k service schedule
"A guide for spark plugs !" I hear you say. Well in case you don't know, not only are there 12 of them but the exhaust silencers have to be removed as does the engine bay heater ducts and airbox. As well as that, one plug is particularly time consuming to get to. This is the famed offside inner plug on cylinder 1 and legend has it that some garages conveniently omit this one during routine servicing. It requires the removal of the offside engine shroud and the clutch ventilation tube. - Removing mufflers/silencers
TOOLS & PARTS REQUIRED Socket set with wobble extensions and universal joints x12 BERU 14 FR-5 DTU or Bosch spark plugs FR 5 DTC (not for the 993 Turbo which require something completely different)
I'll run over this as it's not detailed anywhere else on my site.
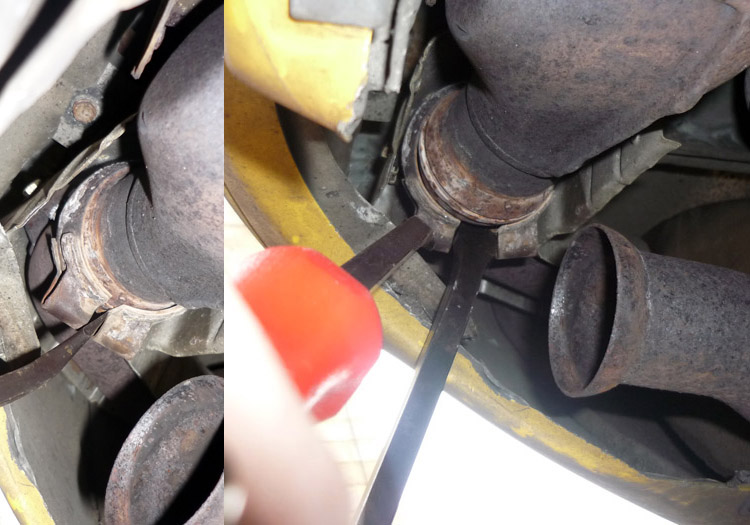
Two 13mm spanners/sockets to undo the screws clamping the exhaust tips tight. When they are off pry the C ring flange with pliers to open it up and then pull the whole tip off along with the flange and the inner exhaust sealing ring.
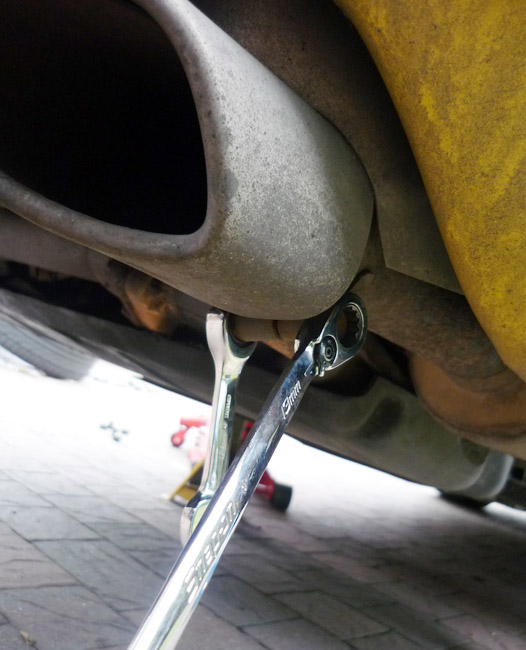
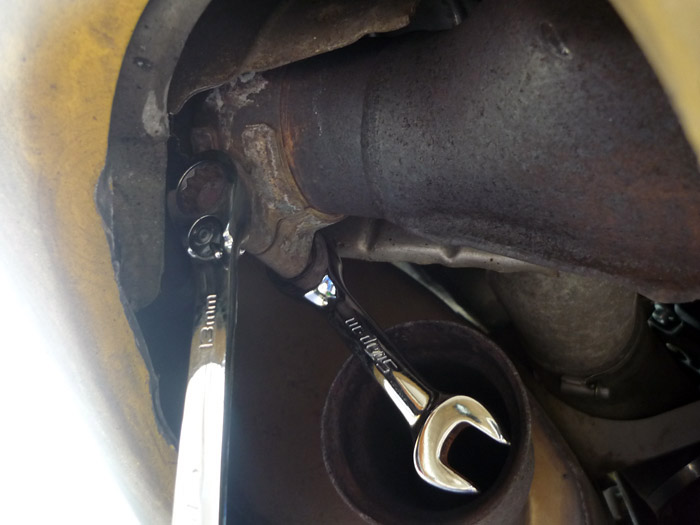
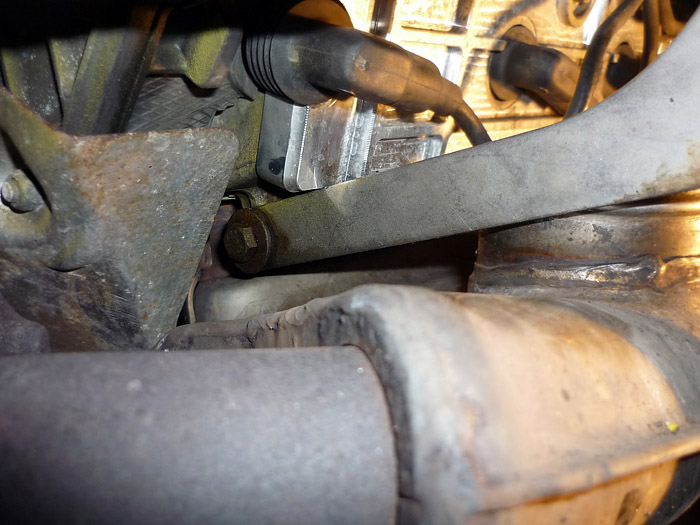
With the tips off you will be able to get to the catalyst clamps. The orientation of the screw head might not be so favourable as in my picture (depending on who last tightened it) but remember when you reassemble that this is how you want it for ease of access in the future. Again, use two 13mm spanners or a spanner on the inboard nut and a 3/8 ratchet + socket and entension bar works pretty well on the head of the screw.
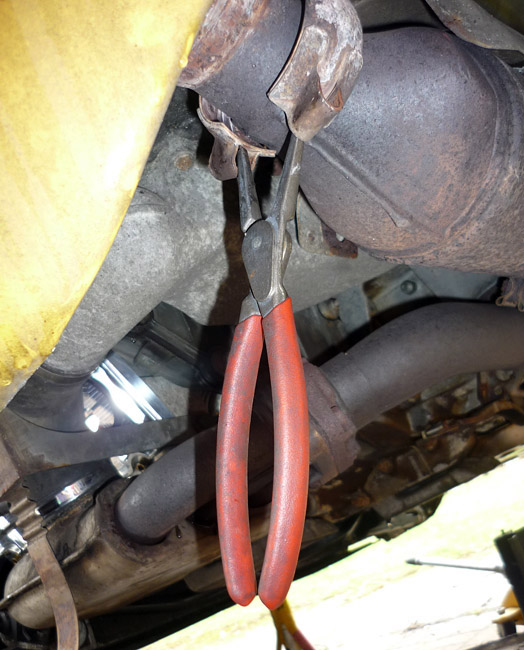
When you are done, pry open the flange with pliers or the twist of a pry bar and try and pull the flange towards you keeping it on the catalyst (which will help later when you reassemble). I generally use some designated circlip pliers specifically these flanges. Because the handles cross you compress to widen the jaws and also because of the little tabs on the ends they tend to grip and stay like that. They make life a LOT easier.
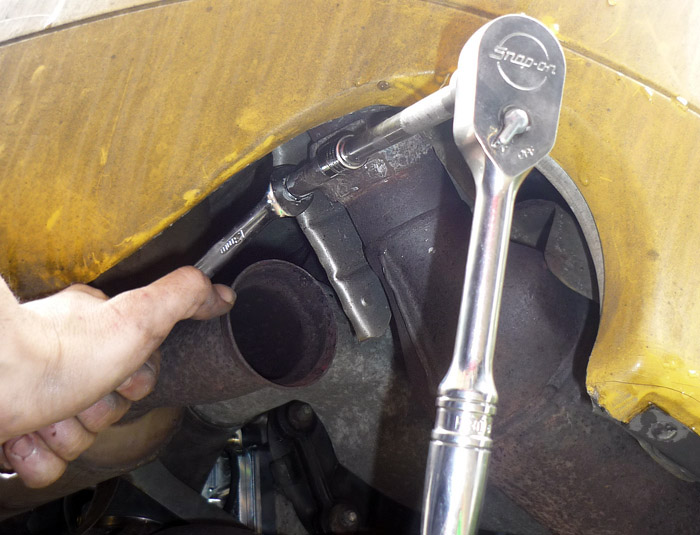
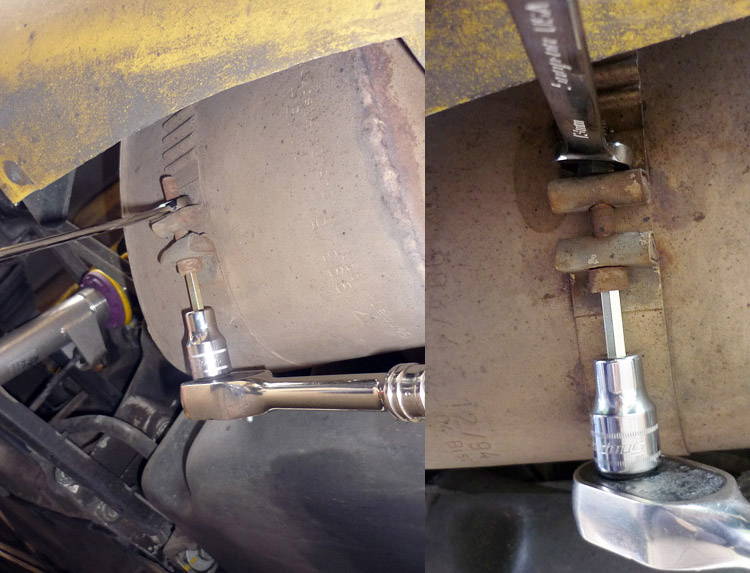
Onto the silencer straps. You will need your trusty 13mm spanner again (the open end) and then a quality 6mm hex driver on a ratchet. When the strap is free, the silencer's intake pipe will still be resting on the exit of the catalyst. Pull the bottom end of the strap downward then inboard toward the middle of the car. Lift the silencer upwards off of the catalyst then across toward the front of the car and then down. As you bring it down you can rotate it to clear it completely from the bodywork and rest of the car.
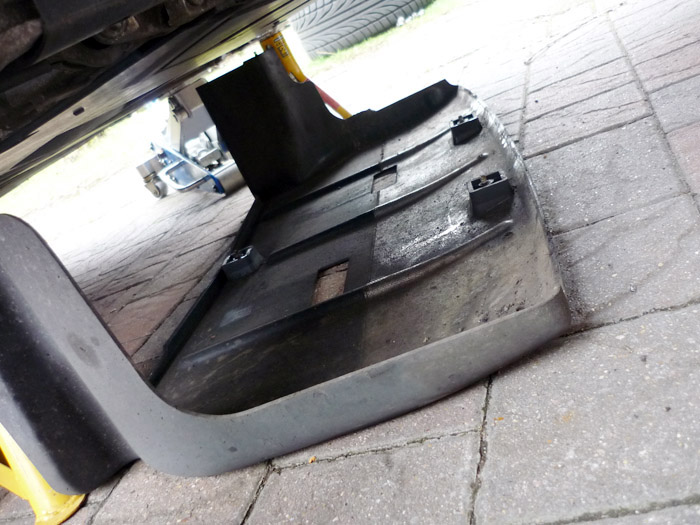
After that undo the 5 large phillips screws to release your engine tray.
Now you nede to remove the L shaped heater ducts either side for greater access. I use a flexible screwdriver with a 6mm socket end that is specifically for jubilee clips. Loosen one clip near the heat exchanger and the other one the other end where the pipe connects to the heater ducts.
When they are loose, use some force to pull and wiggle the flexible hose out and away from the car.
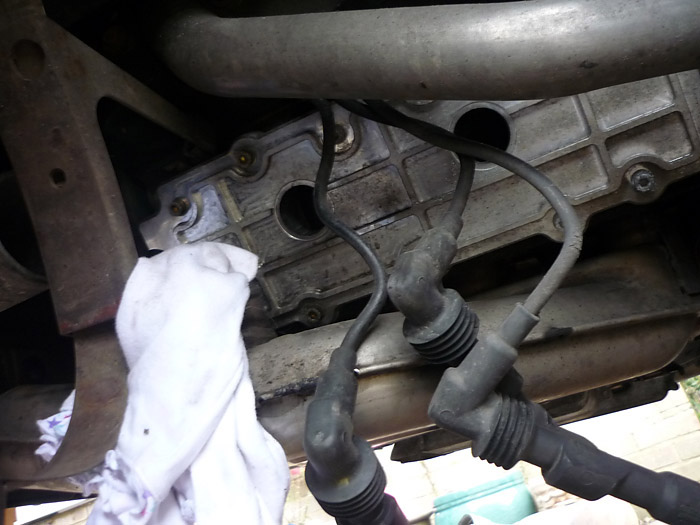
There will be a large hole left on the top of the heat exchanger. Do yourself a favour and cover it up with gaffer tape or plug it with a rag. It is VERY easy to lose stuff down here. I still have an allen key somewhere in the bottom of one of my heat exchangers ! You can also pull on the boots of the HT leads now (don't pull on the wires) as well and tuck them somewhere out of harms way.
Tea Time !
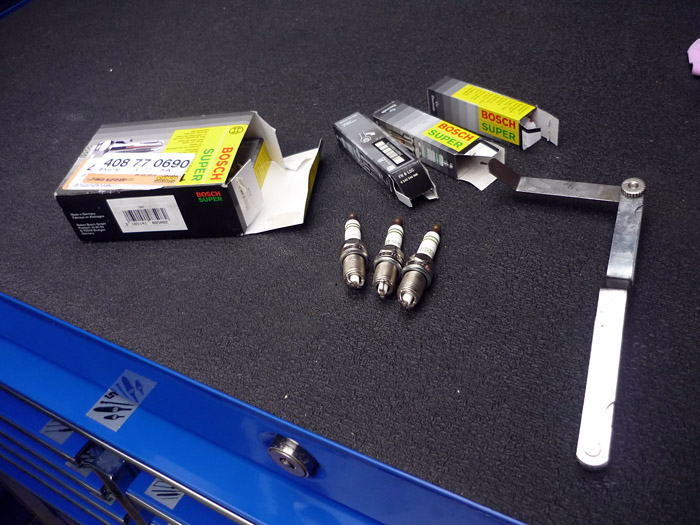
The original plugs are the Beru FR-5 DTU. I opted for the twin electrode Bosch alternatives. They will be gapped correctly but its always a good idea to check. They should be 0.7mm. As the gap is curved you really need wire type feeler gauges but I made do with a conventional set.
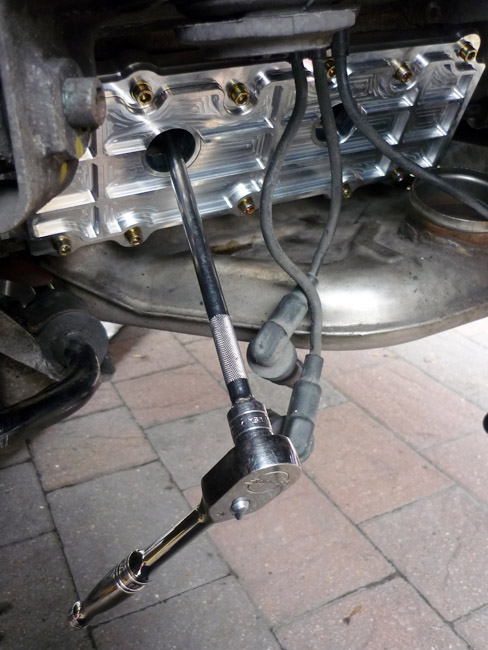
Your x6 lower plugs will come out easy enough. It's useful to have a good selection of extensions on hand. I like using the shortest extension possible just to be kinder to the threads. I also used dedicated spark plug socket that will pull the plug out either magnetically or with a rubber insert. I always hold try and hold the ratchet head with my free hand, locating it square on to the head of what I am turning, particularly when we are dealing with threads into engine parts, suspension parts and calipers and the like.
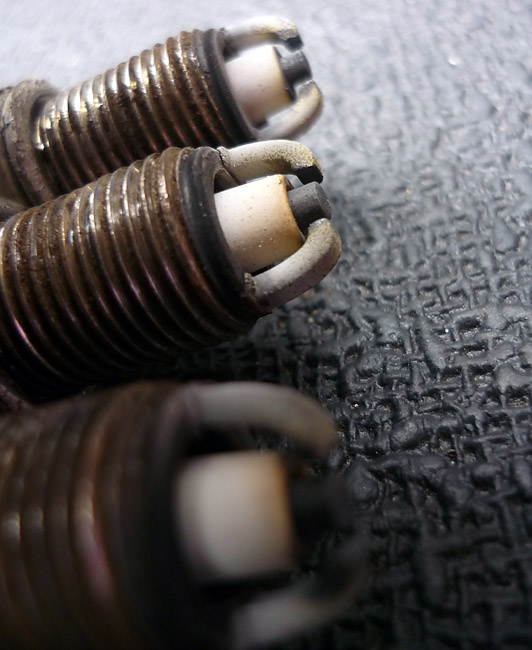
This is what came out of my car. So far so good.
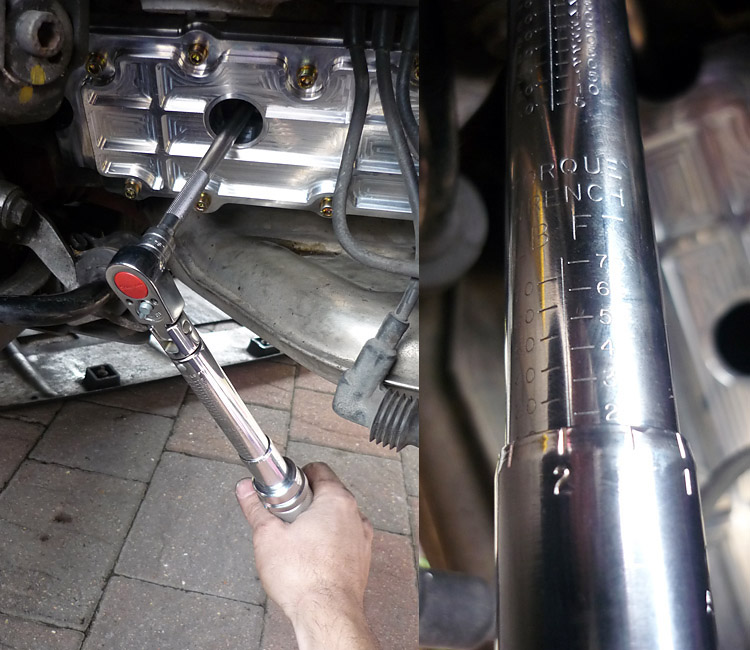
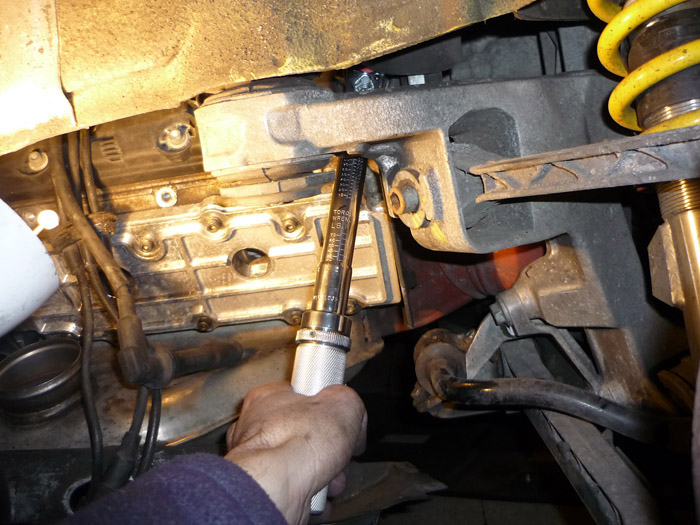
Once the gap has been checked on the new plugs screw them in one by one and tighten to 22 ft/lb or 30nm. Remember that for the lower banks the plugs are always angled slightly upwards and towards the rear of the car. Despite access difficulties I was able to torque all 12 plugs up using a swivel head torque wrench and an exhaustive set of extensions.
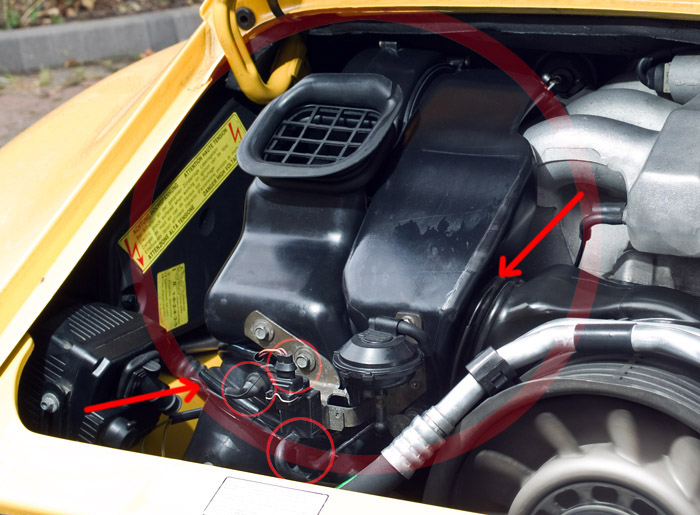
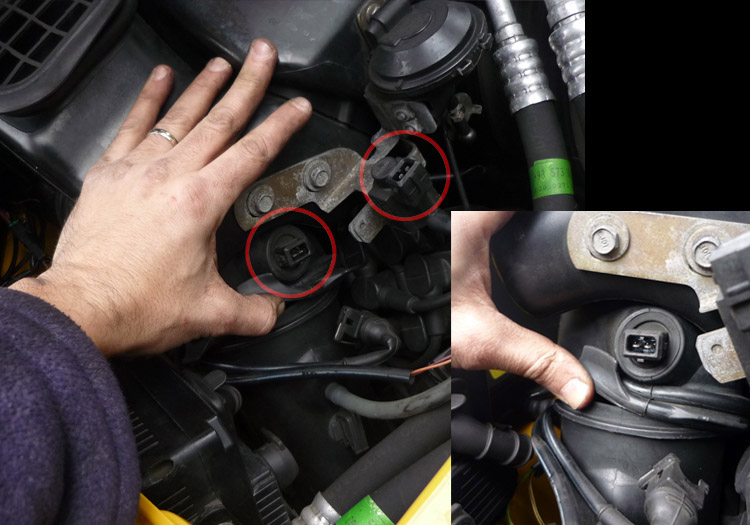
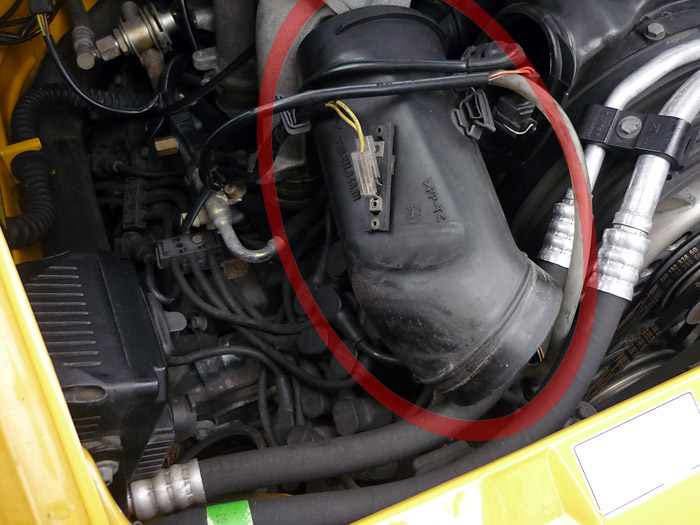
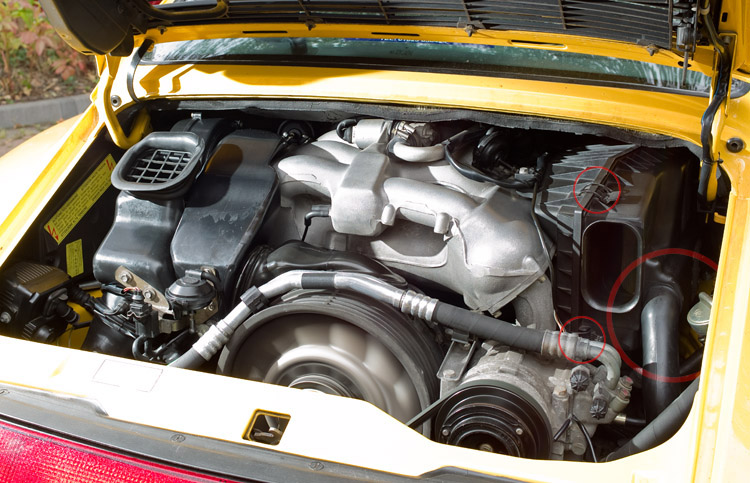
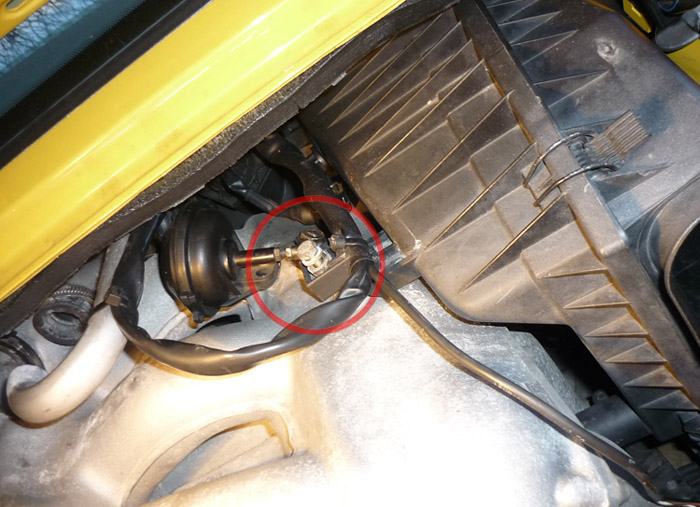
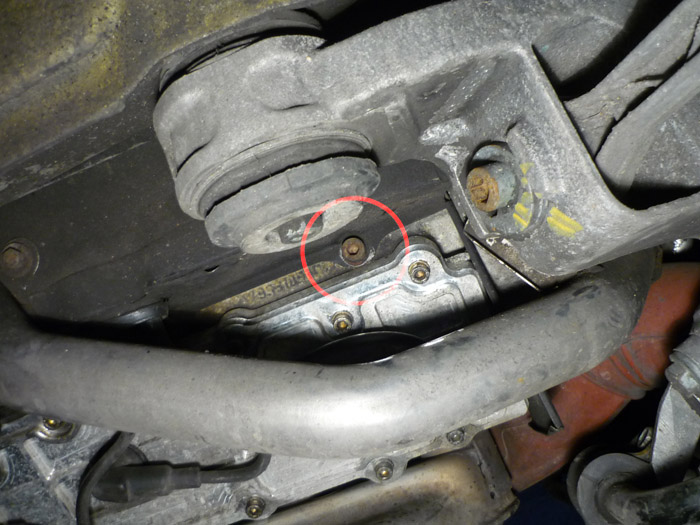
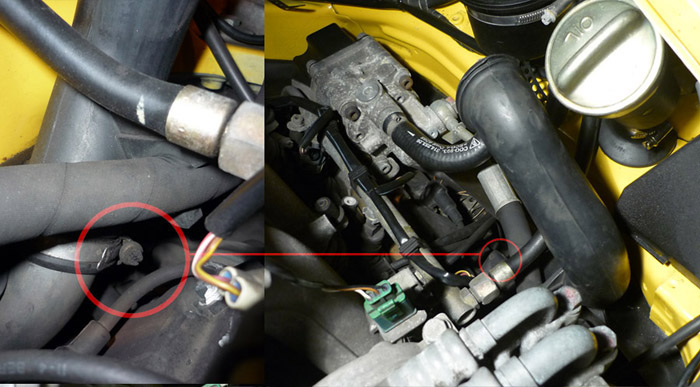
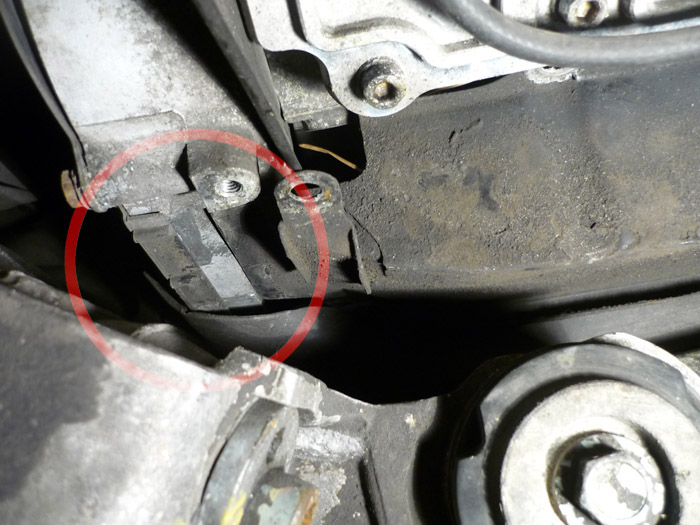
Now onto the nearside or LHS top bank. You will first need to remove the engine bay heater ducts & blower assembly shown by the large thick red circle below. First of all you will need to detatch at the two rubber gaskets marked by the red arrows and also unclip 2 sender plugs marked by the 2 smallest circles. The next smallest circle marks the location of a thin air hose which also needs disconnecting.
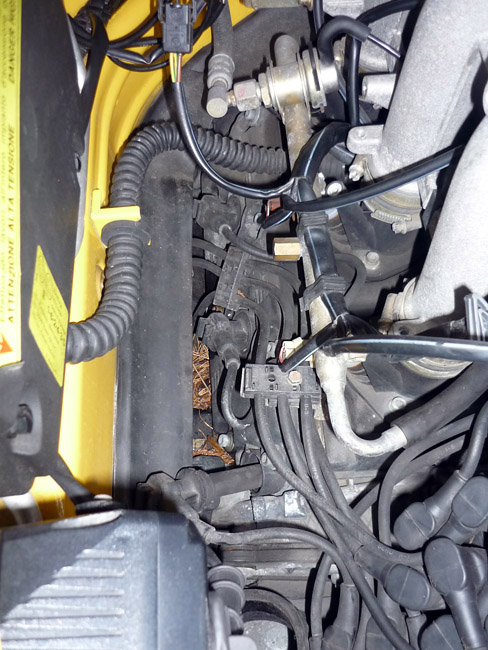
Looking closer, at the front you will see those two connectors that will need to be removed first. Also down here, pull on the lower rubber lip and lift it off the vertical pipe that extends up from deep inside the front left hand corner of the engine bay. Make sure these 2 elements are separated.
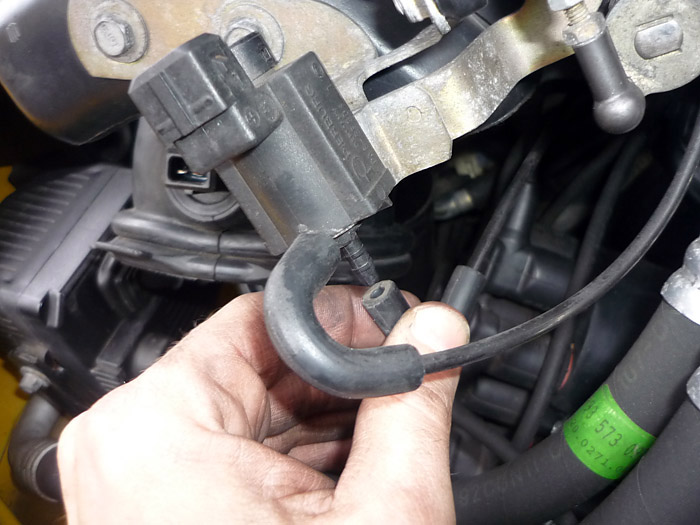
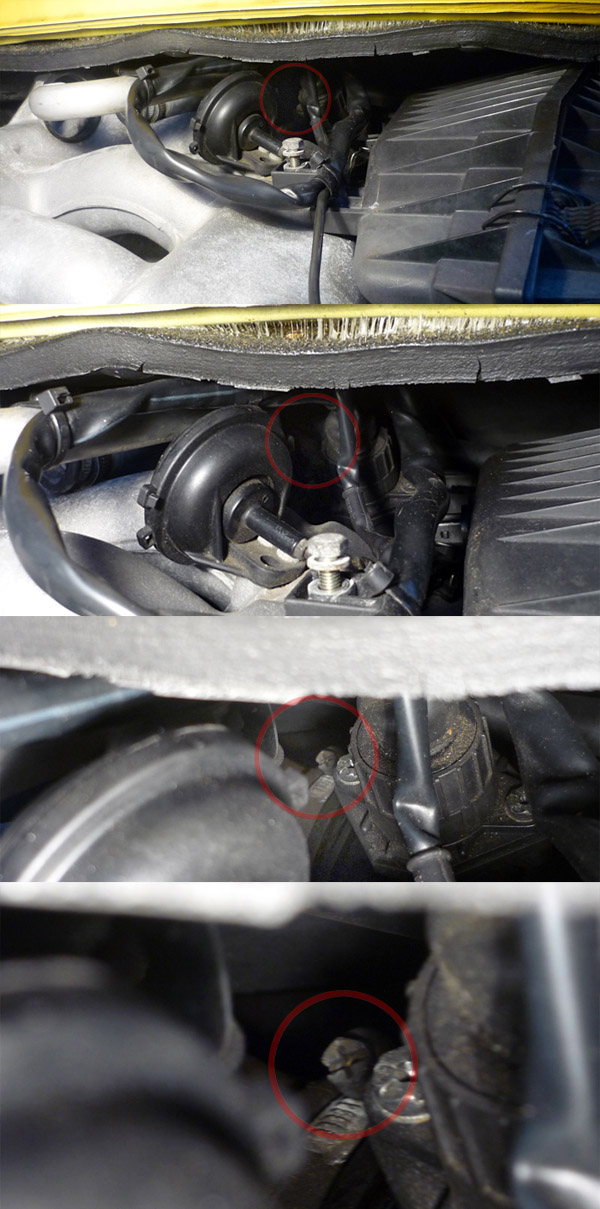
Just to the right of the connectors, remove the small downward vacuum pipe.
Now you have to loosen x2 10mm bolts that affix the intake trumpet and blower assembly. I use a deep socket here and a stubby ratchet for ease of access.
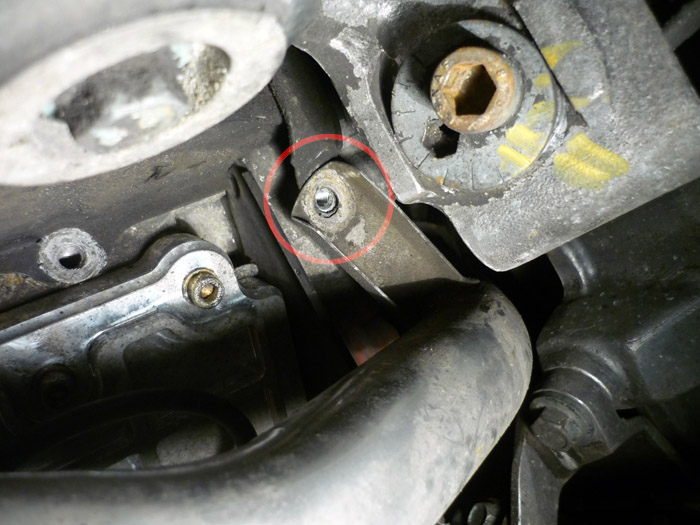
The second bolt is harder to find. It's where the first more obvious one is but lower down. If you have a feel in the general area it's reasonably easy to locate. Just loosen both of these, there is no need to remove them completely. With that done, you can now pull the whole assembly foward. As you do you will see it is still tethered by a final connector (as seen above by the red circle). Unclip this using some needle nose or channel lock pliers to compress the side clips.
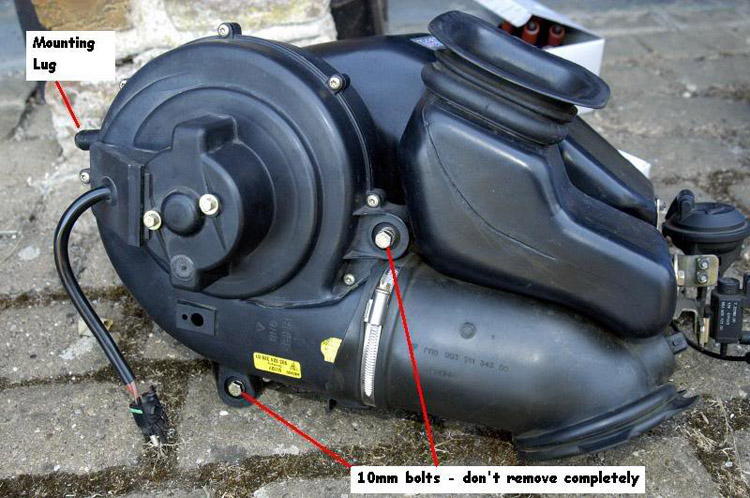
Here you can see from the side with everything removed where and what these bolts look like (picture courtesy of RSman on rennlist).
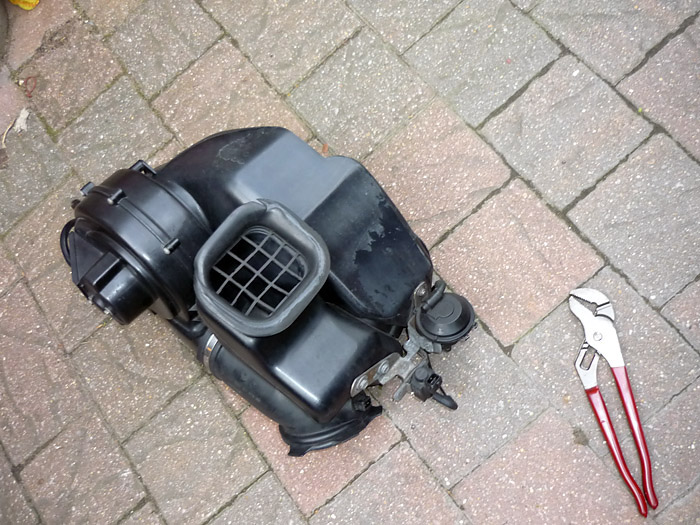
left behind will be that stubby hard plastic pipe that emenates from the front left hand corner of the engine bay. You can simply pull that off and move it to the right as in the photo. This allows far better access to the plugs as seen below.
The space is still quite limited on the upper plugs. The problem is you have to get the plug socket in and assuming that is of the 3 inch variety you will need at least another 4 inch extension on the end just so it clears the engine and there is enough left outside for you to get a ratchet onto it. Not only do you have the deep dish of vertical bodywork obstructing you but that annoying strip of thick rubber as well. Once you have a 7" length or so into the engine, you then have a very small amount of space to get a ratchet onto the end of it.
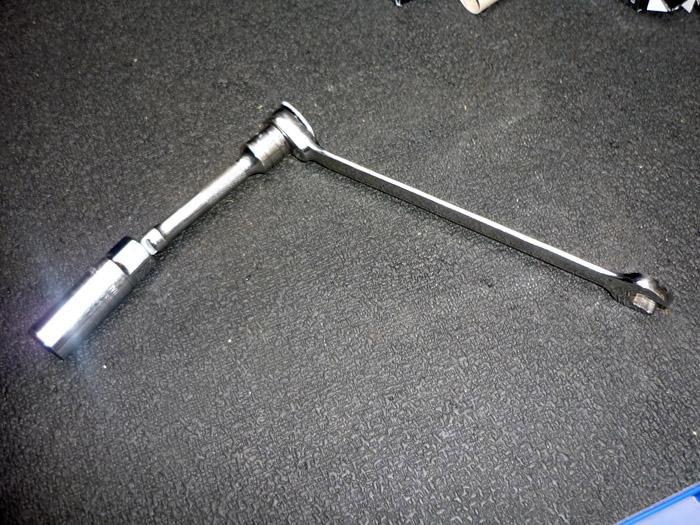
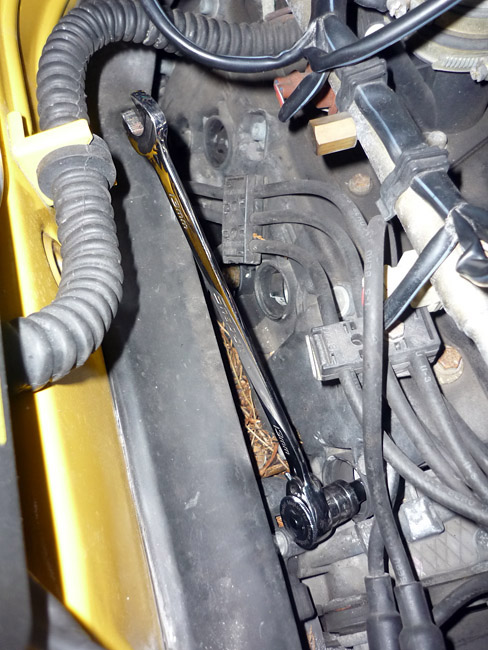
My solution was to use a 4" wobble extension on the end of the spark plug socket and then use a ratchet spanner (converted to a square drive with a socket adapter gizmo) as leverage. This solves the problem of limited space for a big ratchet head. Another solution would be to use one of those slimline ratchets. I know some people use a univeral joint in there somewhere as well probably with a shorter extension, but overall I found this to be the very best combination. I would arrange the spark plug socket + wobble extension so that it was bent where they join and then manouever this into each hole and then once the socket was seated securely onto the plug I would push the extension bar in further to disengage the wobble and then bring down my ratchet spanner, lock it onto the end and then undo. The spanner is also nice and thin so it tends not to get in the way or catch anything when you are turning.
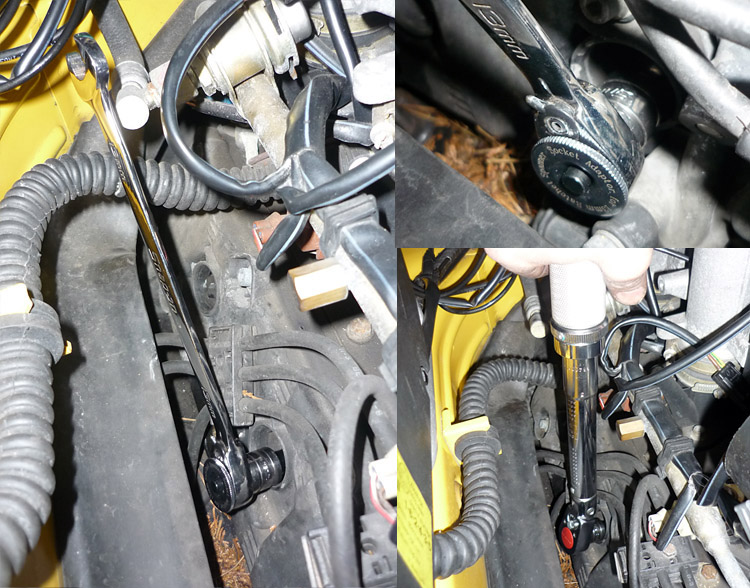
Torqueing up was again very simple with a small 3/8 flex head wrench.
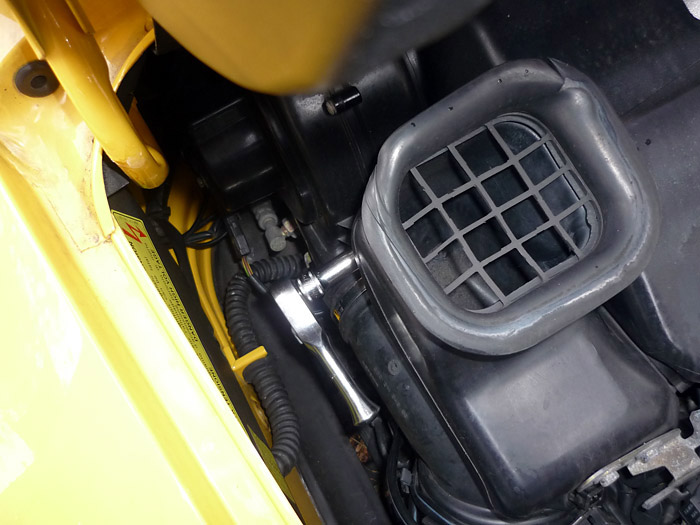
To get to the top offside row of plugs you first need to remove the airbox. I'll describe this step by step as it's not covered on my site anywhere else and it can be very tricky if you're just guessing.
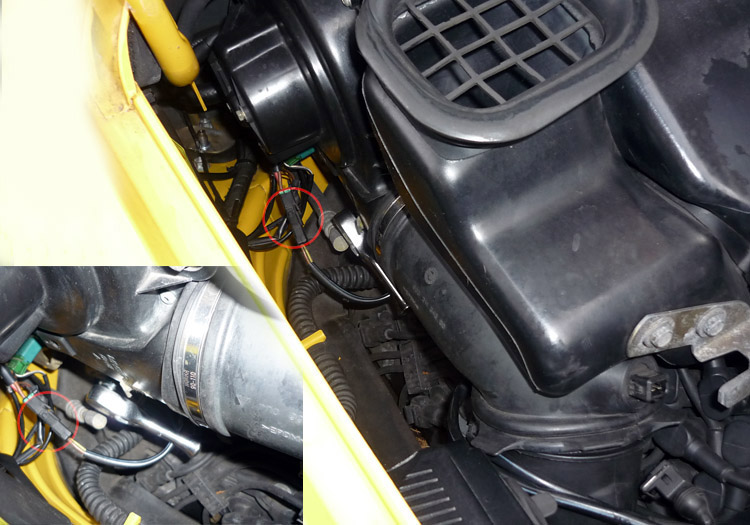
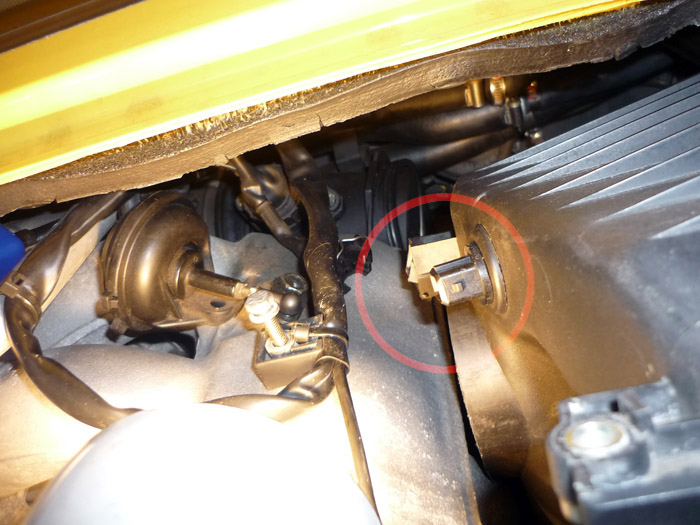
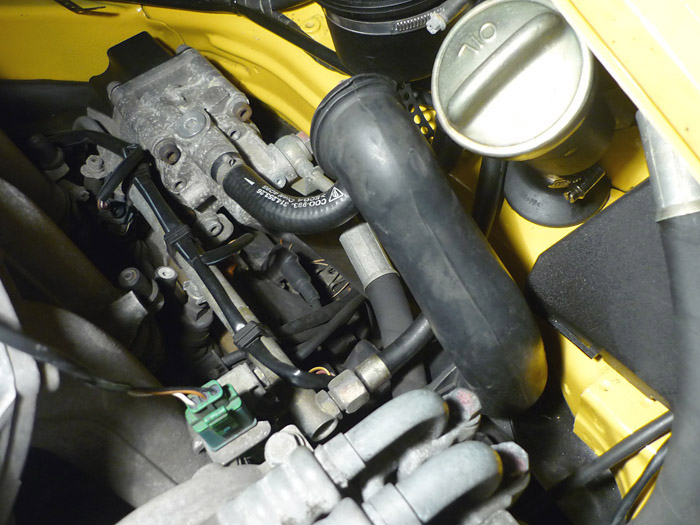
First up there is a rubber tube that mates to the front RHS of the airbox as circled in red in the picture. This rubber tube vents air that comes from the clutch. Give it a squeeze and a pull/twist and detatch it. Also you will need to remove the airbox cover and take the filter to one side as well. To do that unclip the hinged clips maked by the two smaller red circled then simply pull the front of the cover to the right and then forward.
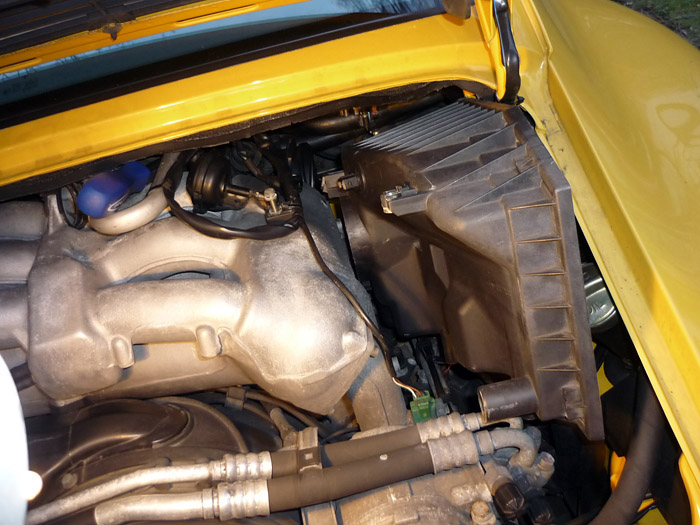
Next you'll need to undo the screw in the picture and slide out the holed tab of the airbox.
Now for the bit you wouldn't have guessed. With the airbox now free you just have to rotate the MAF sensor which is located just before the point at which the airbox attaches at the back. You will see a sort of zoom on my picture. This takes you to the location of a worm drive jubilee clip. Get a socket onto this either on a flexible extension or using some UJ's. Undo it and then put your hand right in there and grab hold of the cylindrical black plastic MAF sensor (or grab the fluted connector attached to it as shown in the 'zoom' picture.. the piece which is fastened down with two phillips head screws). Rotate this away from you as much as you can and now you will be able to pull the airbox to the right and then forwards and then out completely. Just don't forget to undo the electrical connector as circled in the picture below.
Pull the airbox towards you to remove completely.
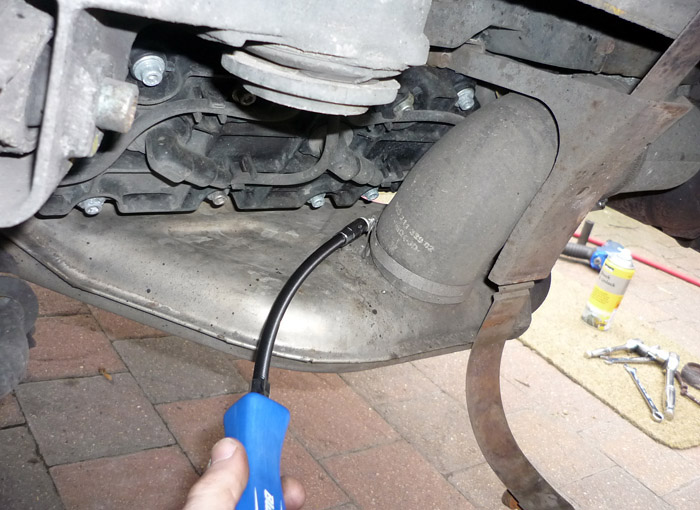
You can see here that access to the innermost plug is completely obstructed. You have to get to this underneath.
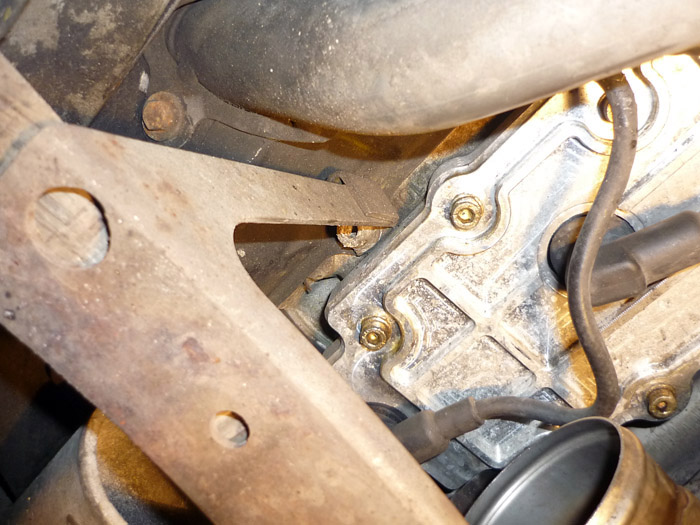
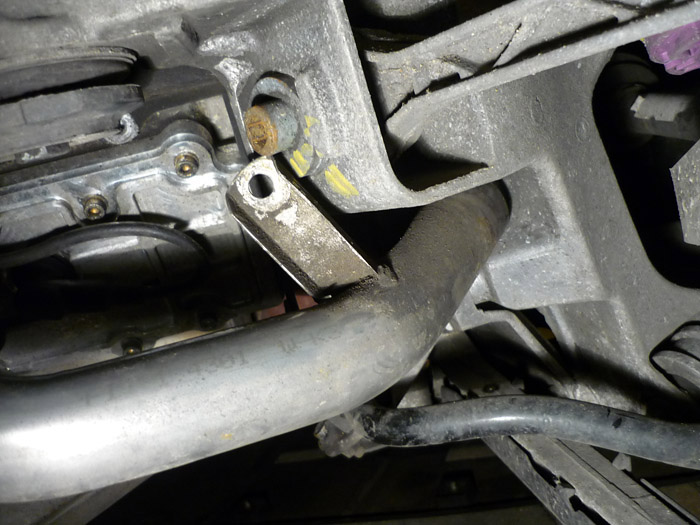
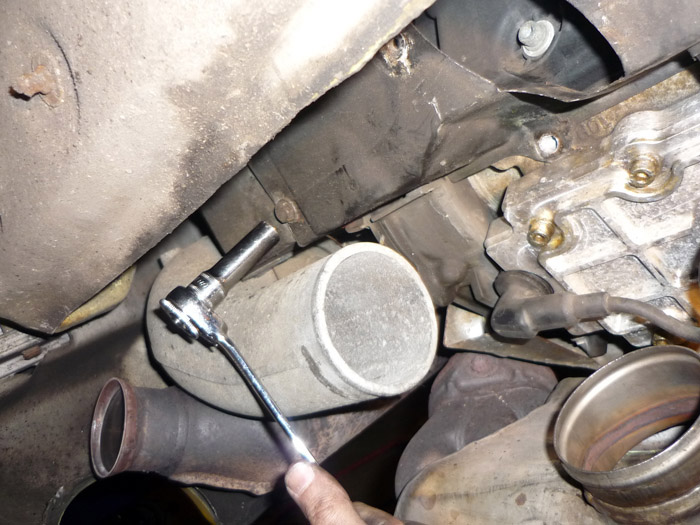
Go back under and take a look at the silencer bracket (that holds the long strap). It has an upper leg which is held in place by a hex head bolt. This bolt is also one of 3 that secures the engine shroud. By removing the engine shroud we will be able to see upwards and access the upper bank of spark plugs from below.
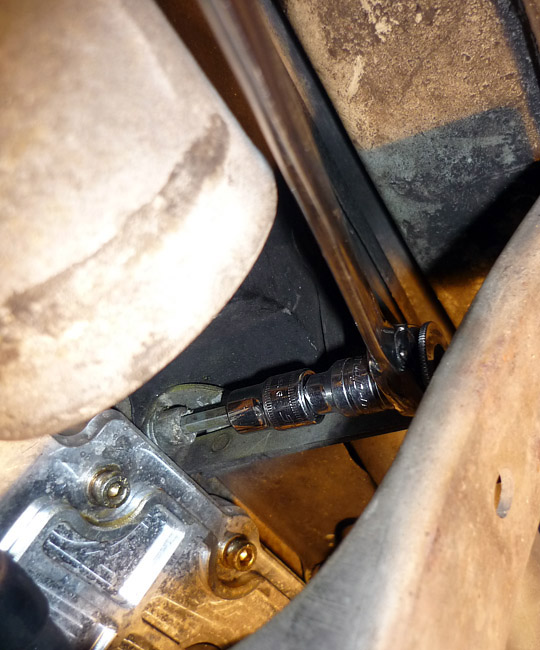
Here is your upper hex head which secures the silencer bracket. Access is tight here and there are a ton of things for any tools to hit so use a very small headed ratchet, maybe a 1/4" drive or a converted spanner and the exact combination of extensions so that the ratchet or spanner arm is clear of the catalyst exit.
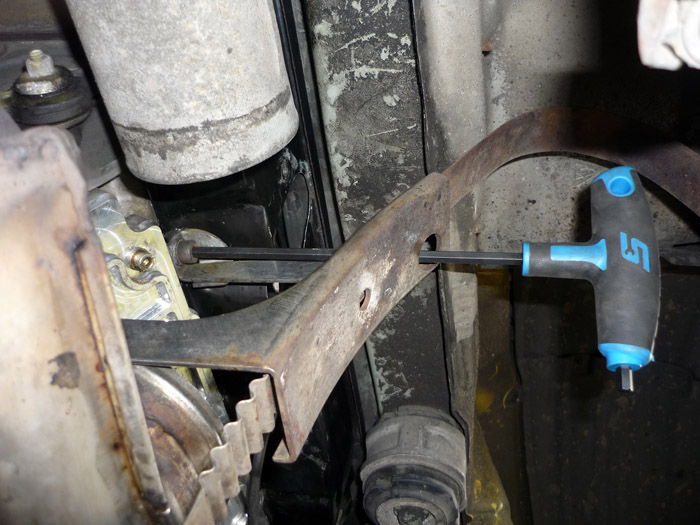
There is actually a better trick here that I discovered during reassembly. Get yourself a long allen key or a 1/4 socket on a long thin extension. I used my a hex T bar key and what you do is push it through a hole in the bracket which faces directly onto the head of the bolt.
The lower leg of the silencer bracket can just be loosened. This will allow the leg to slide out and the bracket to be freed. This is a 13mm I think and it's easier to get to it from underneath the car round the other way rathre from this point of attack seen in the picture.
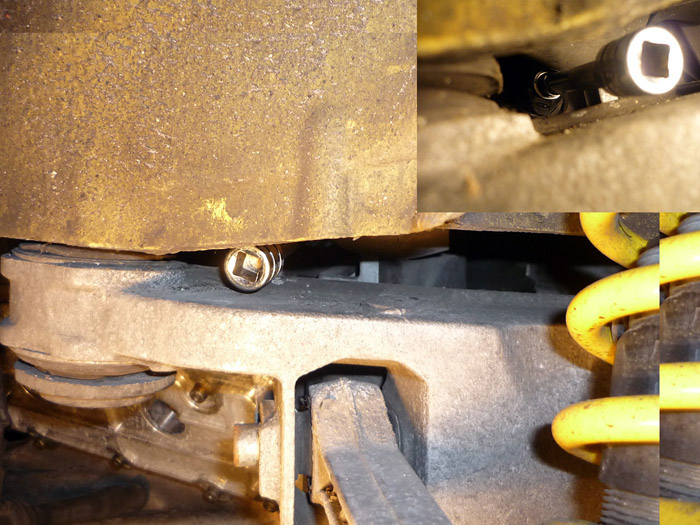
Next you have another 6mm hex head the other side of the shroud. This one is also tricky because there is not enough clearance to get a socket in there (it will hit the top of the shroud) and there is also the suspension cage bushing there in the way which means you need something long (there is not enough space before it to wrangle with it inboard of the suspension side member bush). The ideal hting would be a ball headed hex socket with a very long shaft. Or a regular L or T shape key with a ball head and a good length. You can also try a small socket (maybe 1/4") with a couple of wobble or UJ pieces in there as well. As always, try and keep the driver square onto the head of the cap. The thread is part of the block and it's not something you want to chew up.
Finally there is a third screw in the middle of the shroud. It helps to prise the spark plug leads up into the opening in the shroud and that way you can get your socket in between. Clearance is good here so it's easy to remove.
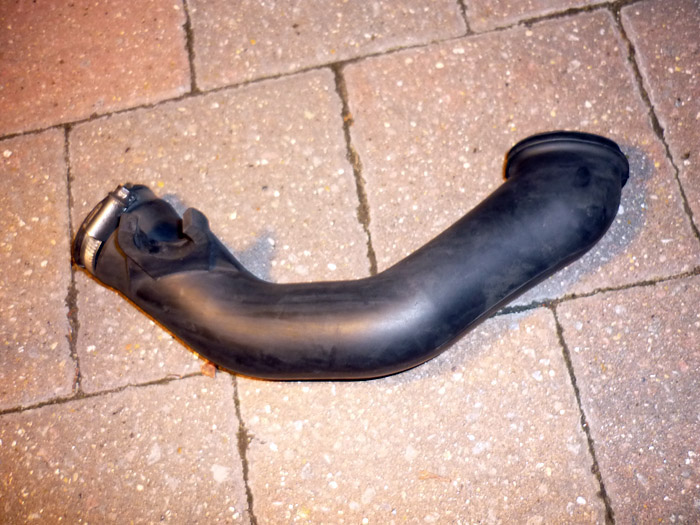
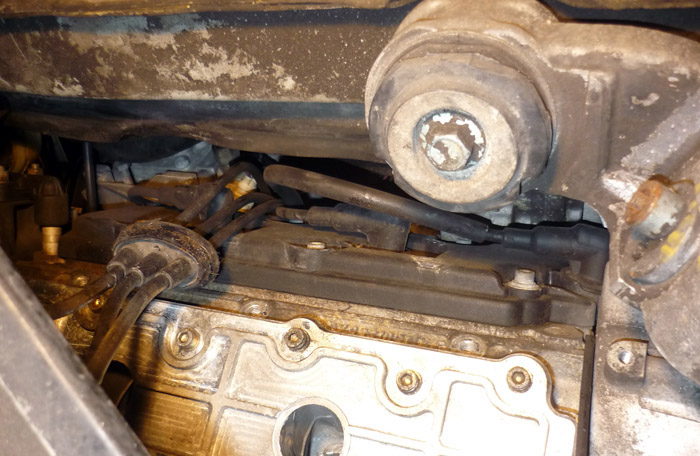
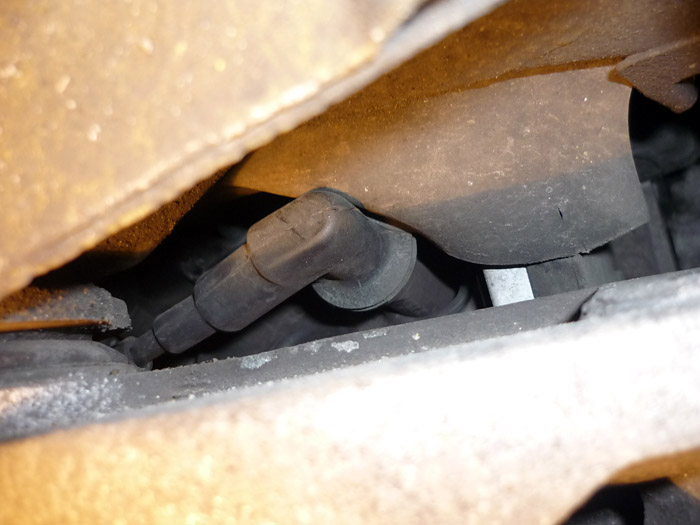
Now we have to focus on the clutch ventilation pipe which runs across us then up through its own little opening in the shroud. Unscrew the two bolts that attach it to the shroud using wobble extensions or a UJ or swivel socket..
There is another screw on the right hand side. To be honest I can't remember how I undid this. It was pretty easy I think because it was loose and I just used my fingers but doing it up again was a real pain as you'll see later on.
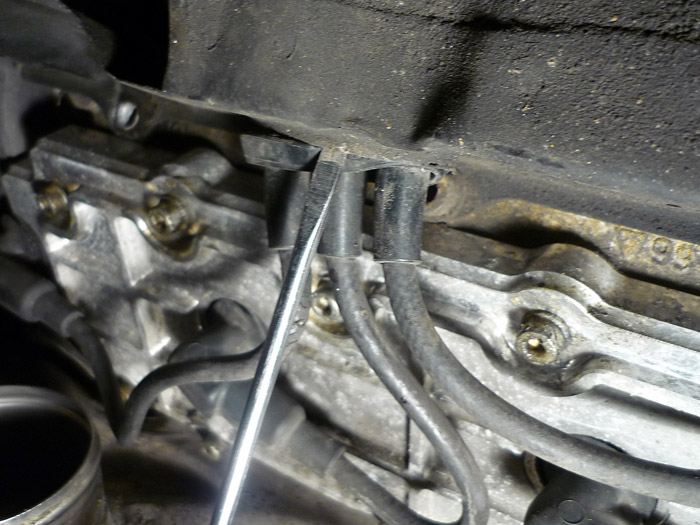
Back in the engine bay locate the jubilee clip that holds the rubber vent hose. Undo this and remove it.
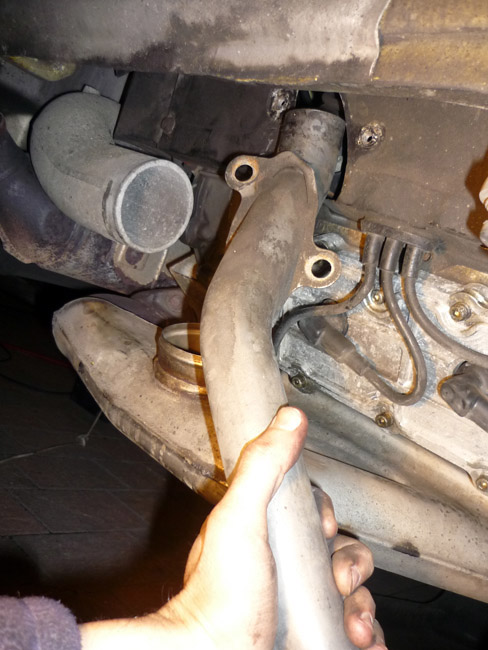
Now back underneath you need to use some force to pull the end of the clutch vent pipe outwards through the crevice in the suspension side member. Youmay need to undo another jubilee clip on this end as well to free it. Give this end a firm yank outwards ... If you don't like the diea of this or find it difficult then mabe consider dropping the shroud and pipe as one.
And then pull it downwards.
The shroud has one last fastener. A small screw on the LHS.
Undo this then slide the whole shroud to the right a couple of cm.
Then it should drop down with ease.
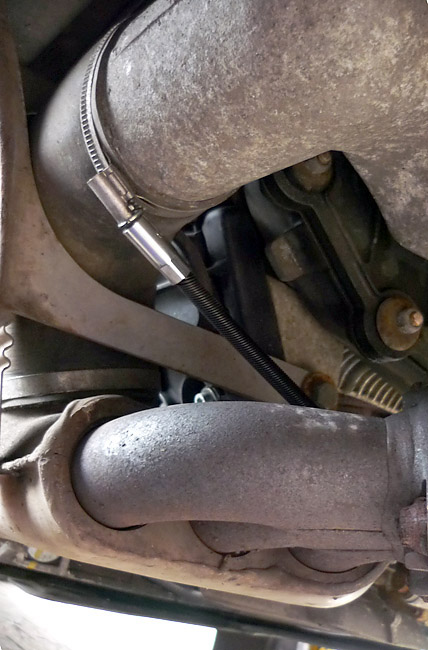
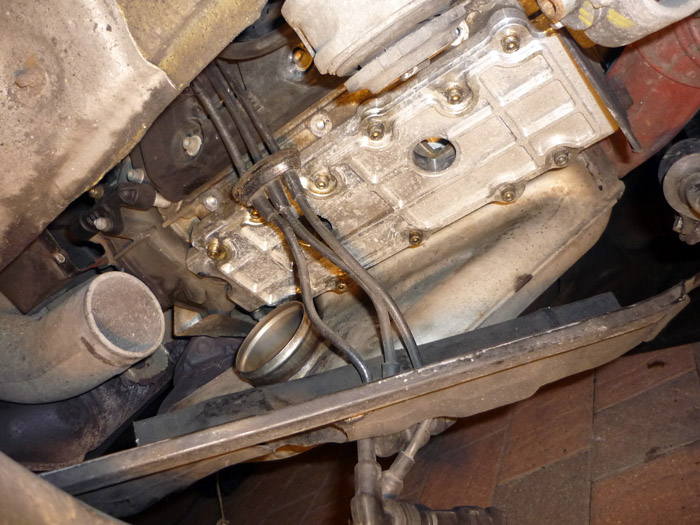
Looking up now you have masses of space within which to work.
Your boot on the innermost tricky spark plug can be pulled through the gap that's formed by the chassis side member.
In the same way you can insert your spark plug + socket + extension or whatever configuration you find easiest. I actually used the same here... my spark plug socket plus 4" wobble extension.
Plenty of space. Enough to torque up nicely as well. The other two upper RHS plugs can be done from lower down if you wish.
A few points about putting it all back together.
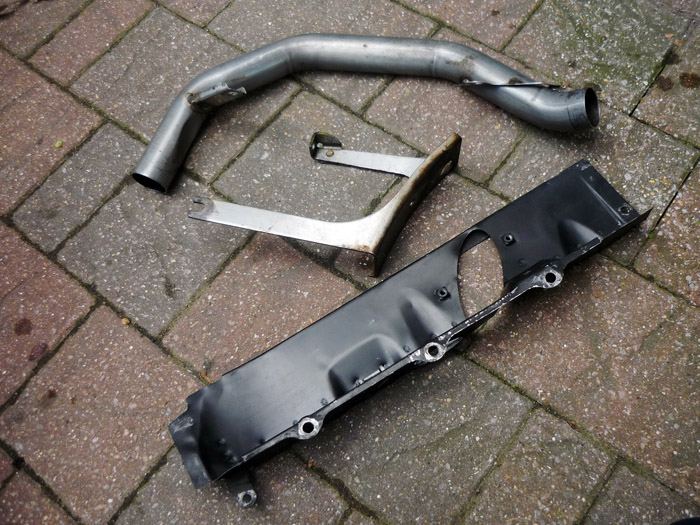
Shroud, vent pipe and silncer bracket given a quick clean up. (one day I will get that grit blasting box !).
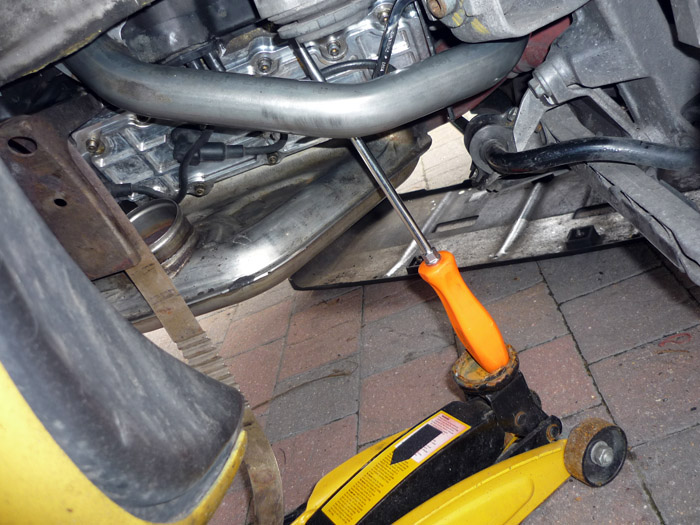
That 10mm screw on the far right of the shroud, the one that I said we'd come back to that also goes through a tab on the clutch ventialtion pipe .... well, it can be a real nightmare. The little 10mm screw has to go though the shroud, the pipe and the pipe end has to go into a soft hose underneath the car. At the same time, the hole in the shroud could well be misaligned and you can see here that I had to use a jack and a large screwdriver to push gently on the lower face of the shroud to align the screw hole with the thread in the engine block. To make things doubly worse, the recessed tab on the vent pipe means that the screw sits in a narrow channel, thereby preventing the use of a conventional spanner. As for turning the screw head on, you can forget that too because you have a huge piece of the suspesnion cage in the way where the upper camber eccentric is. I found that the angle is too severe to use a UJ or wobble/swivel as well.
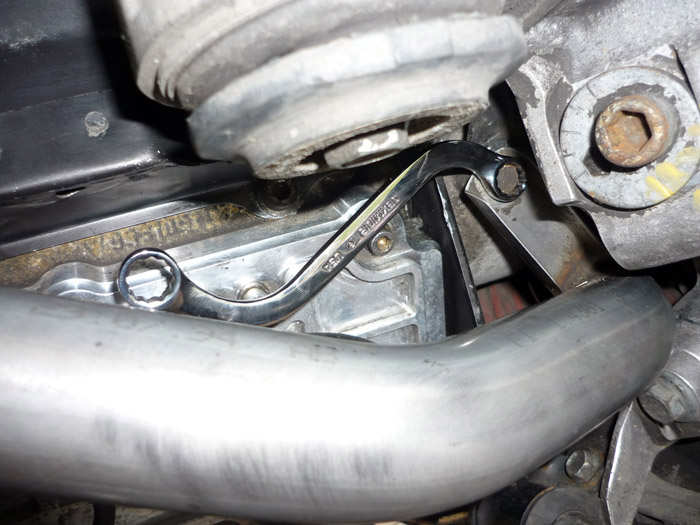
In fact that only way I found to tighten it was to use an S shaped obstruction spanner. You can get the spanner flat on the head by routing the spanner through the top of the tab, thus avoiding the two side walls. Ok, so you have to perform countless turns but at least it gets tightened !
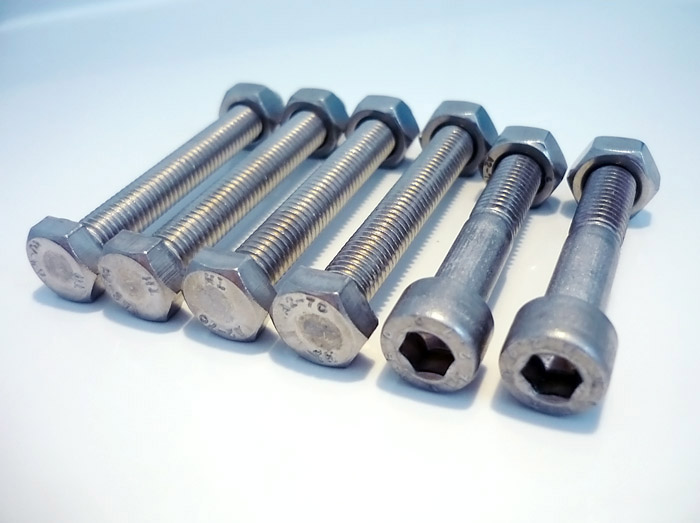
When you refit the silencers the torque settings are as follows: exhaust tip screws, 30nm One final thing. I had my silencers off last October and everything was nice and clean then. Despite greasing all my bolts I noticed that after the heavy winter everying is very rusty there now and it was a bit time consuming removing the silencers. I took the opportunity to source some decent stainless bolts for the exhaust tip, silencer/cat flanges and the silencer straps. I have a local place to me that sells any screw imagineable but you might like to order from Namrick who also run a very good service.
A NOTE ABOUT Partially seized spark plugs
|