24k-30k-60k Service - oil and all filters
Here are links to the other parts of the servicing: 1. 60k service schedule
The 993 has 2 drain plugs, 2 oil filters (one long and one short) and you'll drain off around 9-10 litres and then replenish with about the same amount, maybe a little more. The oil tank drain plug is just forward of the offside RHS rear wheel behind the wheelarch liner and you will need to remove a small bit of the side/sill underbody trim to access it. The long filter goes here as well. The main crankcase plug is easy enough to spot off to the LHS of the sump. The short engine filter is located near this but its behind an anti roll bar and also crucially an oil return line so access is limited. The air filter and pollen filters are obviously very simple to replace as is the fuel filter. Note that the fuel filter is only supposed to be replaced every 60k miles. Click here to jump to this section.
TOOLS Do not attempt the oil filters unless you have either an oil filter cup wrench (76mm with 14 flute as per the laser one at halfords) or a universal 3 legged style tool as sold by machine mart or made by draper. A chain wrench won't cut it because access is limited and you won't be able to get the tool in from the side. As for the rest: 10mm socket + ratchet and phillips screwdrivers for the liners, undertrays and trim
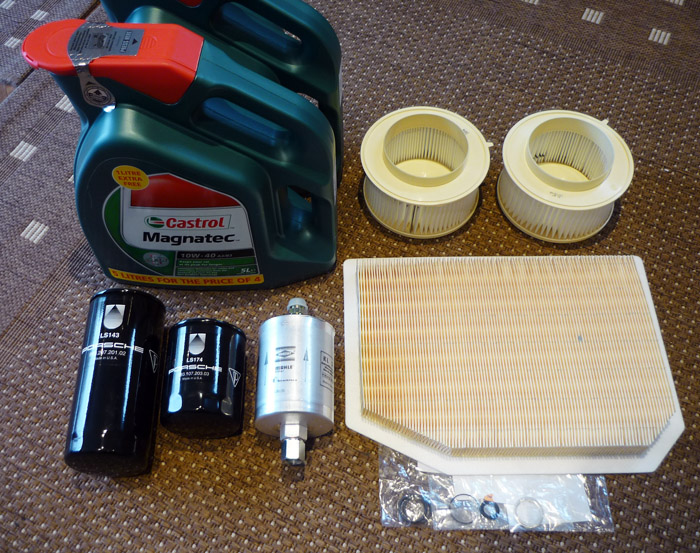
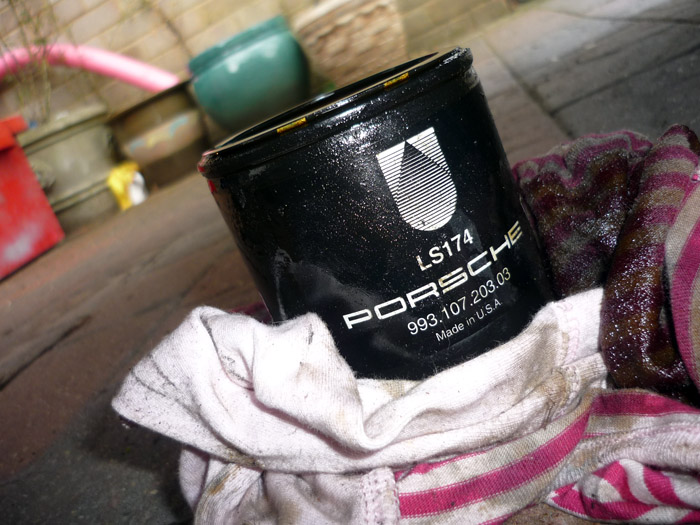
10 litres of Magnatec 10W/40, 2 pollen filers, air filter, fuel filter, long and short oil filters and x2 drain plug sealing rings. I have to say I loathe endless oil debates and I don't want to reproduce any waffle here. Suffice to say that my shortlist came down to Silkolene Pro S and Castrol Magnatec. The paper bits were OEM but for the oil filters I elected to get the proper Porsche items.
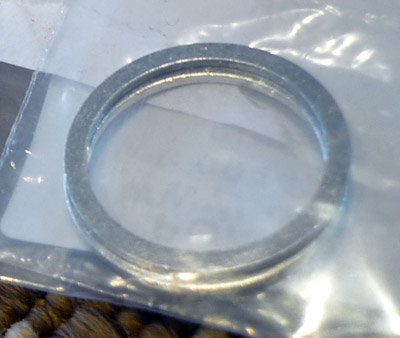
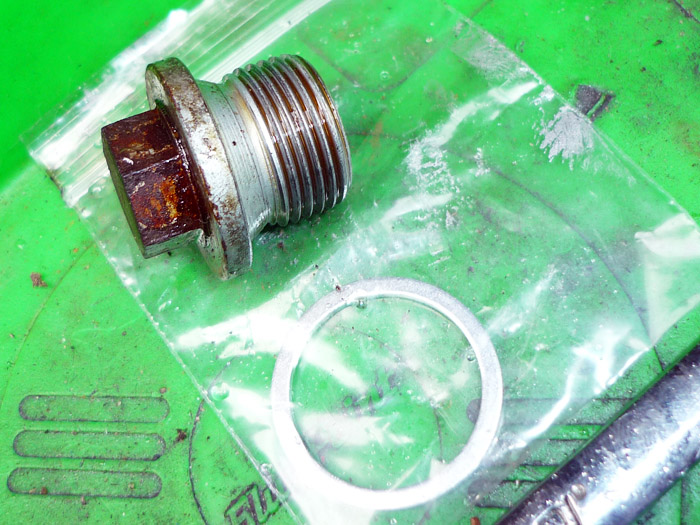
The drain plug sealing rings, part number 900 123 118 30 Before you start, idle the car and get her up to temperature. Make sure that the oil cooler stat has opened so that the oil cooler lines get drained as well. You can determine this when the oil temp. needle is poiting to 9 o'clock.
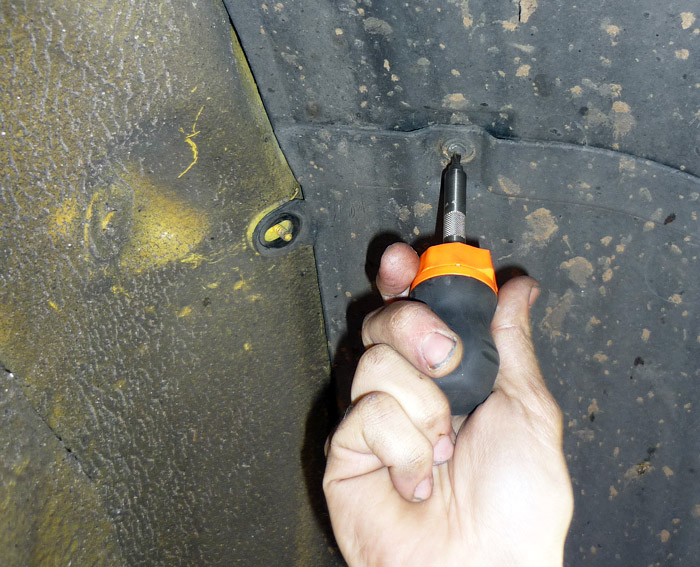
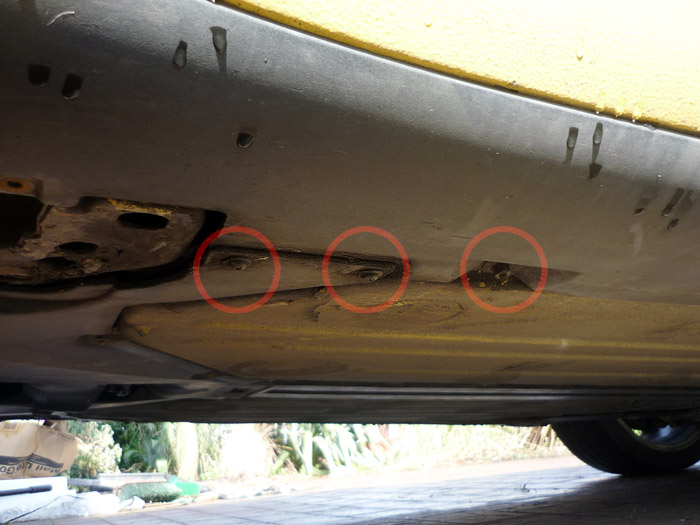
First off remove the offside rear wheelarch liner (the foward part). You have x2 10mm plastic trim fasteners to remove (I use a neat little spinner ratchet for these and a deep socket), one low down here between the two metal pipes and one higher up (see pic below).
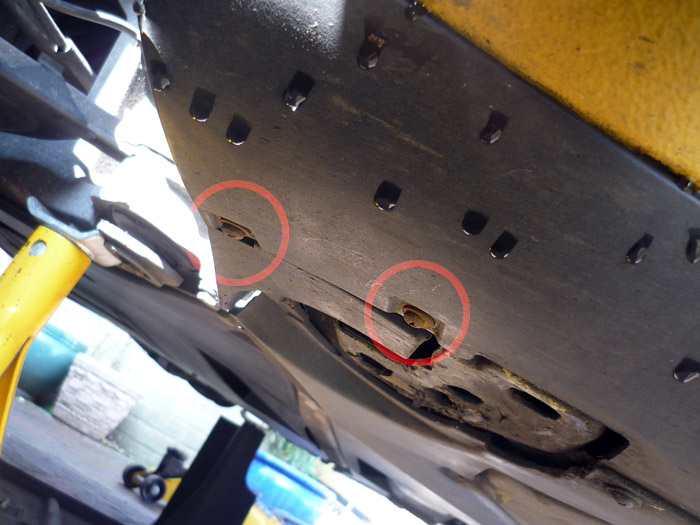
You also have 2 phillips screws up high in the arch and then 2 down on the underside.
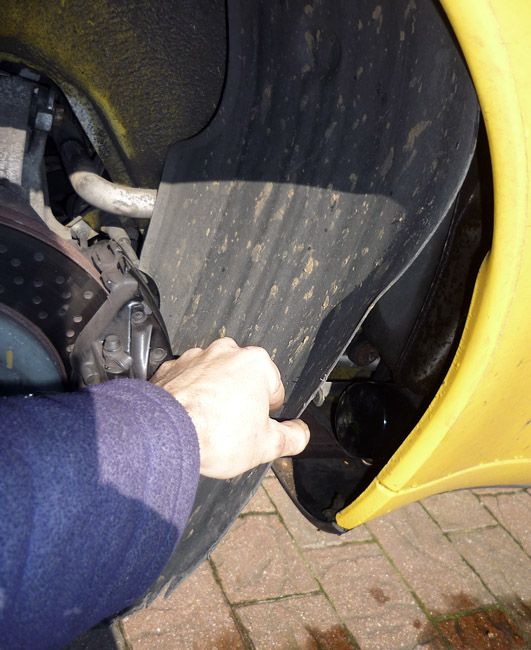
Peel the arch back to access...
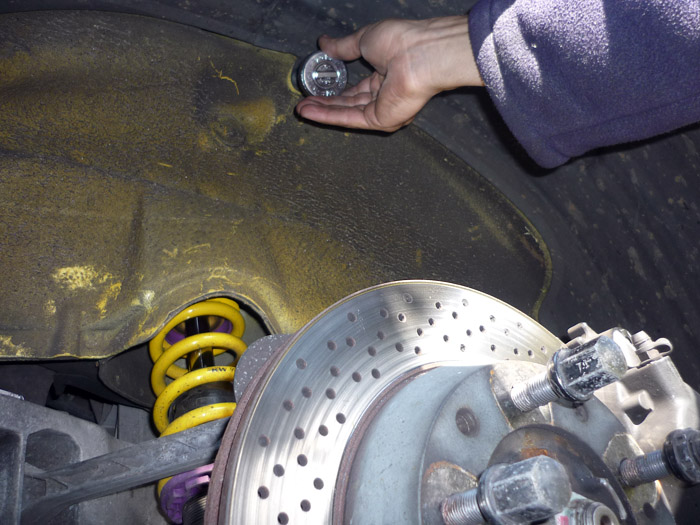
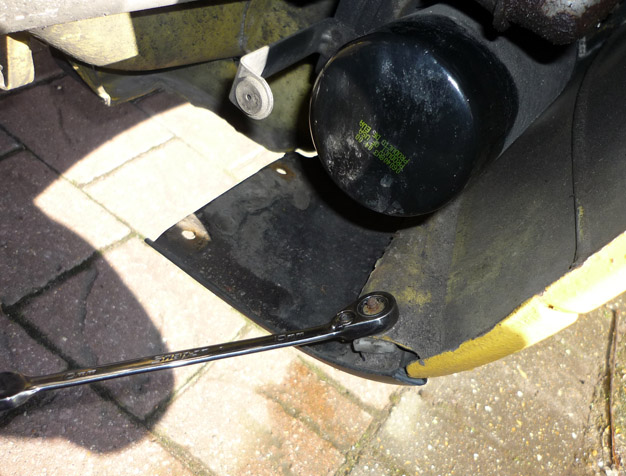
To reveal the long oil filter. The drain plug is directly below the filter so as you can see you need remove or bend down the first part of the side sill. Remove the 10mm fastener here at the corner.
Then onto 2 philips screws and another 1 or 2 fasteners further forwards and underneath. Pull down the sill when you're ready. Try not to cry when you see how filthy and dirts strewn it is under there !
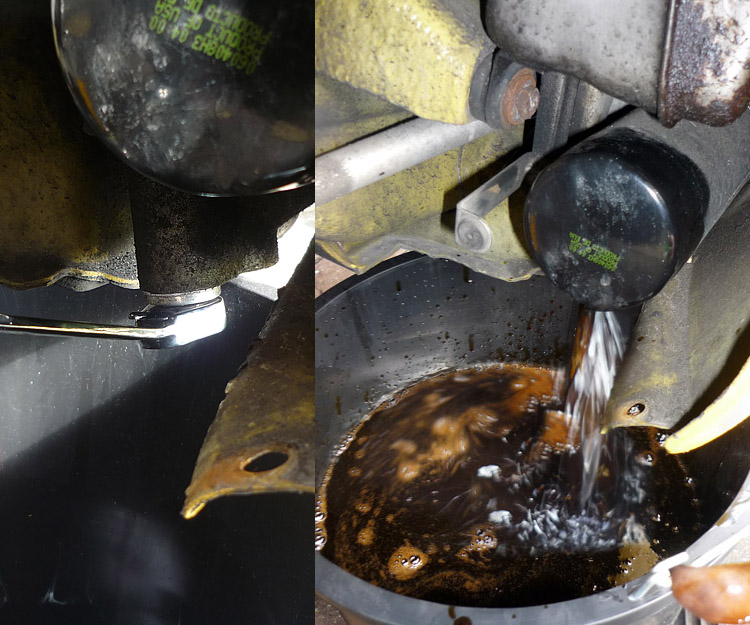
15mm spanner on the drain bolt, give it a yank and then turn by hand and be ready to pull it clear. The oil will gush out in a huge torrent.
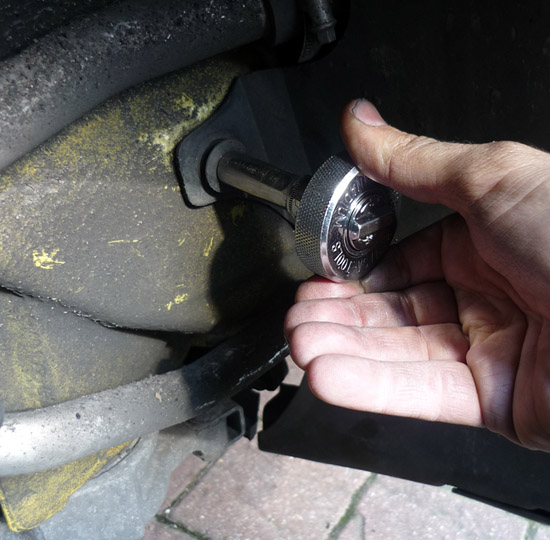
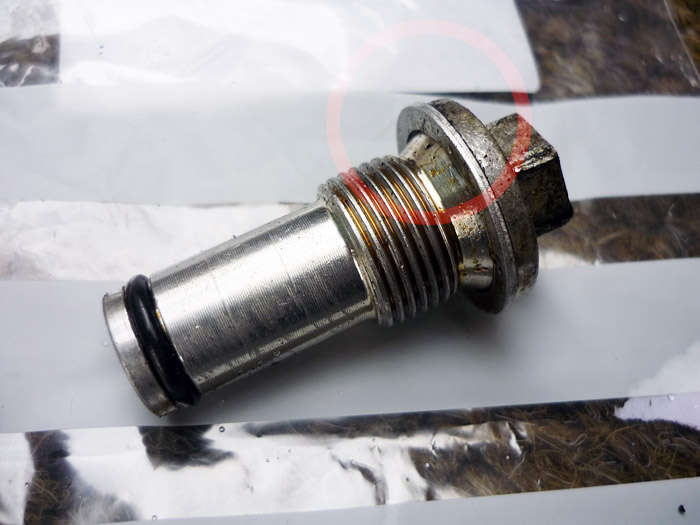
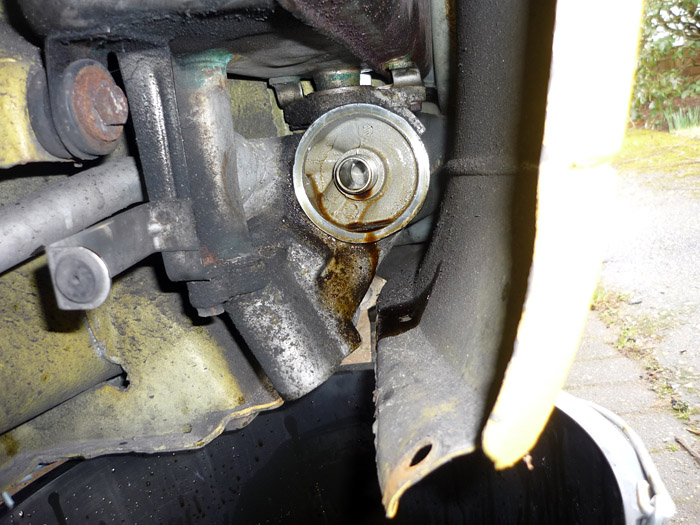
Here is the oil tank drain plug. Forget about the O ring, it only goes into the thermostat. You do need to change the metal sealing ring though at the head.
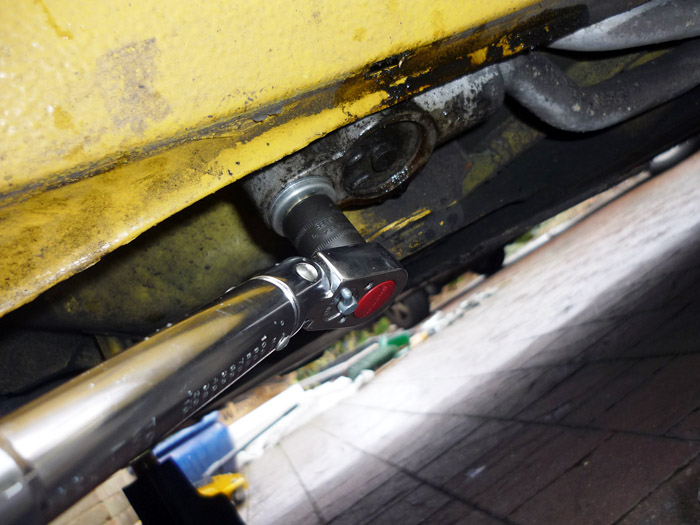
Torque it up to 40 lb/ft
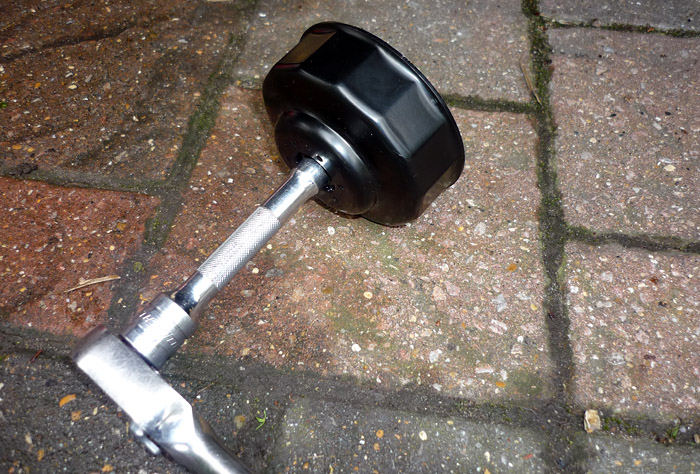
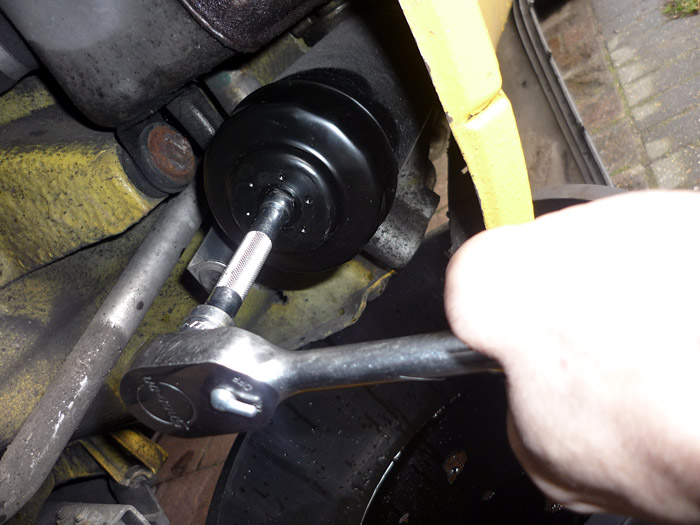
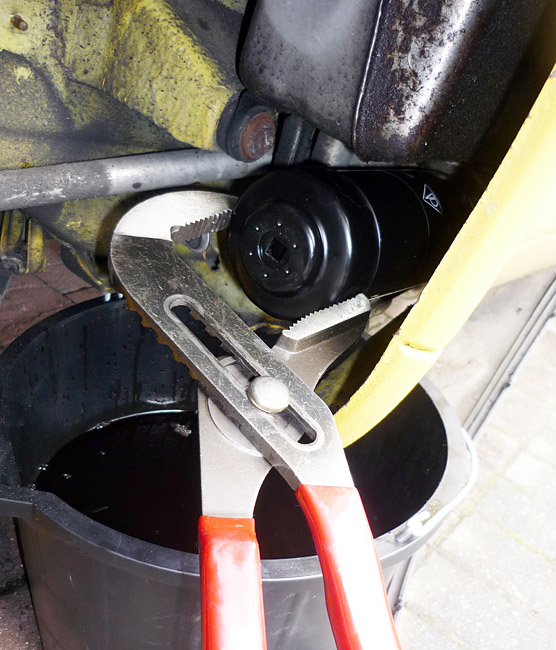
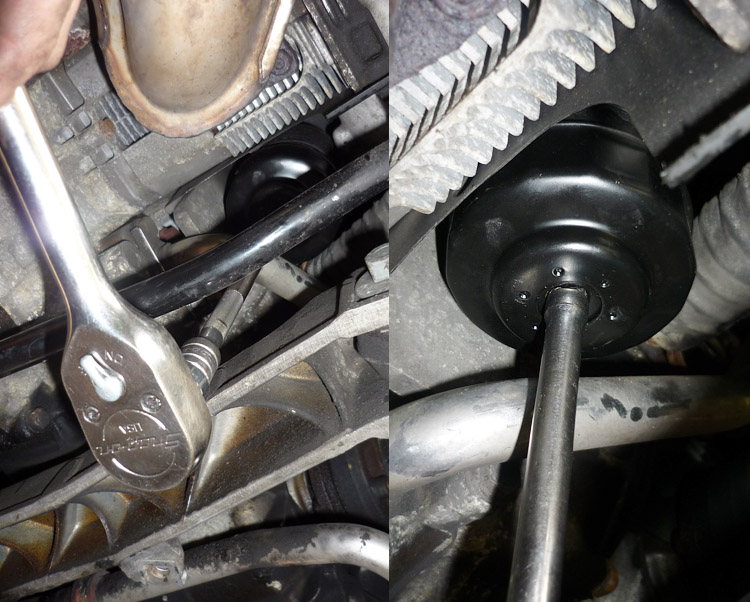
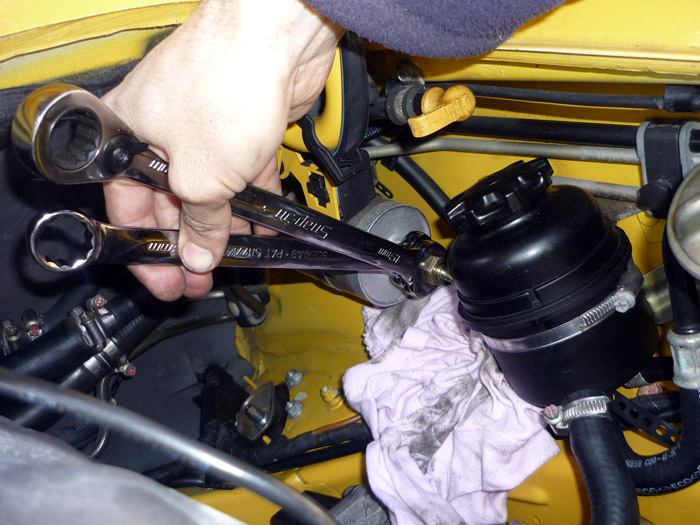
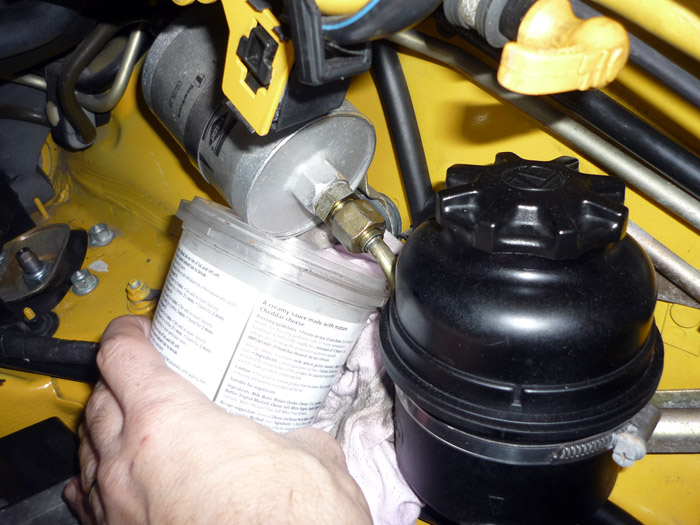
Now for the first filter. Here is the arrangement I used with the cup wrench, a 3/8" extension and ratchet.
Tap or hammer the wrench securely on and then undo.
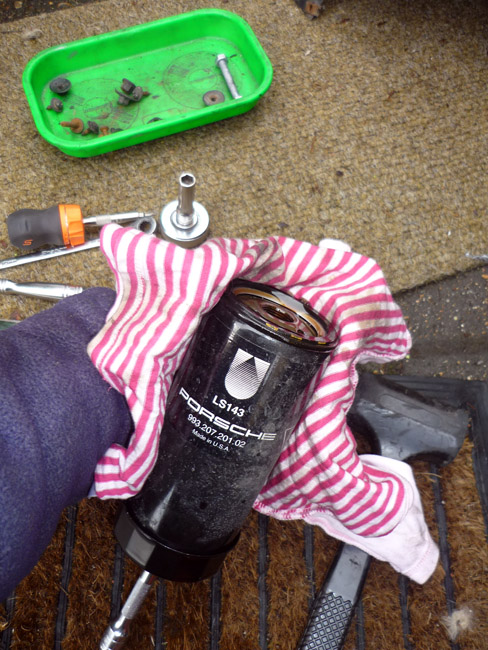
make sure the rubber gasket of the old filter came off with the filter and isn't left behind.
Grease the rubber gasket on the new filter or smear it with some oil. Screw it in by hand and tighten by hand. Most people leave it at that but the workshop manual does say add on another extra 1/2 a turn with the wrench. You don't want it too tight, I added around quarter of a turn just to be on the safe side. Getting the cup wrench off again can be interesting. A large pair of pipe grips works well.
Now onto the engine drain plug. Take the engine undertray off by undoing the x5 Dzus fasteners. Do the same for the transmisison undertray.
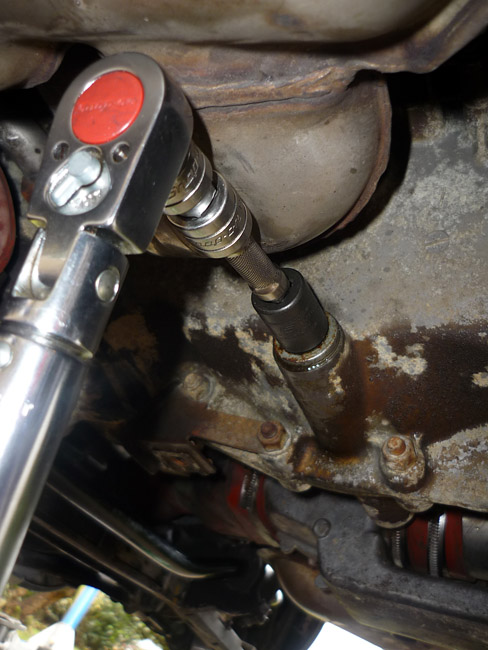
Looking from the back of the car to the front you can see the engine drain plug here on the LHS.
Undo with a 15mm spanner. Catch the oil (nowhere near as much as at the oil tank) and then fit the new sealing ring.
Torque up. (although in reality this didn't really work too well as the heat excahnger is in the way). If anyone knows a good way to do this then please let me know.
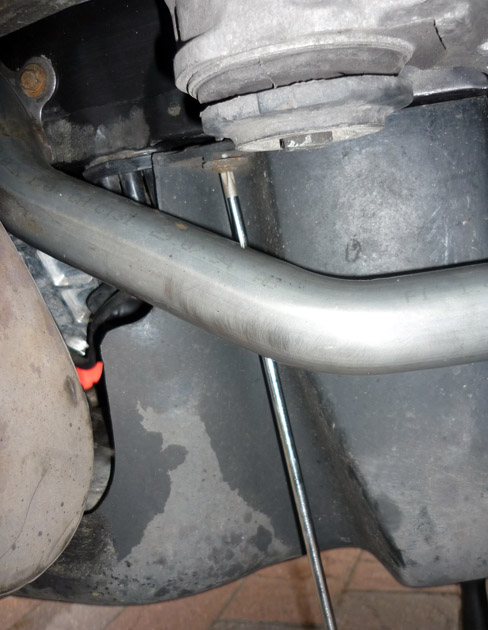
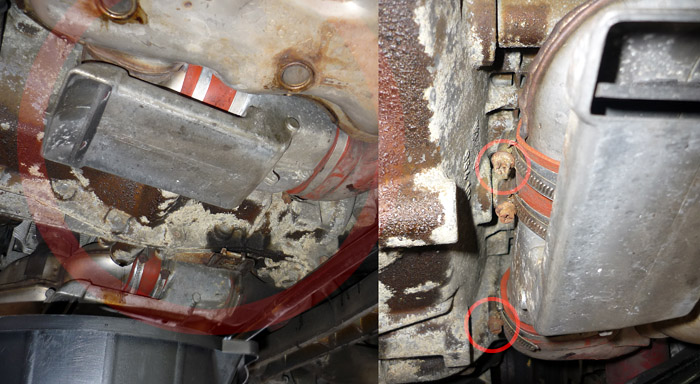
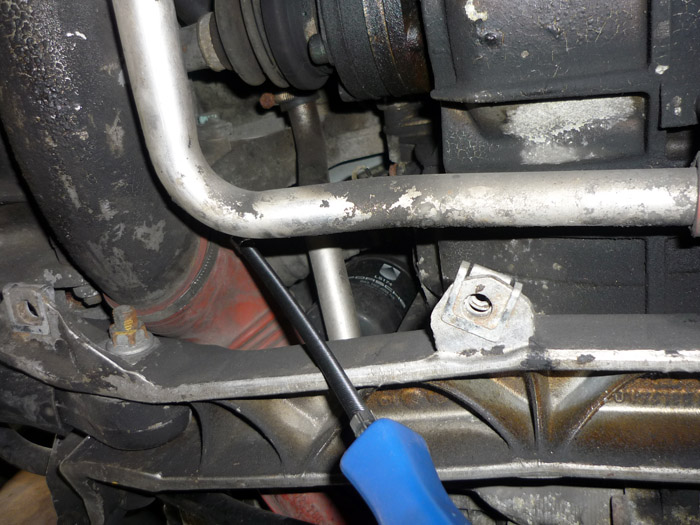
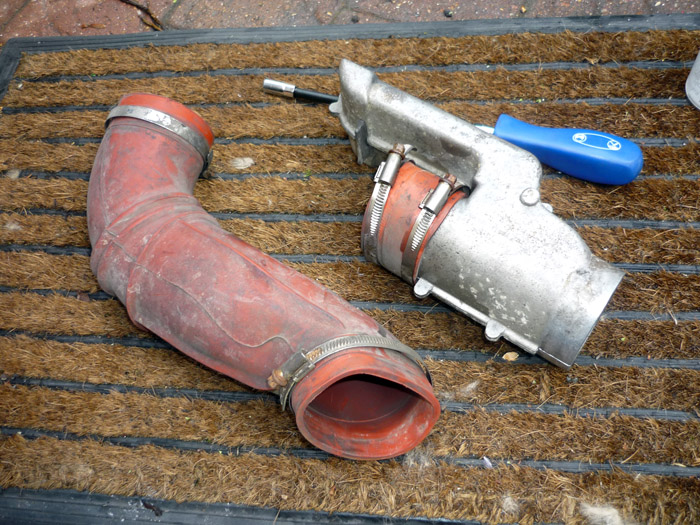
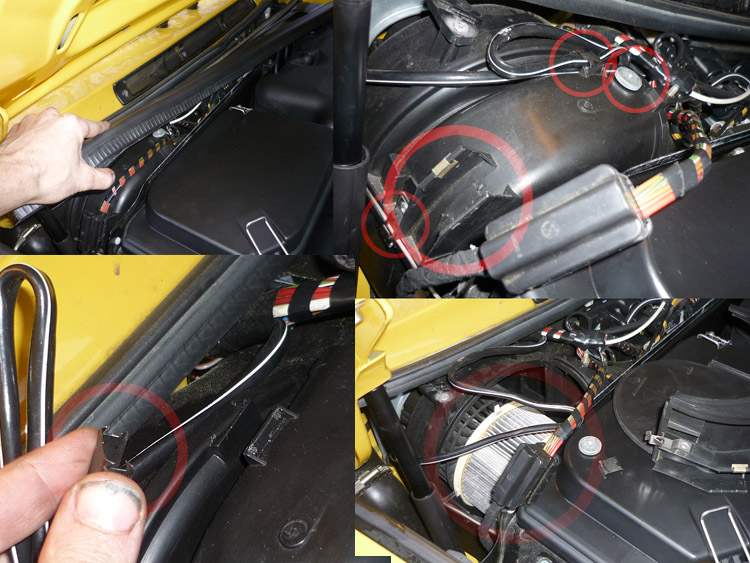
Now onto the short engine oil filter. Its up in the recesses of the car. To access it you need to remove the longer section of red/brown vent hose and to remove that you'll first need to remove the short section along with the metal heating flap (the piece that looks like the end of a vacuum cleaner). Undo the two clips as in the pic above.
The undo the other end of the longer ventilation hose. You can see the filter here behind it.
With that little lot out you can now see your target.
Now with a cup wrench it is possible to slide it in place. You have the oil return pipe there in the way but you can roll the cup onto the filter from its North to South edge (assuming North is towards the front of the car). Angle it over the north edge then roll it towards the back of the car. You may need to hammer a bit here and there but it should eventually clear the metal pipe and then you can hammer it onto the filter. Undo and be prepared for a mess. Allow the oil to dribble all over the subframe and anti roll bar etc.. Then unscrew it completely and guide it through the offside gap.
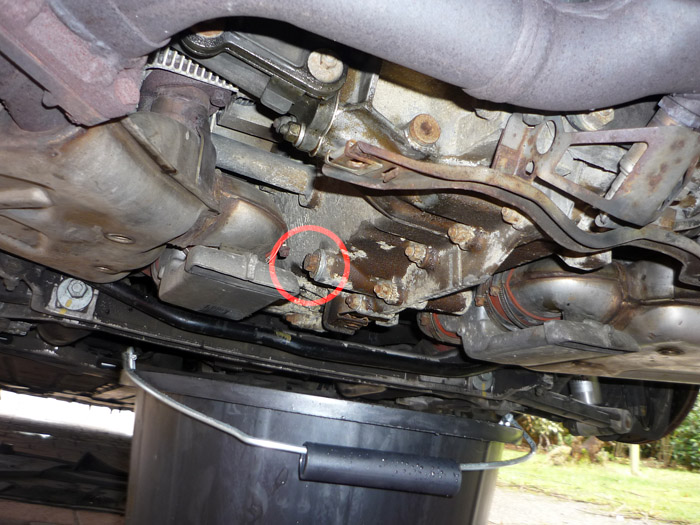
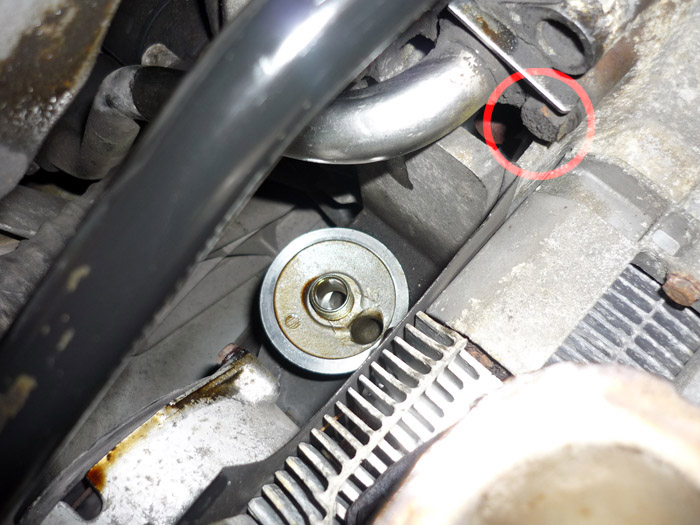
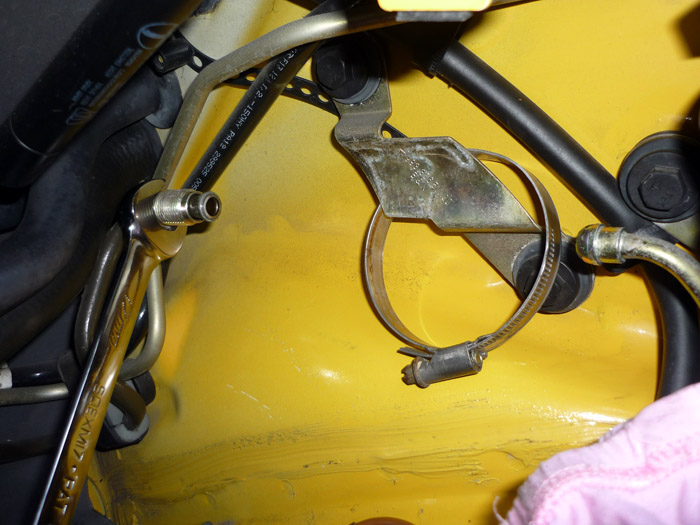
Smear oil on the new gasket, Screw in, tighten by hand and then replace your undertrays and get your oil. Note that if you have problems with access here then the normal trick is to just undo the oil return line. There is just one screw there circled in my picture. Undo, catch the oil that falls and then pry the pipe out to make room.
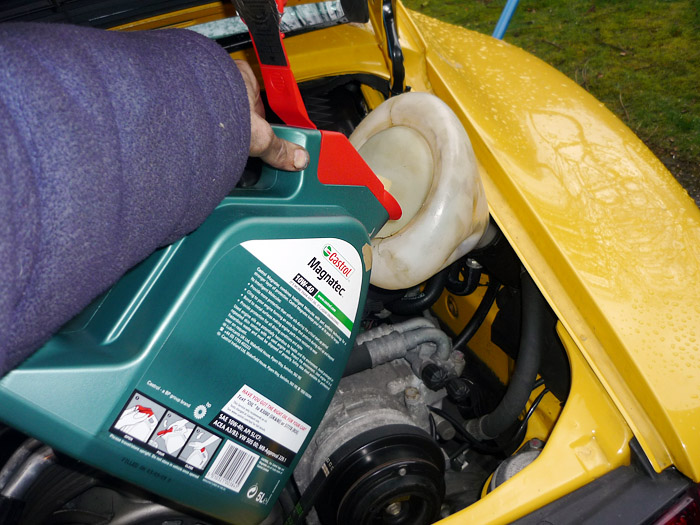
Add 5 litres into your engine. Start her up and then add more until the dipstick shows the correct level as per a normal check.
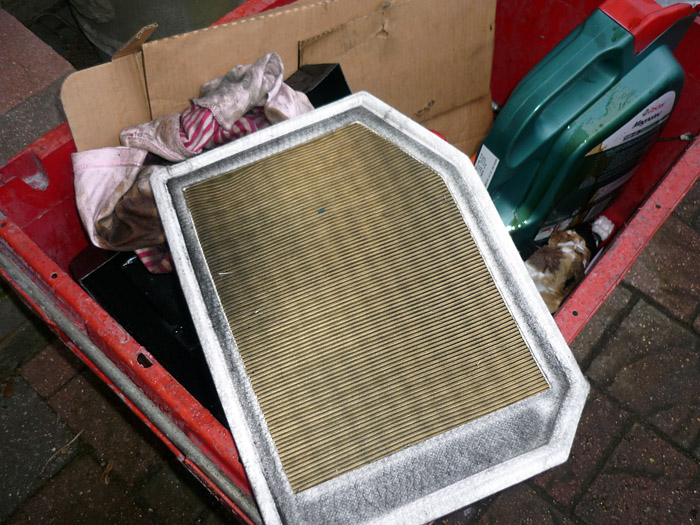
Here's my old and very dirty air filter. Simply remove the airbox cover and replace it with the new.
The pollen filters are simple enough although the outer metal fasteners can be a pain. Open the bonnet, remove the trim piece that runs the length of the windscreen, uncrew the litlle circular bobbin, lever up the clip that holds the wiring, prise the outer metal clip with a screwdriver and in the case of the nearside filter slide out the multiconnector as well. Insert the new filters ensuring that they are properly sat in the circular channel and that the protruding tab on the rim is pointing directly upwards. Replace the cover carefully making sure that the inboard grooves and channels mate properly. Replace the round fastener, clip the wires back in and then push down on the side metal clip with a screwdriver and push it outwards (towards the car's wing) then down so it clicks under the lip of the lower housing. You may need to push VERY VERY hard or possibly start again and put seat the new filter again. Or worst way, you might have to leave the metal clip undone completely if its too far to mate.
The fuel filter is a very easy job. You'll need two 19mm spanners and one 17mm spanner.
First of all for better access remove the airbox as explained in my spark plug guide. The above pic is wrong as it only shows the cover removed. It is possible to do this job with the airbox in situ using midget or stumpy spanners but to be honest it's so much easier with more space and using spanners that give you better leverage.
Undo the connection nearset to you first. Get your two 19mm spanners onto the two connectors and get the spanners close as in the picture then you can grip them and squeeze them together like a set of pliers. This is a very effective method of applying a lot of force and you should find that you'll break the connection quite easily. Have a rag underneath to catch any drops.
Now go in and loosen the large fuel line fastener by hand with a container underneath to catch the fuel. You'll ideally want to leave this container here since more will come out when you loosen the other connection.
Apply a similar technique for the fuel filter inlet although you will need to use a 17mm on the thin nut of the incoming fuel line. The 17mm spanner can slip of easily beceause of the thin nature of the flats and also space and view is limited here so it can be a bit fiddly. Get your spanners close and then grip them both and squeeze together (ensuring of course that the nearest one is rotating anti-clock). When you undo more fuel will drip from the other end of the filter so be ready with rags and that container to catch it.
Undo the 7mm worm drive clip and free the old filter.
Then simply thread the new one into the jubilee clip, rotate the whole filter by hand onto the rearmost connection and then tighten the front connection. Just be sure that the fuel filter is facing the correct direction. It will have an arrow on it which should be pointing toward the back of the car (although in practice I think that the connections means its not possible to intsall it the wrong way round). Start the car, let it idle and just check the fuel filter and all connections for leaks.
|